Getting Started
Set up your shop in about 10 minutes.
HotSeat gives you a branded booking page customers tap to book themselves — name, email, phone, done. No app for them to download, no account to create. This guide takes you from signing up to your first managed appointment, step by step.
Before you start
Have these handy so setup flies by:
- Your business name and address (or the area you serve, if you travel to customers)
- Your services — what you offer, how long each takes, and the price
- Your team — each person's name and email (skip this if it's just you)
- Who does what — if you have a team, note which services each person performs
- A logo — optional, but it makes your page look polished
Create your account
This is the one login you'll use to run everything. Creating it also spins up your booking page. The Start Free wizard collects a few details about your shop, then your login.
- 1Go to hotseatbooking.ca and click Start Free.
- 2On the Business step, enter your Business Name, choose your Business Type, add your Phone Number, and click Continue.
- 3On the Location step, add your address (or tick I travel to my customers and enter a service area), pick your Timezone, and click Continue.
- 4On the Account step, enter your Full Name, Email, and Password, agree to the Terms and Privacy Policy, then click Create Account.
- 5Check your inbox and click the confirmation link to activate your account.
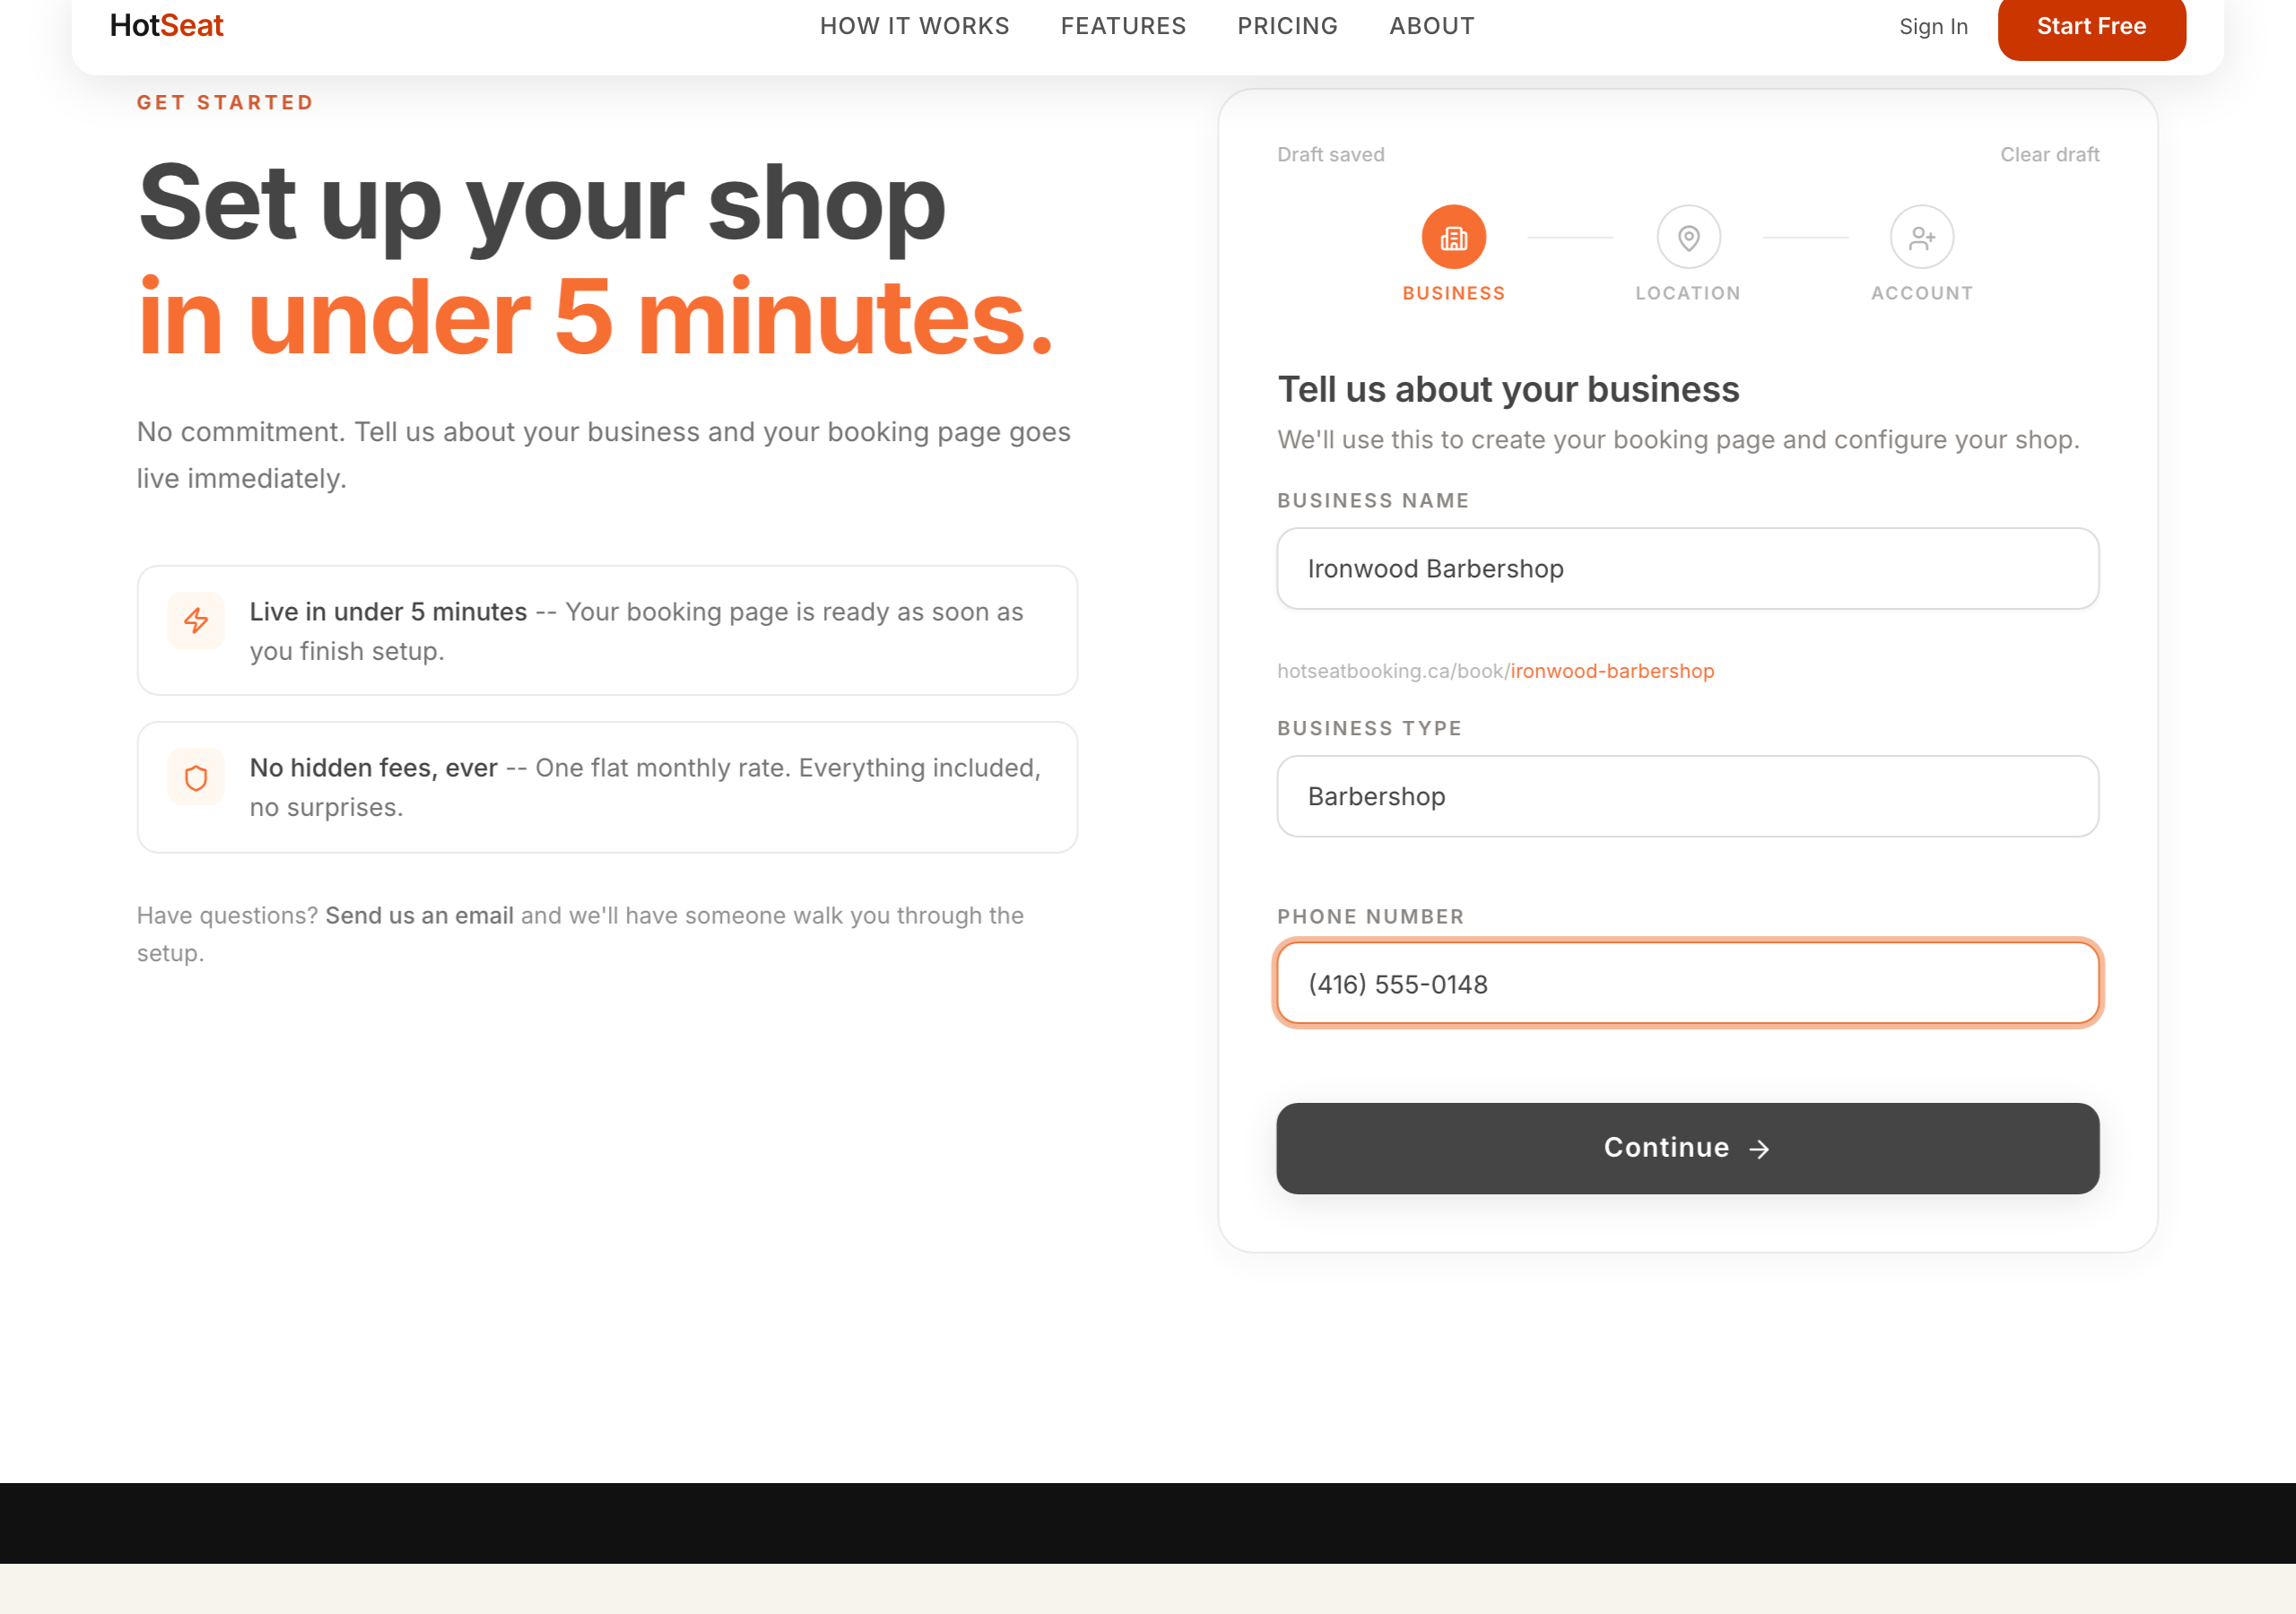
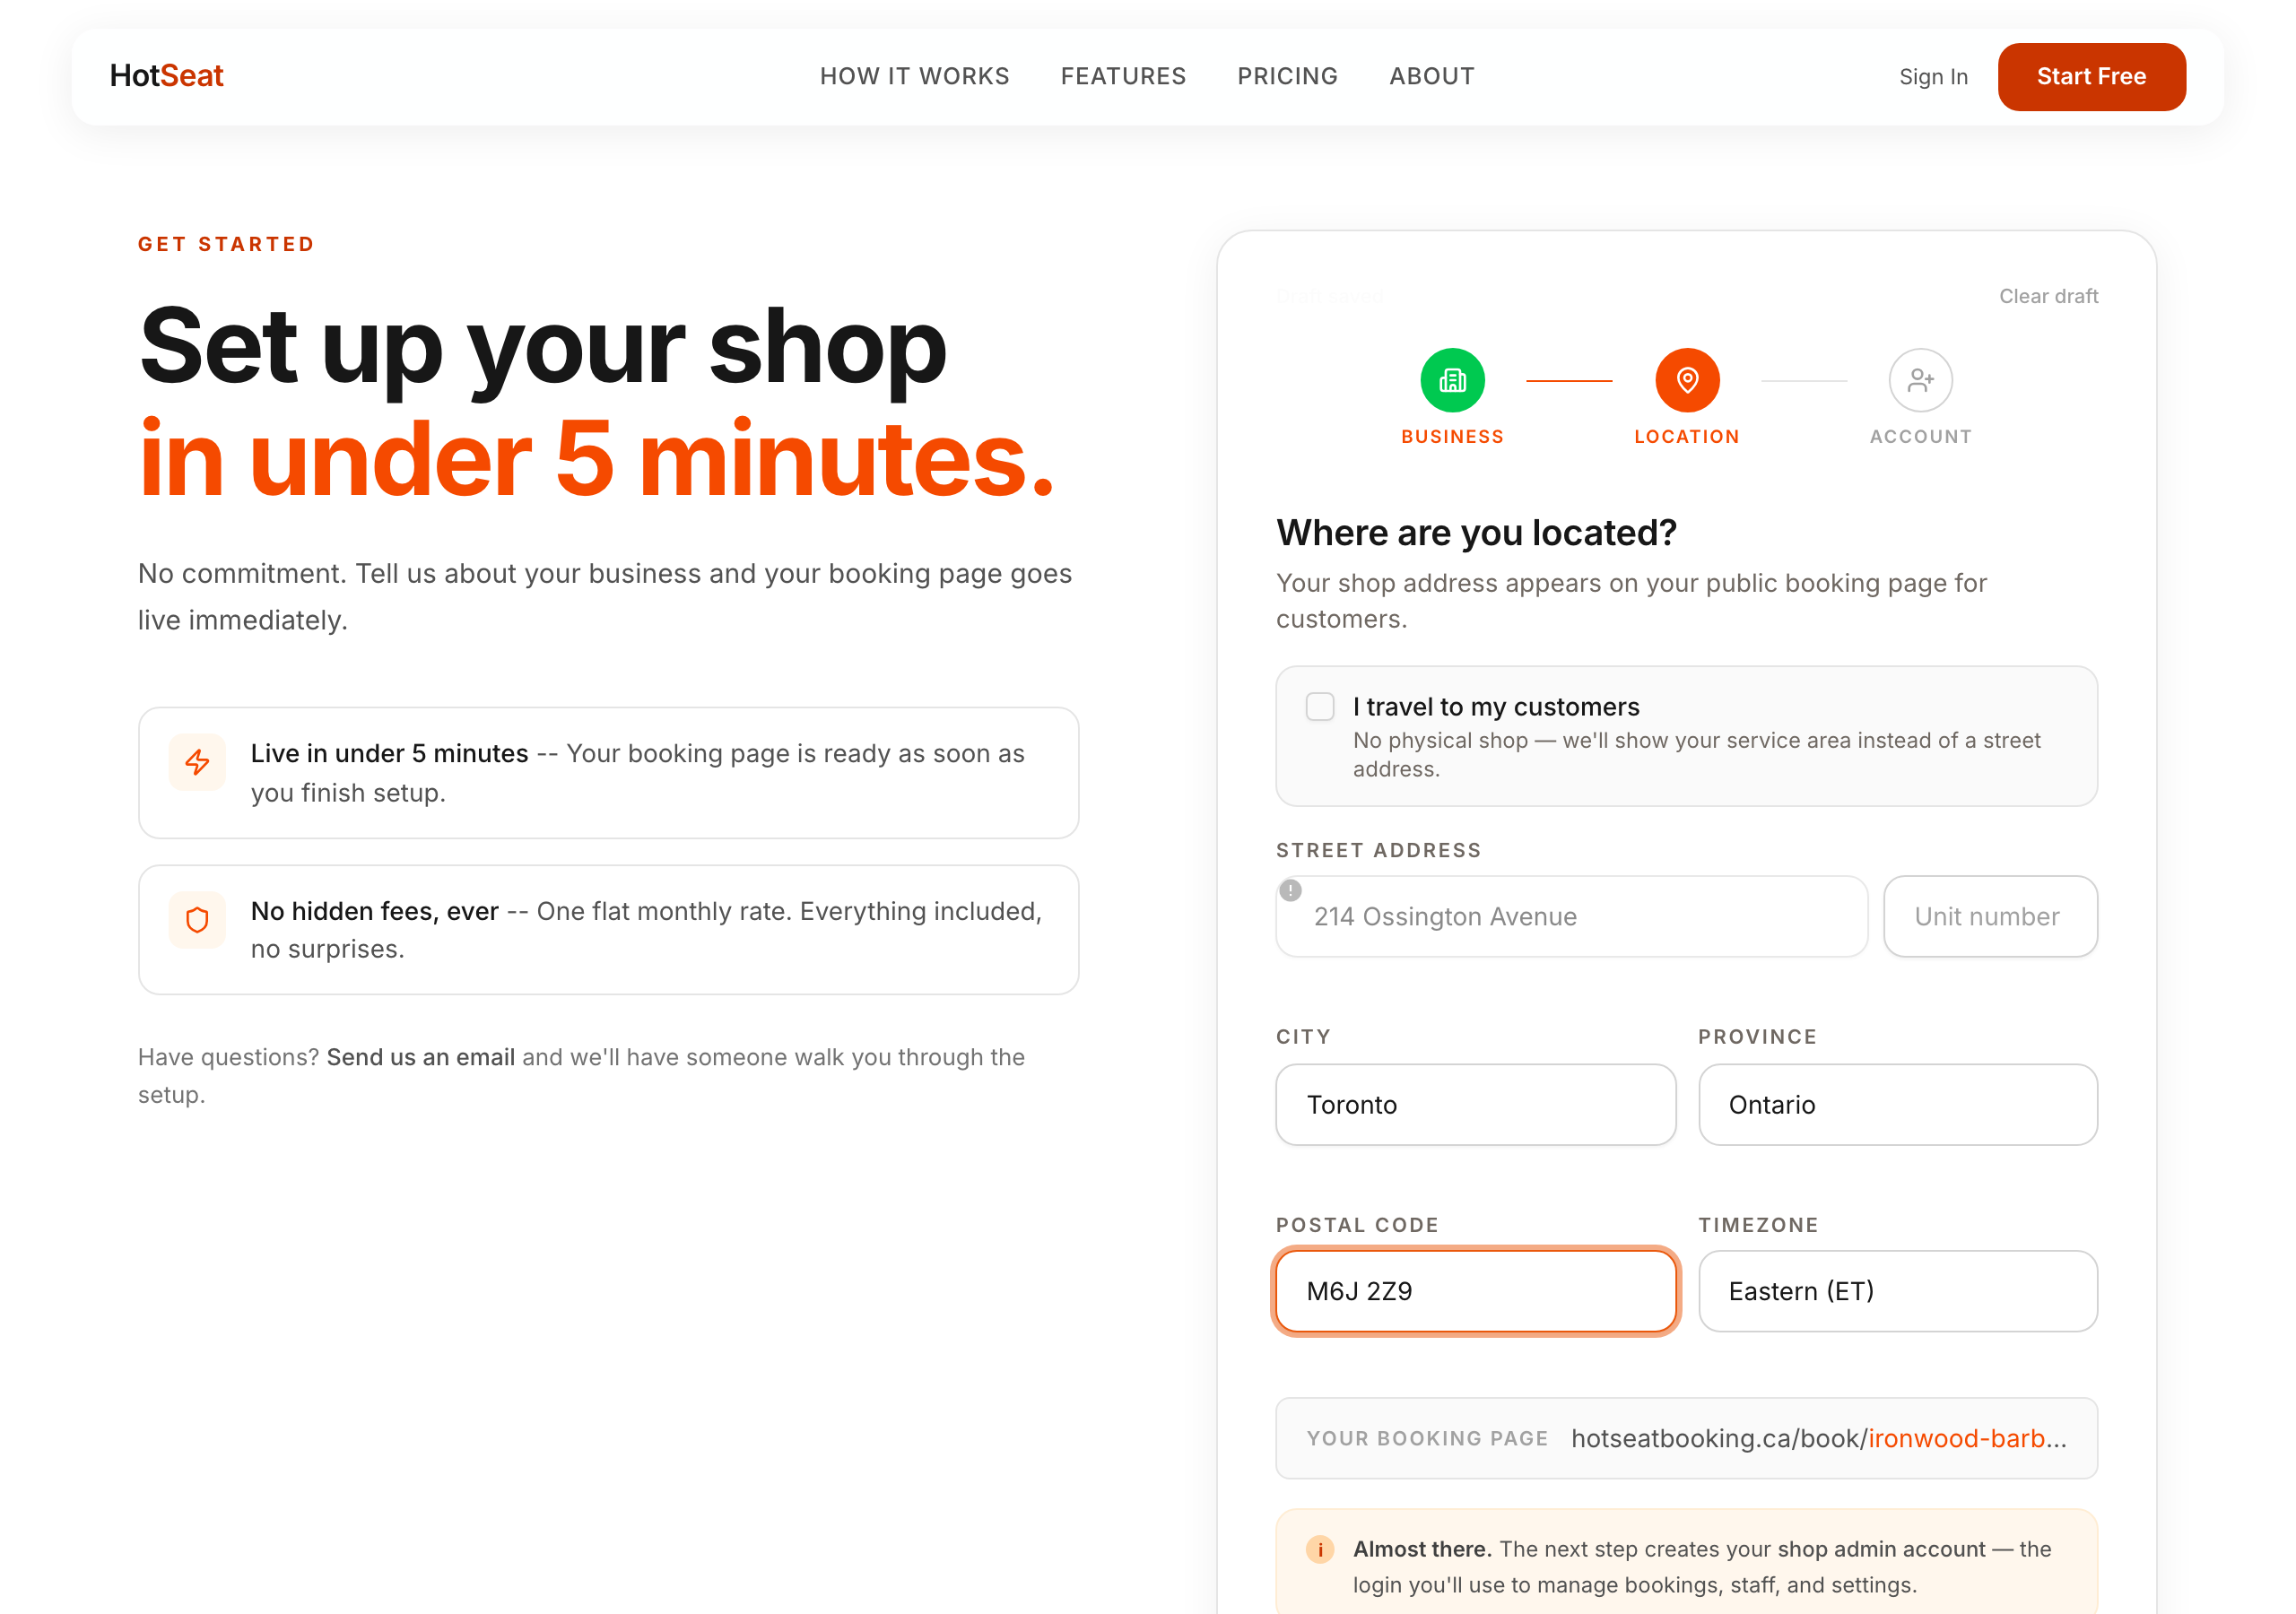
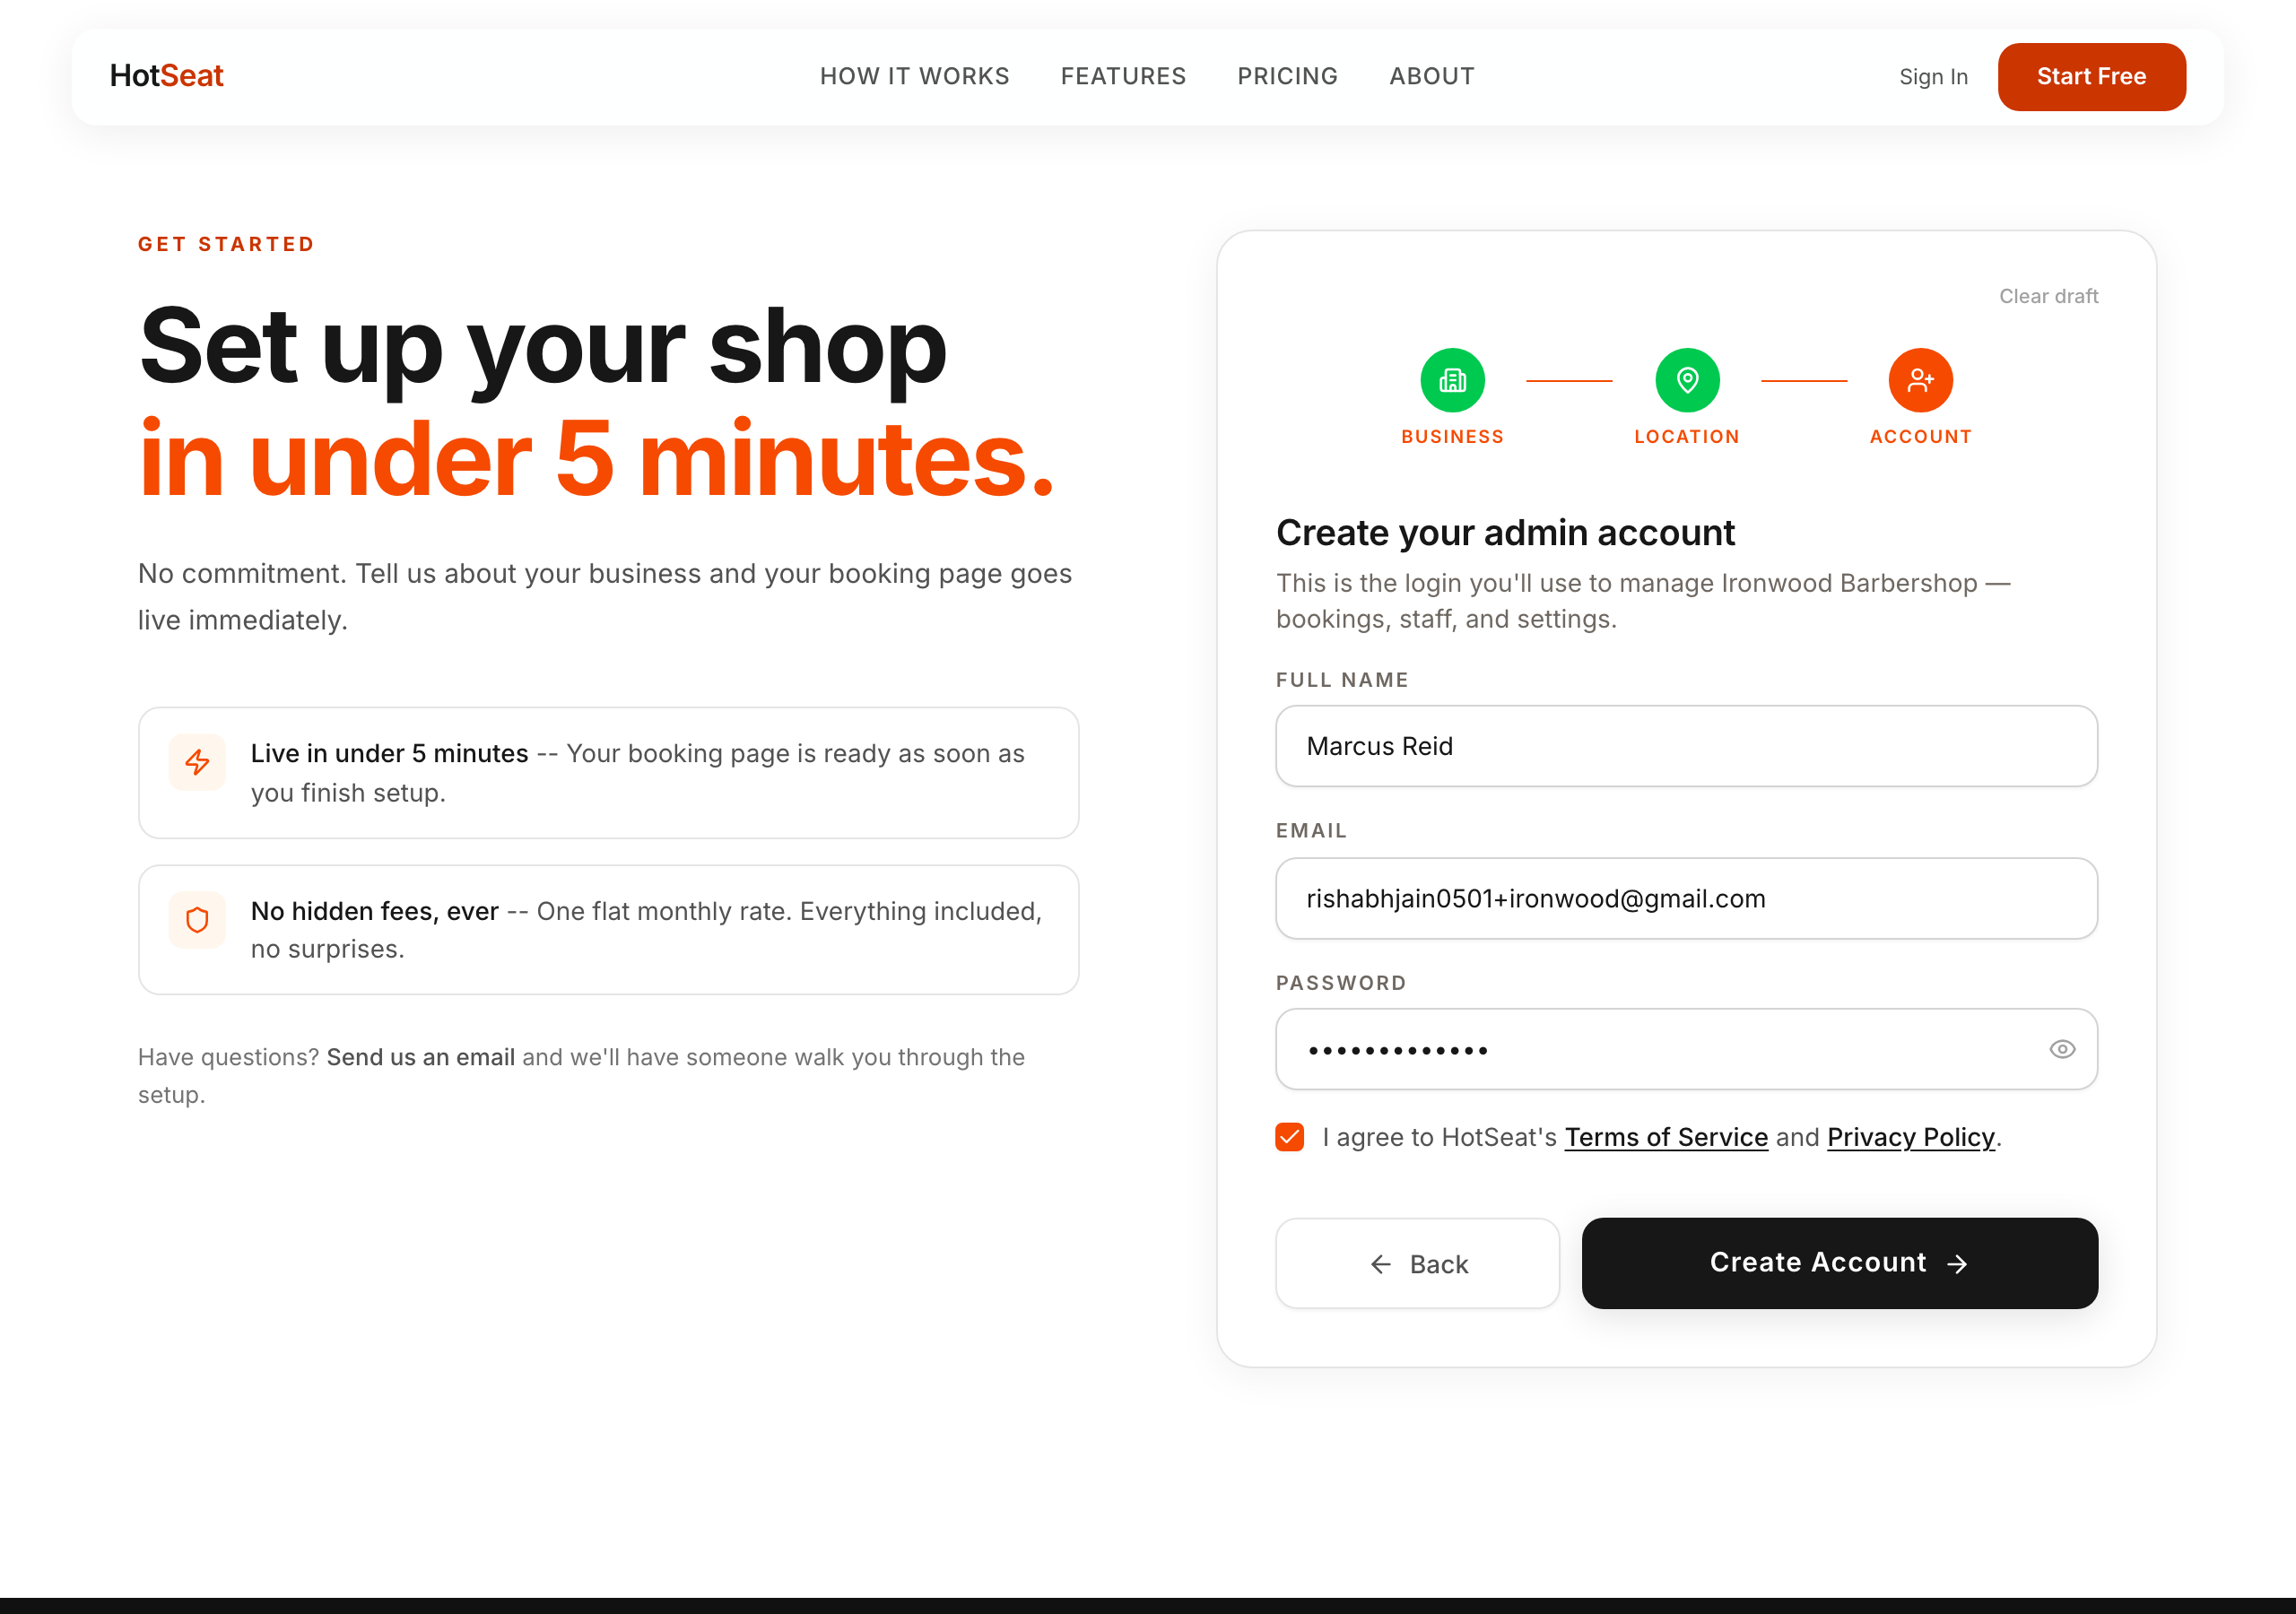
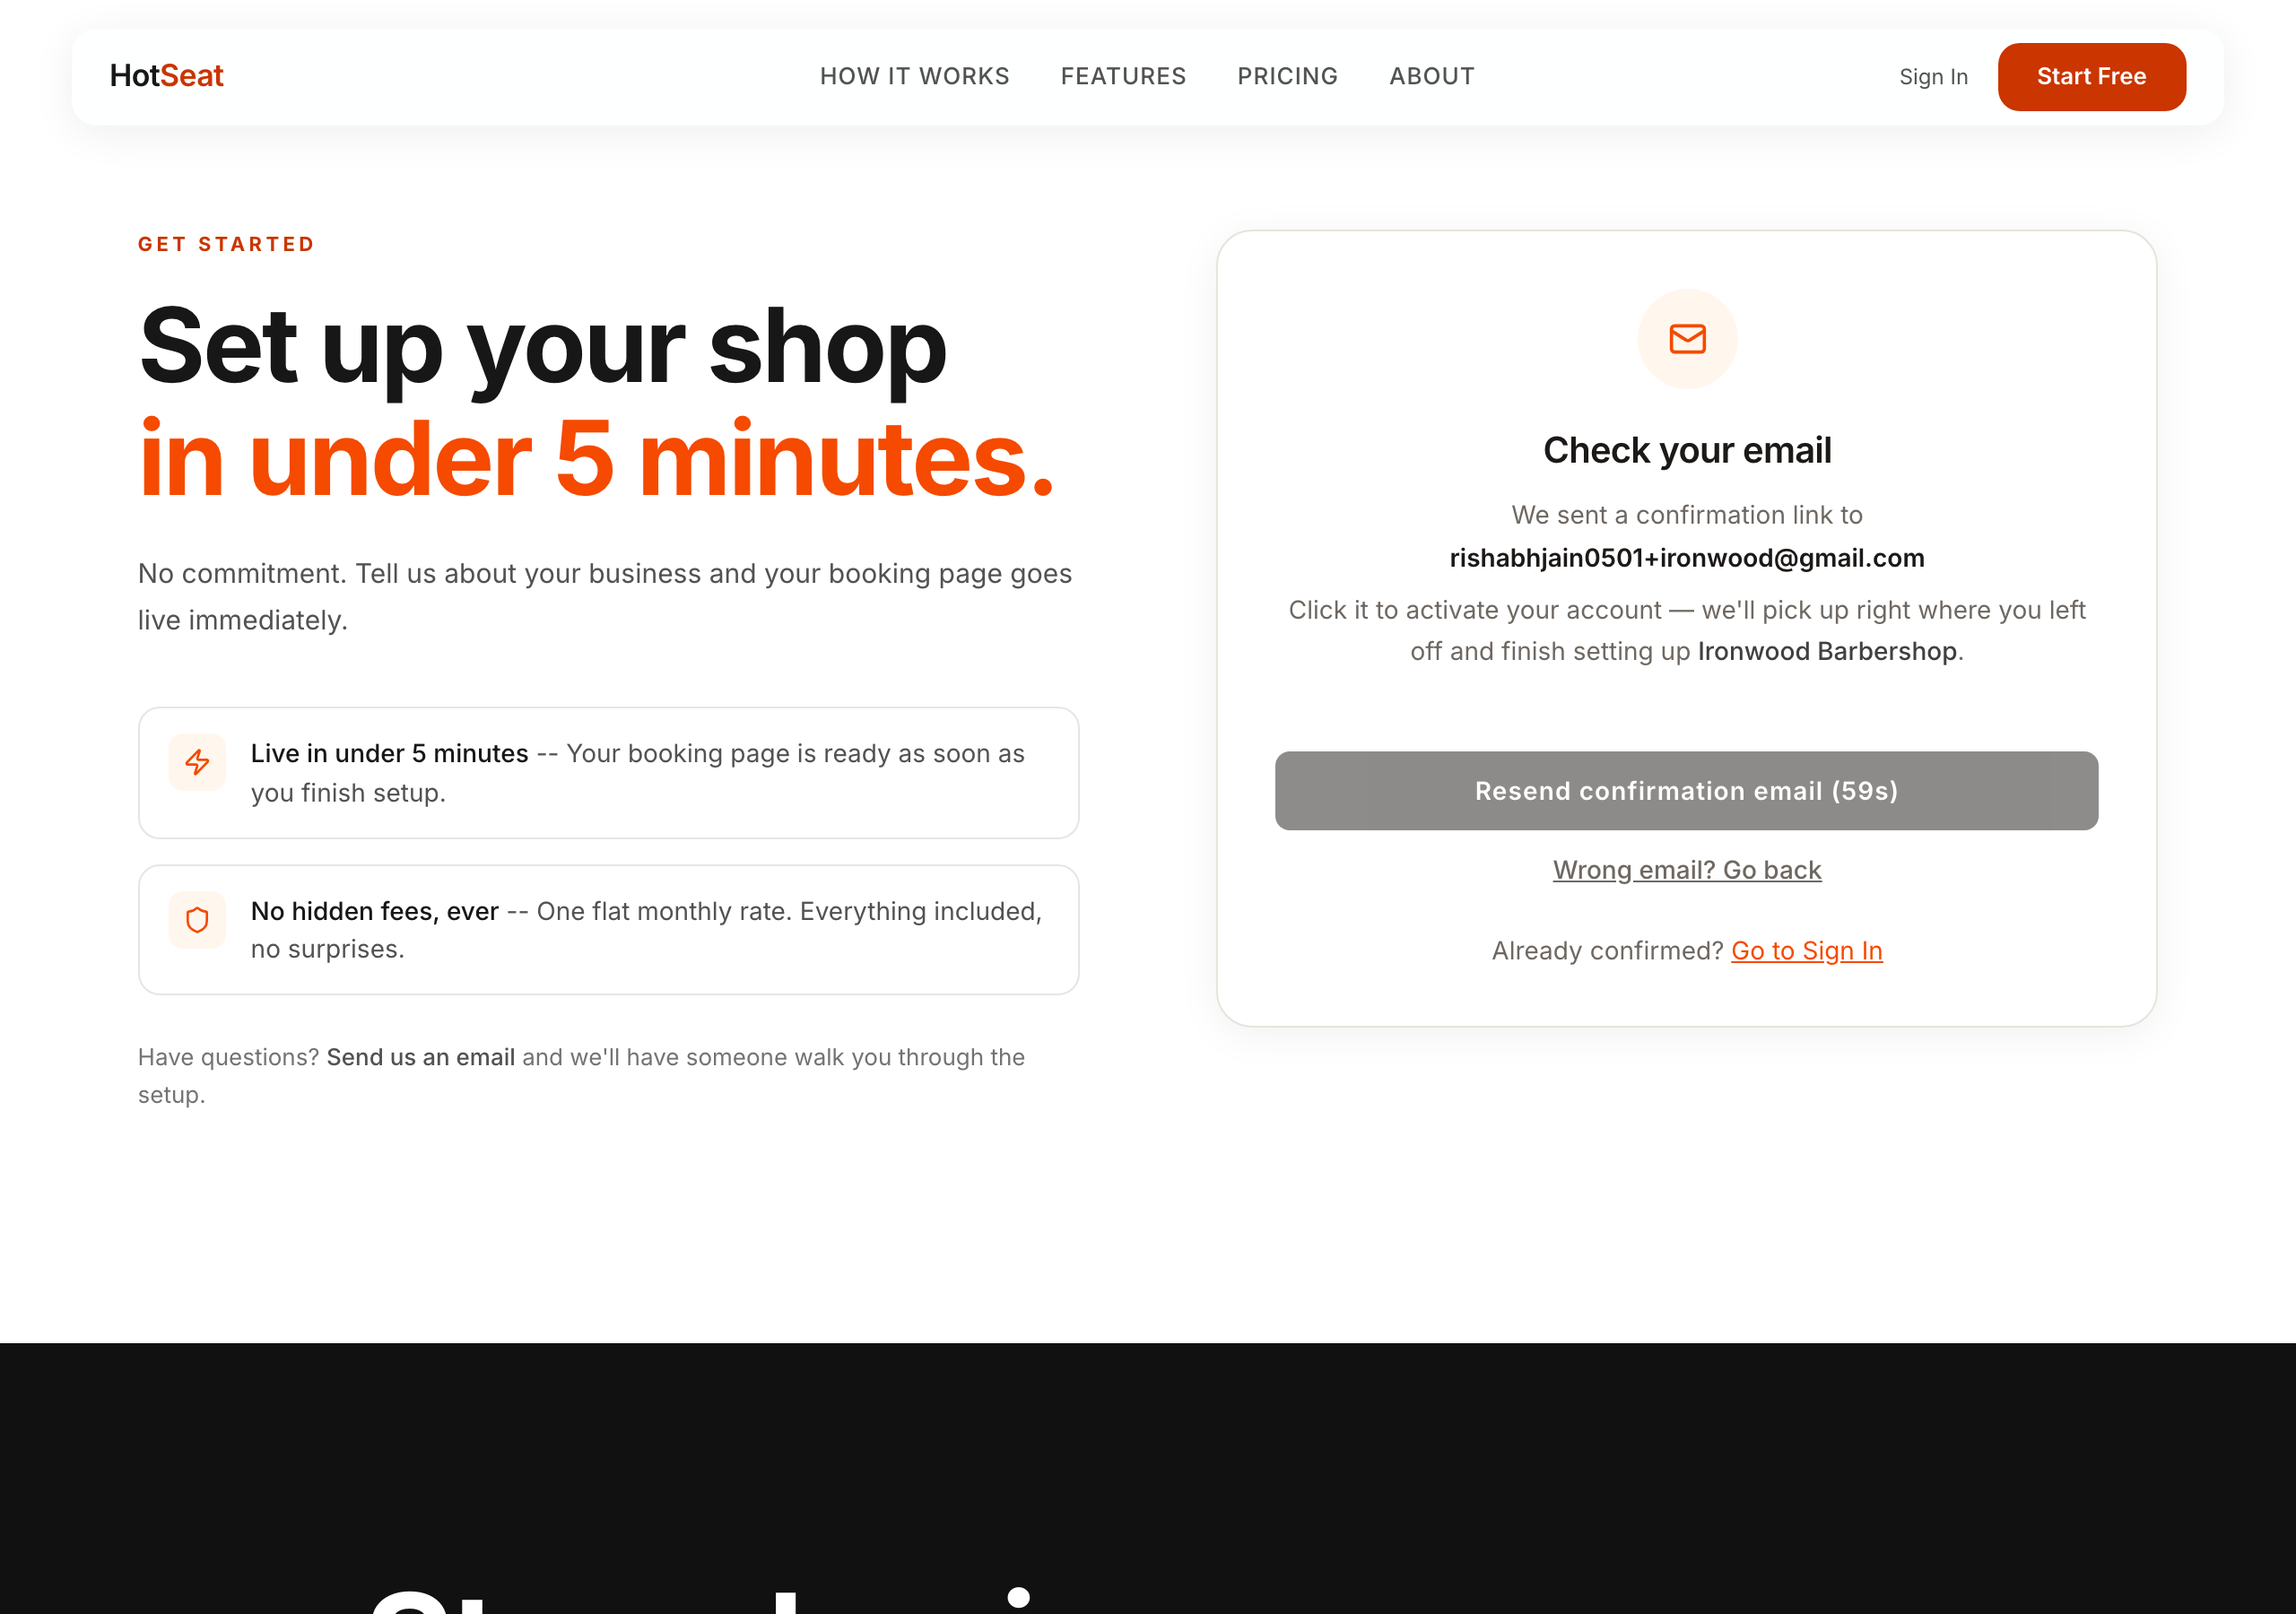
Tip: Use the email address you check most — it's where booking alerts and account notices land. Your password needs 8+ characters with an uppercase letter, a lowercase letter, a number, and a symbol.
You'll know it worked when you click the link in your email and land on your HotSeat dashboard.
Set up your business
Your free month started when you signed up, and your name, location, and timezone were saved. Two things finish the job: telling us your team size and setting your opening hours.
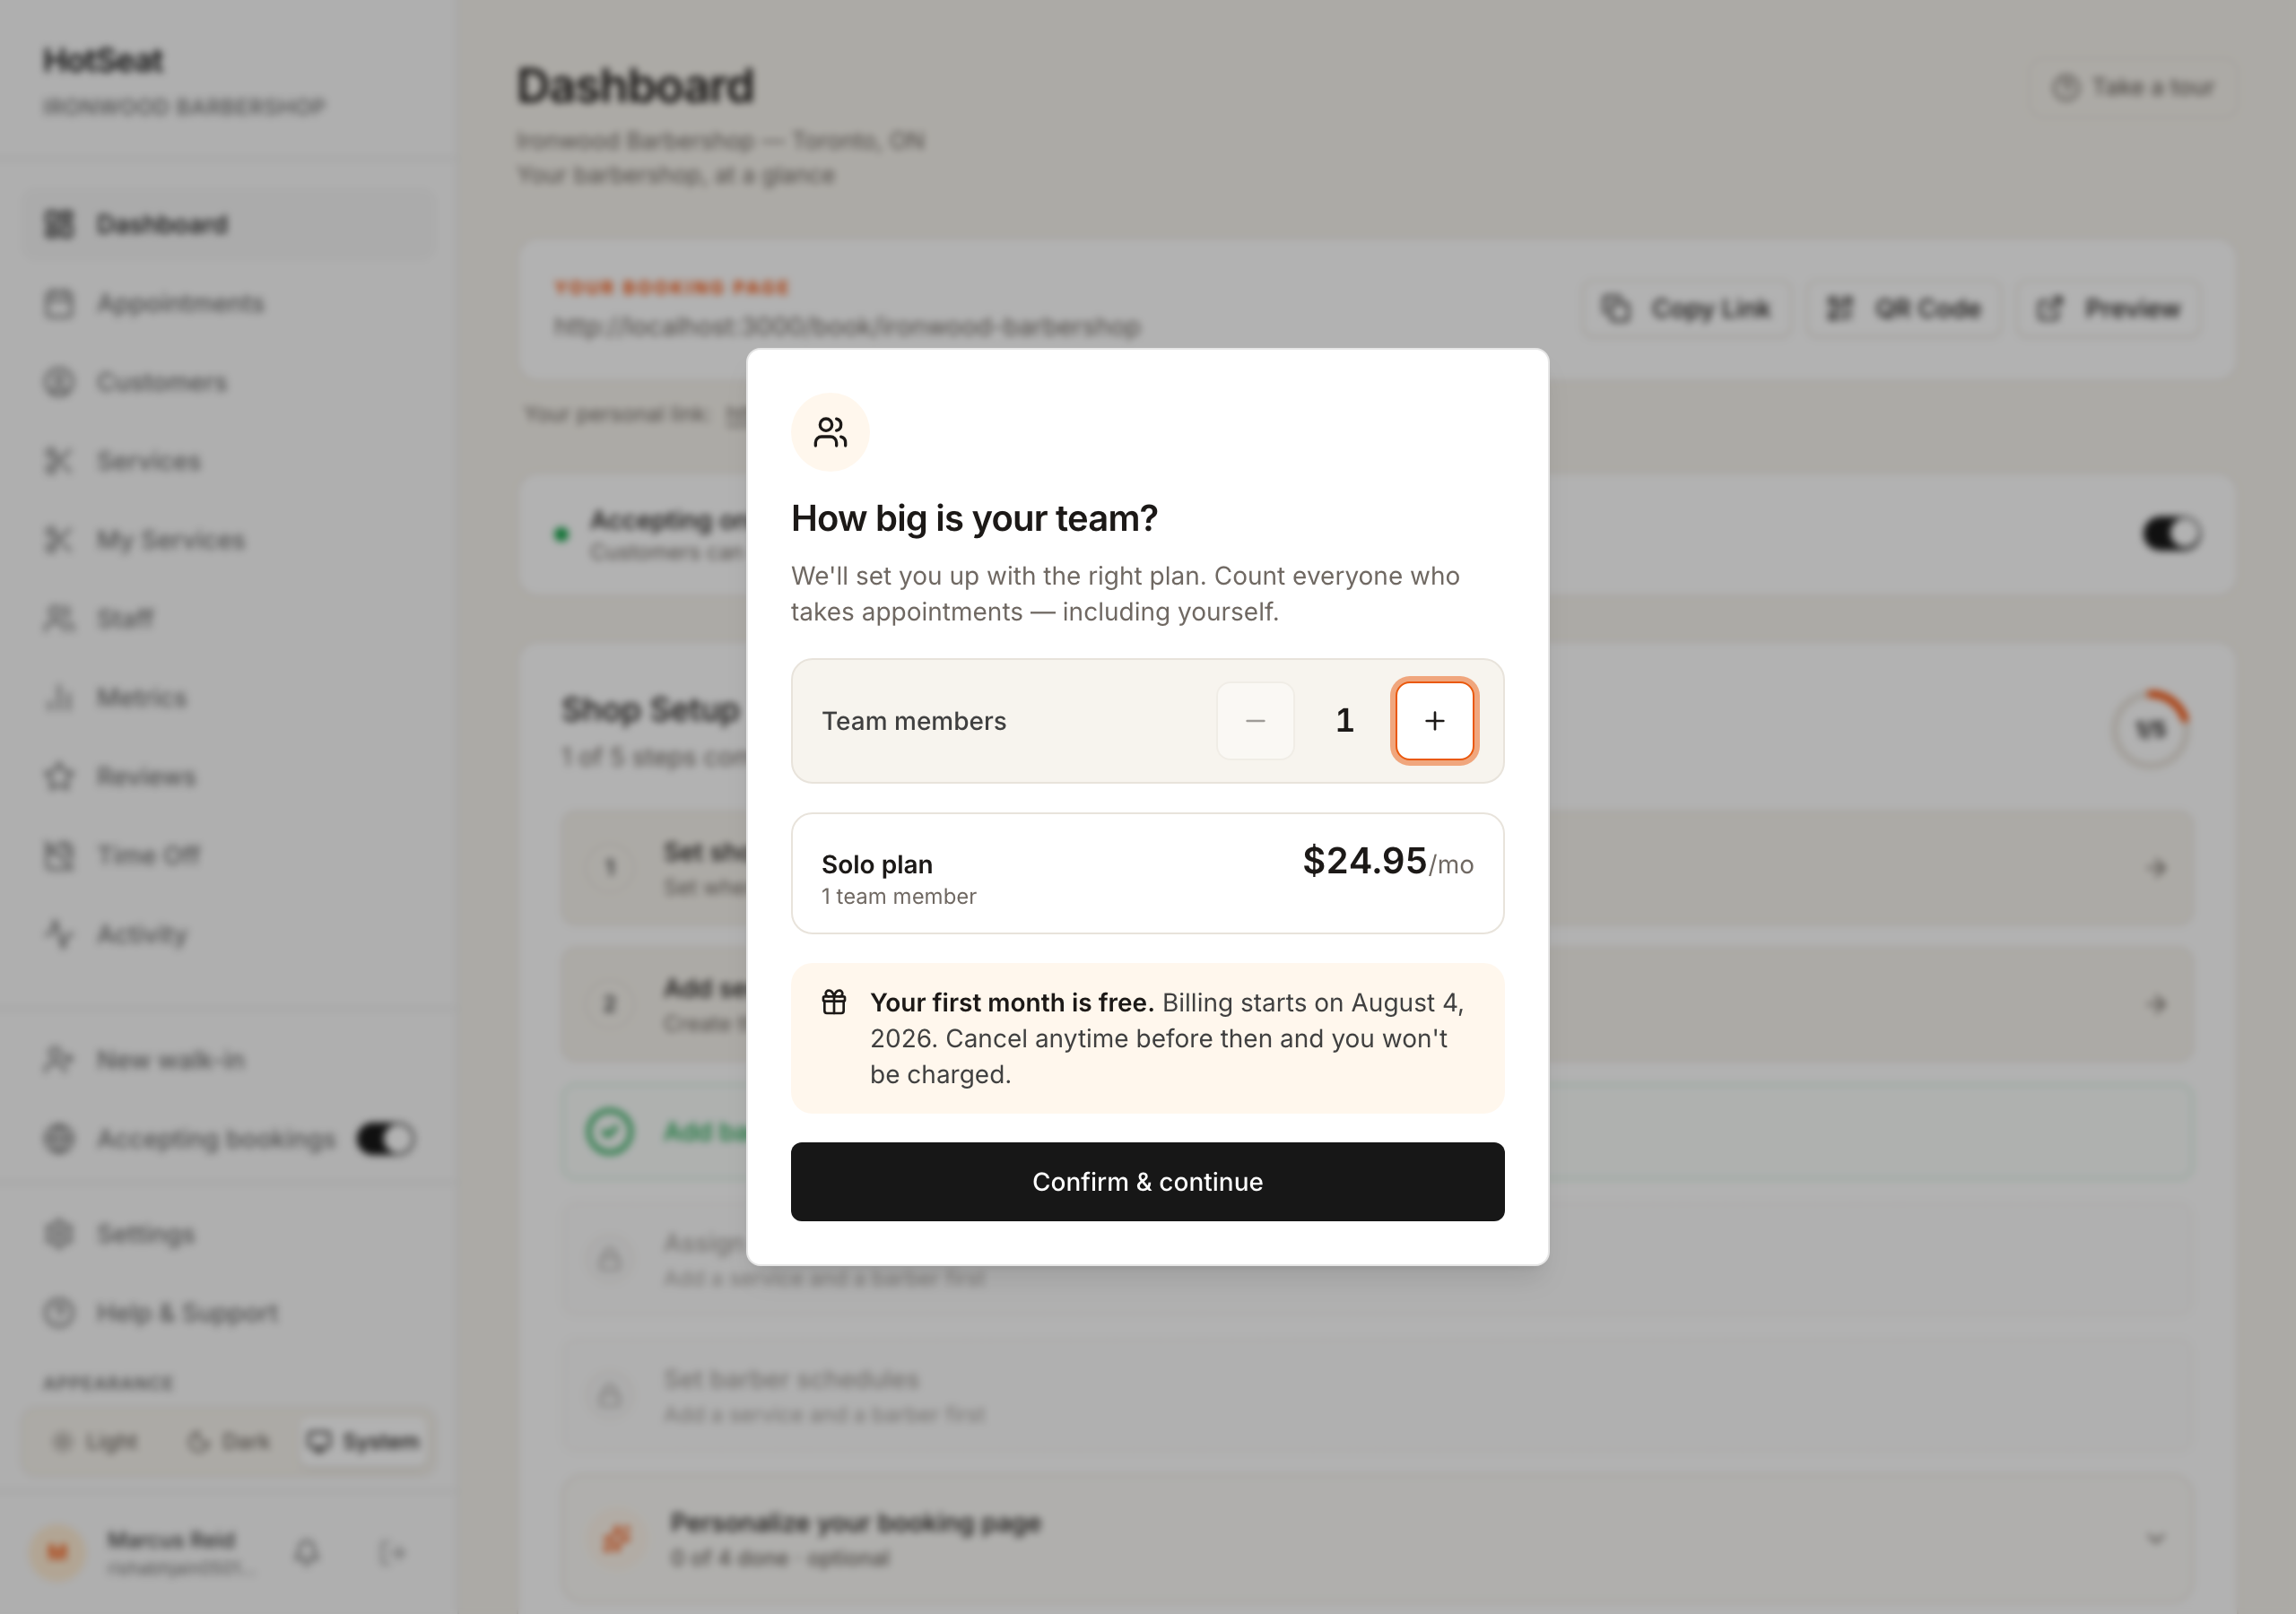
- 1The first time you open your dashboard, HotSeat asks How big is your team? Count everyone who takes appointments — including you — then click Confirm & continue. Your team size sets your monthly price, and you can change it anytime in Settings > Billing.
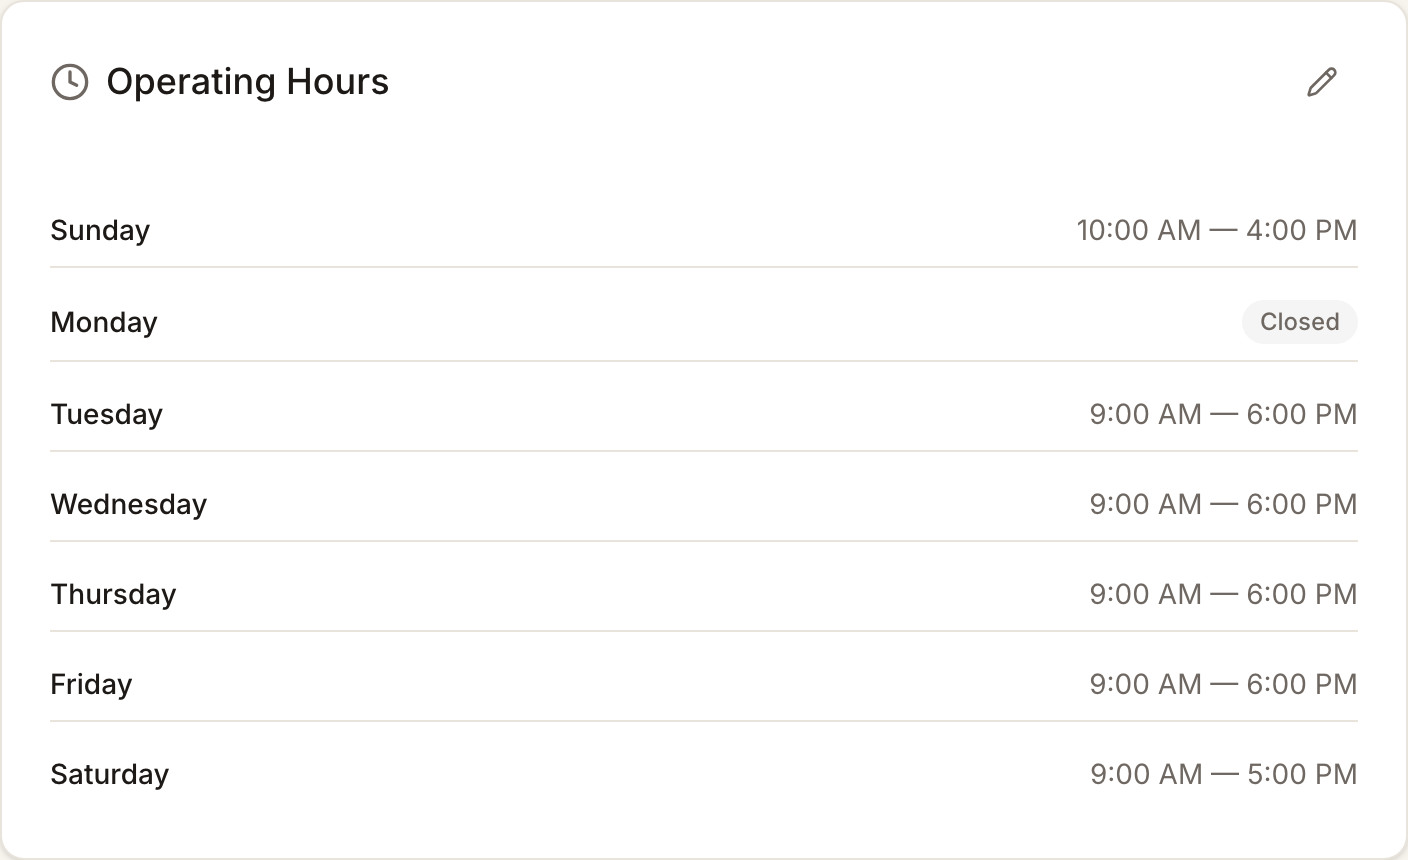
- 2Open Settings in the left menu, find Operating Hours, click the pencil icon, and set each day (mark the days you're closed).
Tip: Your hours are the outer limits of your day. Each team member can still have their own working hours inside them (Step 6), so a late start on Tuesdays is handled separately.
You'll know it worked when your Operating Hours show the right times, with your days off marked Closed.
Add your team
Do this before your services, so each service can be ticked straight to the people who perform it. If it's just you, skip ahead — you're already set up as your shop's specialist. Adding a teammate sends them an email invite, so you never handle their login.
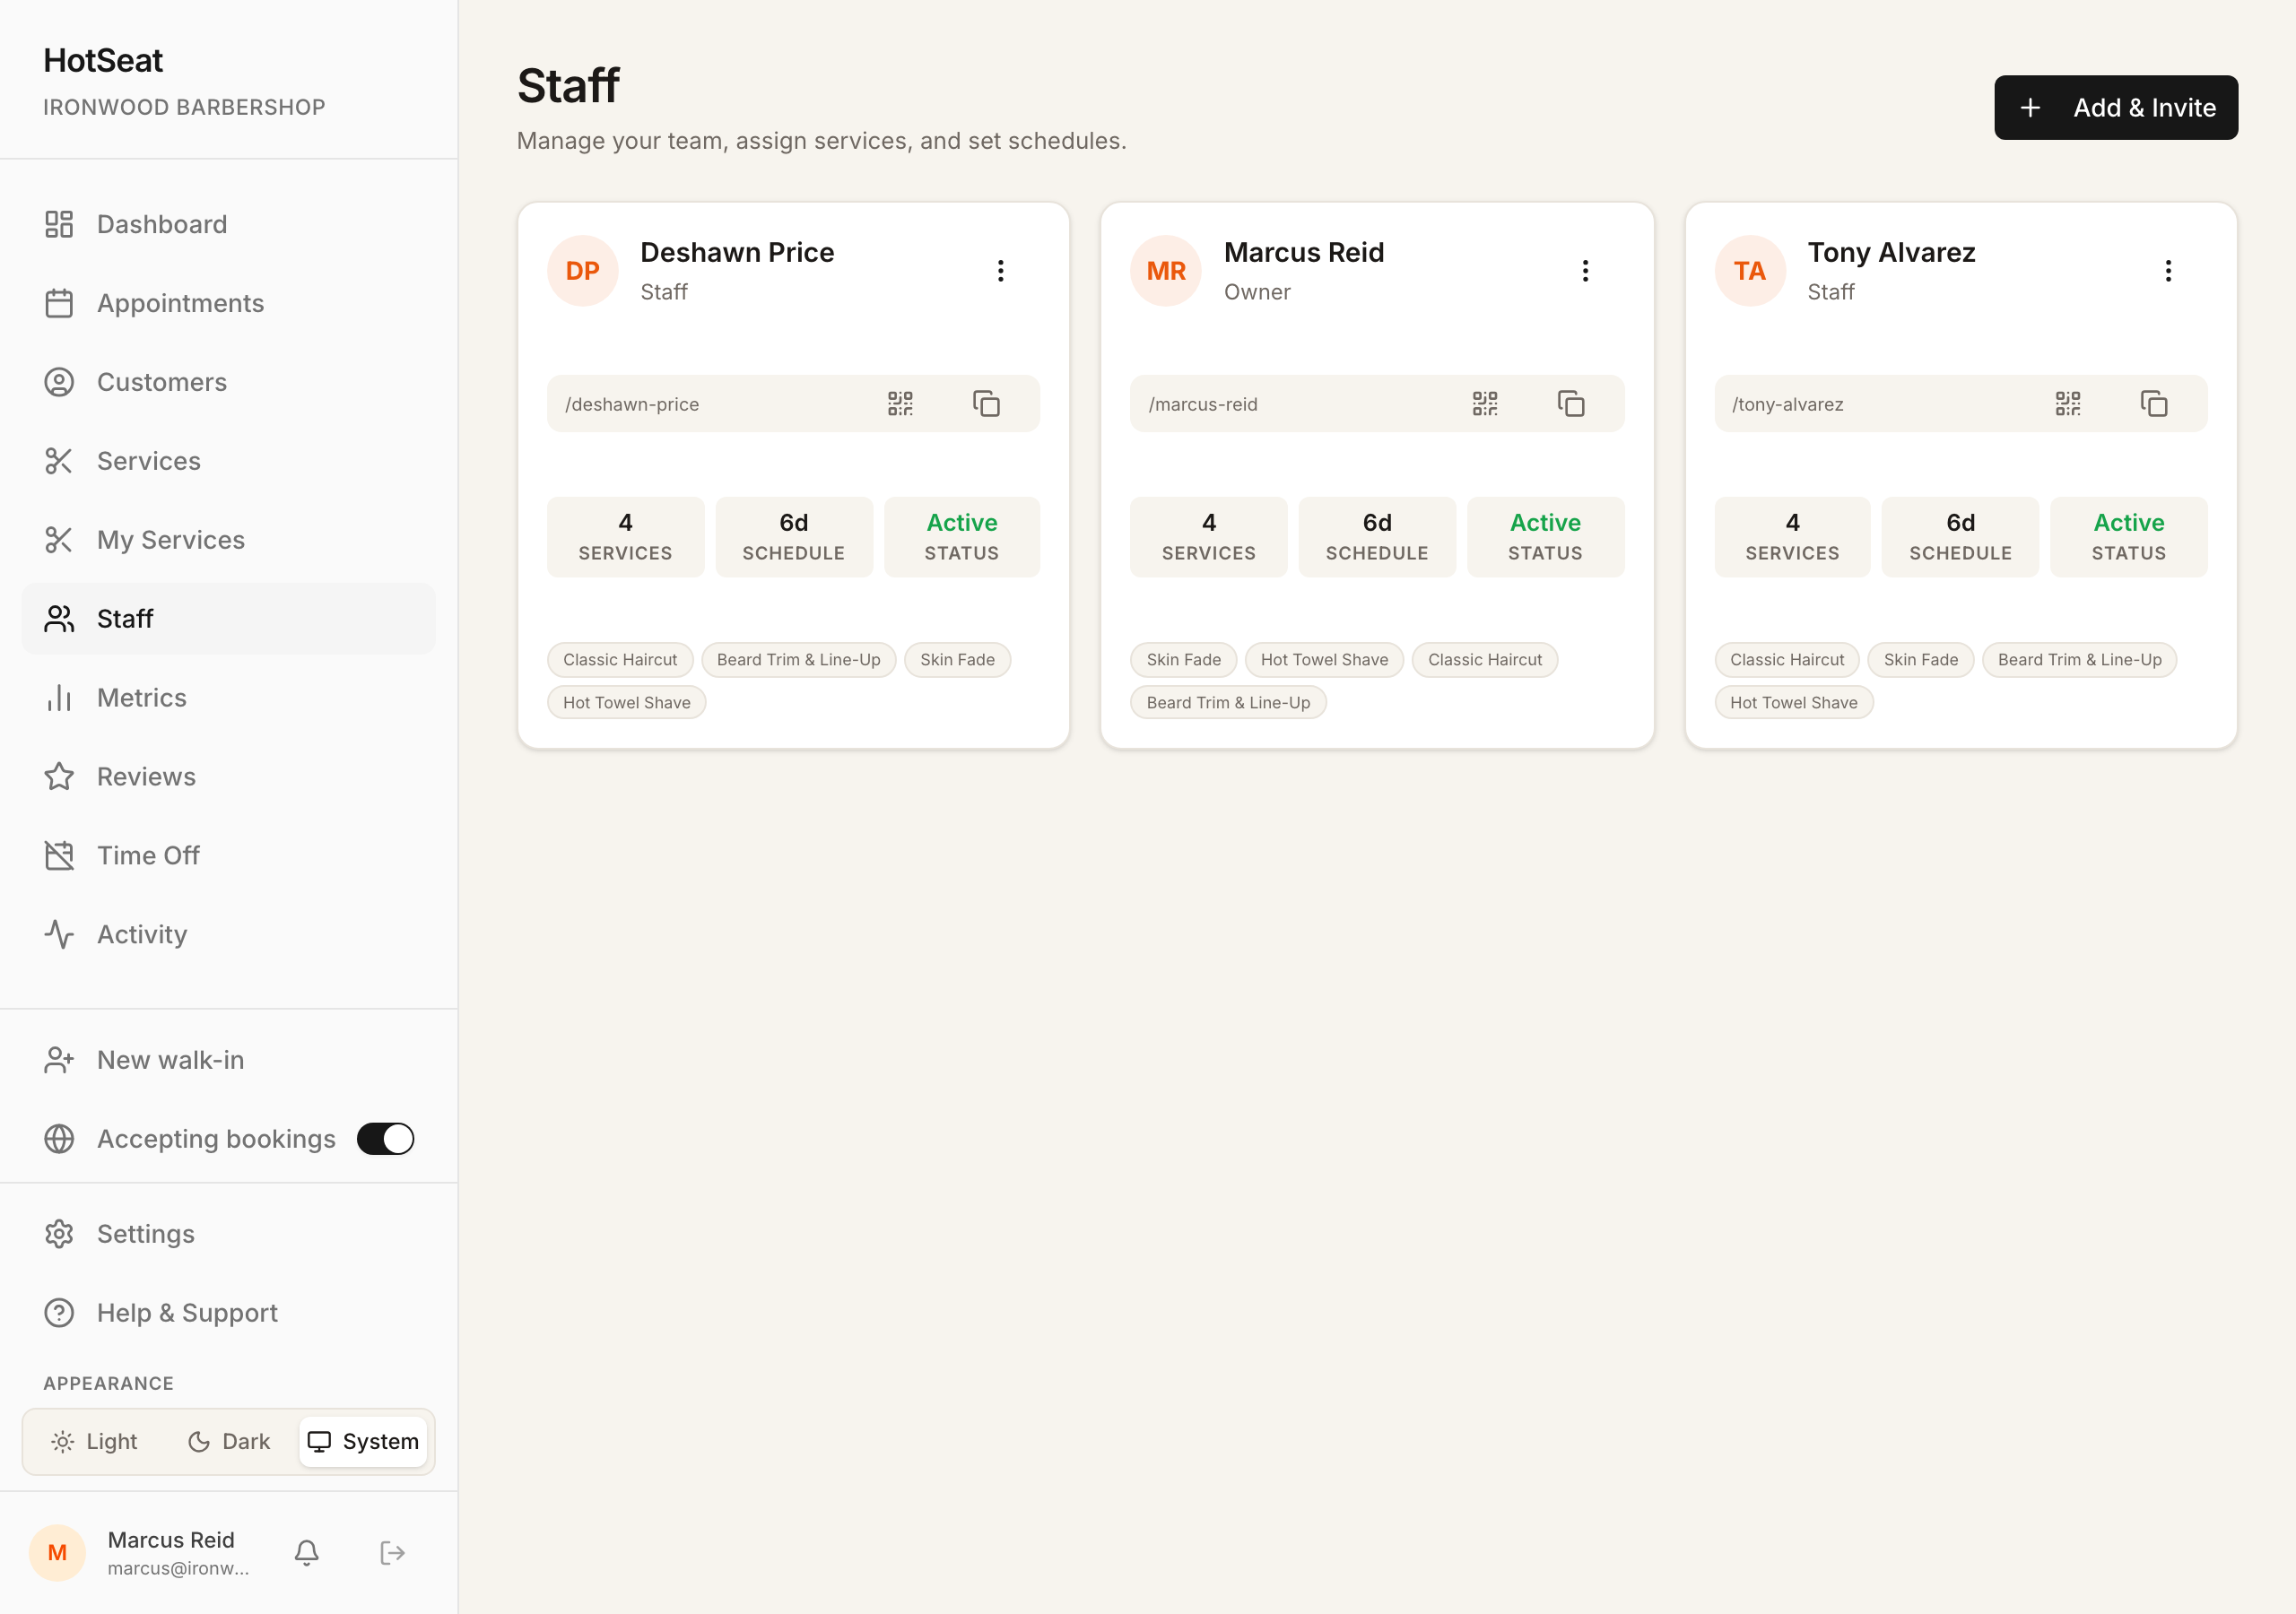
- 1In the left menu, click Staff, then click Add & Invite.
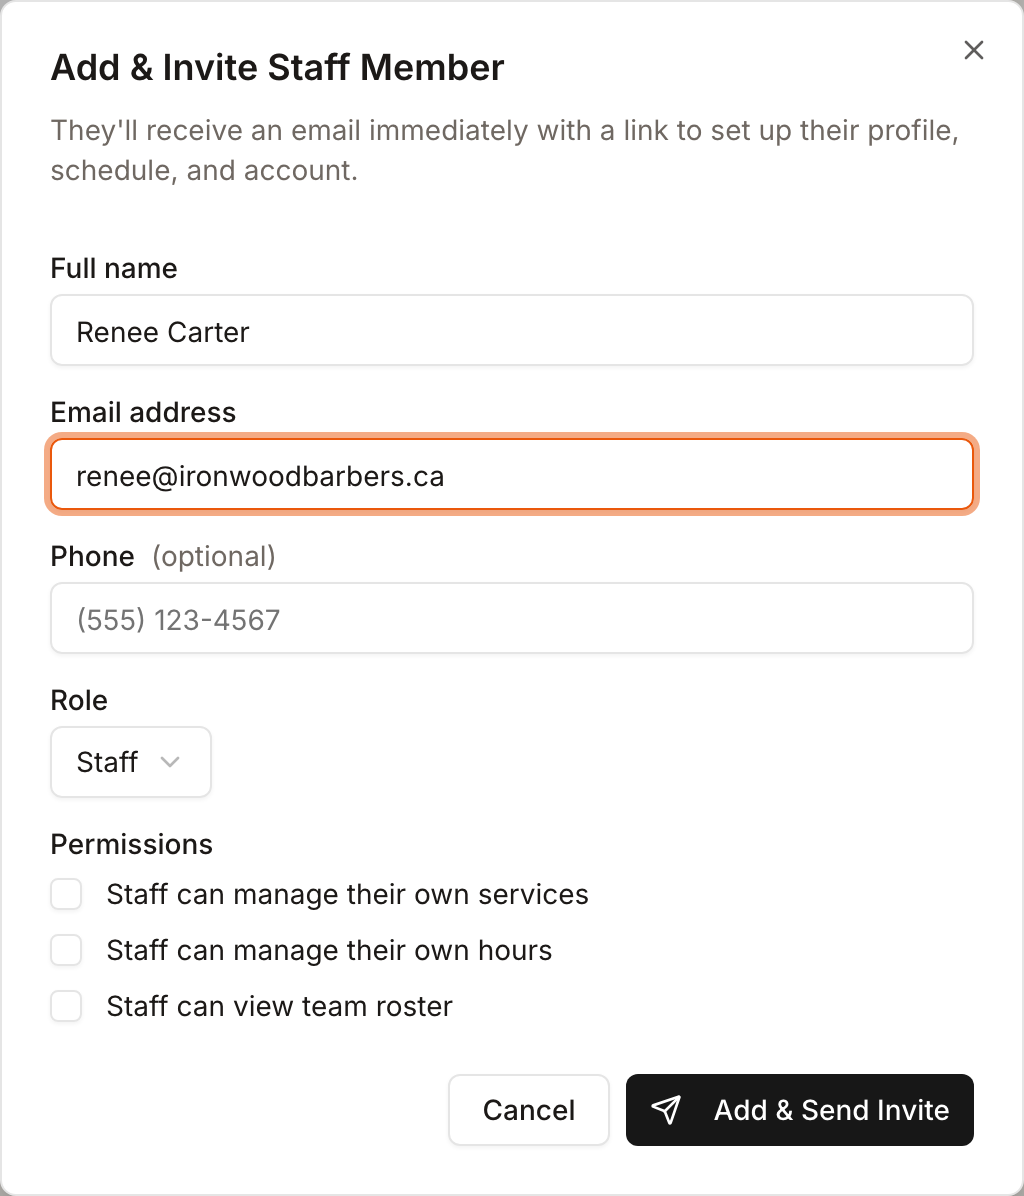
- 2Enter their Full name and Email address, choose their Role, and tick any Permissions you want them to have.
- 3Click Add & Send Invite.
Tip: You can line up a teammate's services (Step 5) and schedule (Step 6) before they accept, so they're bookable the moment they join. Customers see the word “specialist” for everyone, whatever your kind of business.
You'll know it worked when the new person appears on your Staff page (they'll show as pending until they accept their invite).
Add your services
These are the things customers can book. For each one you set a name, how long it takes, the price, and who on your team does it.
- 1In the left menu, click Services, then click Add Service.
- 2Fill in the Service Name, an optional Description, the Duration, and the Price. Pick a Category to keep your menu tidy.
- 3Under Who performs this service?, tick everyone who does it — at least one person is required, and it's what makes the service bookable. Because you added your team in Step 3, they're all listed here. (If it's just you, you're the only name.)
- 4Click Save Service, and repeat for each thing you offer.
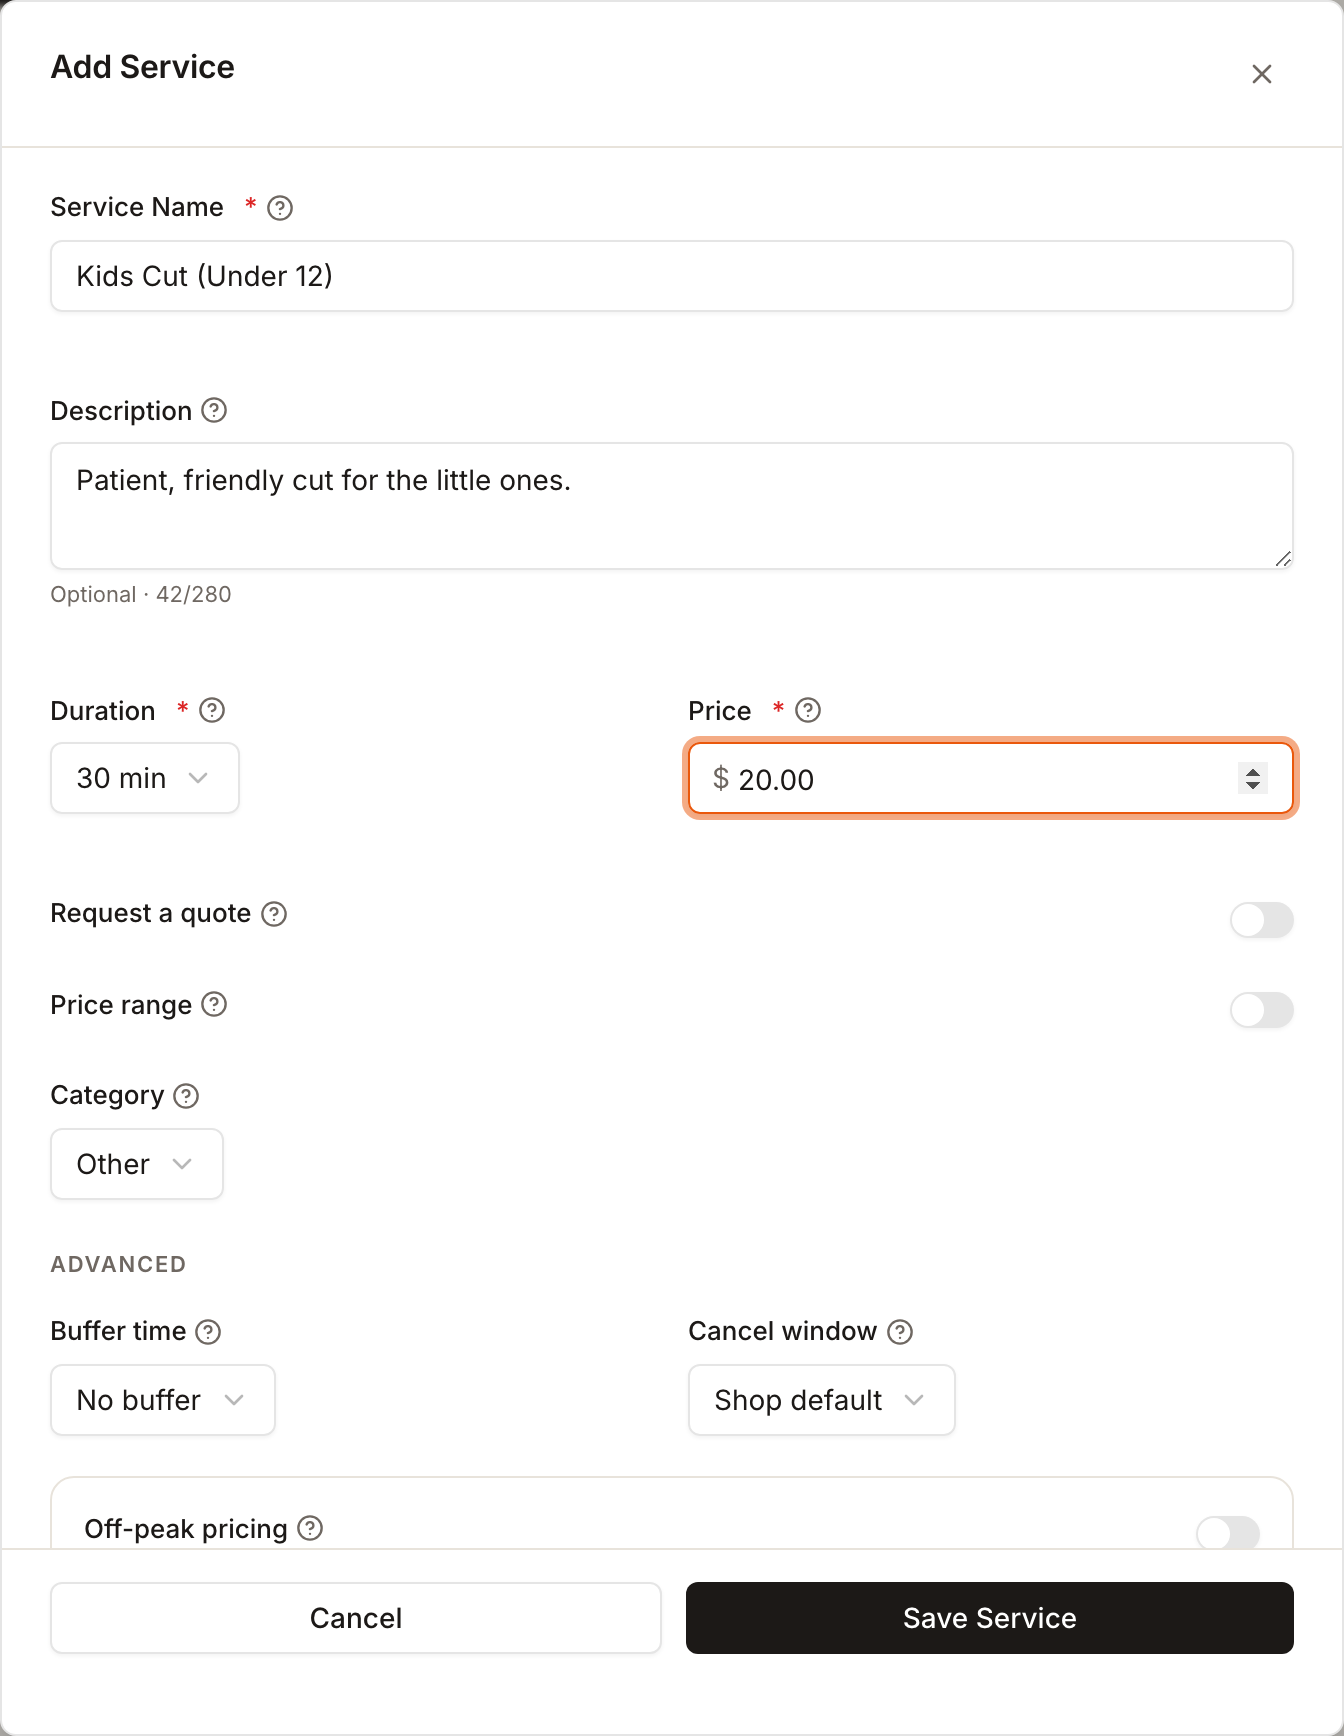
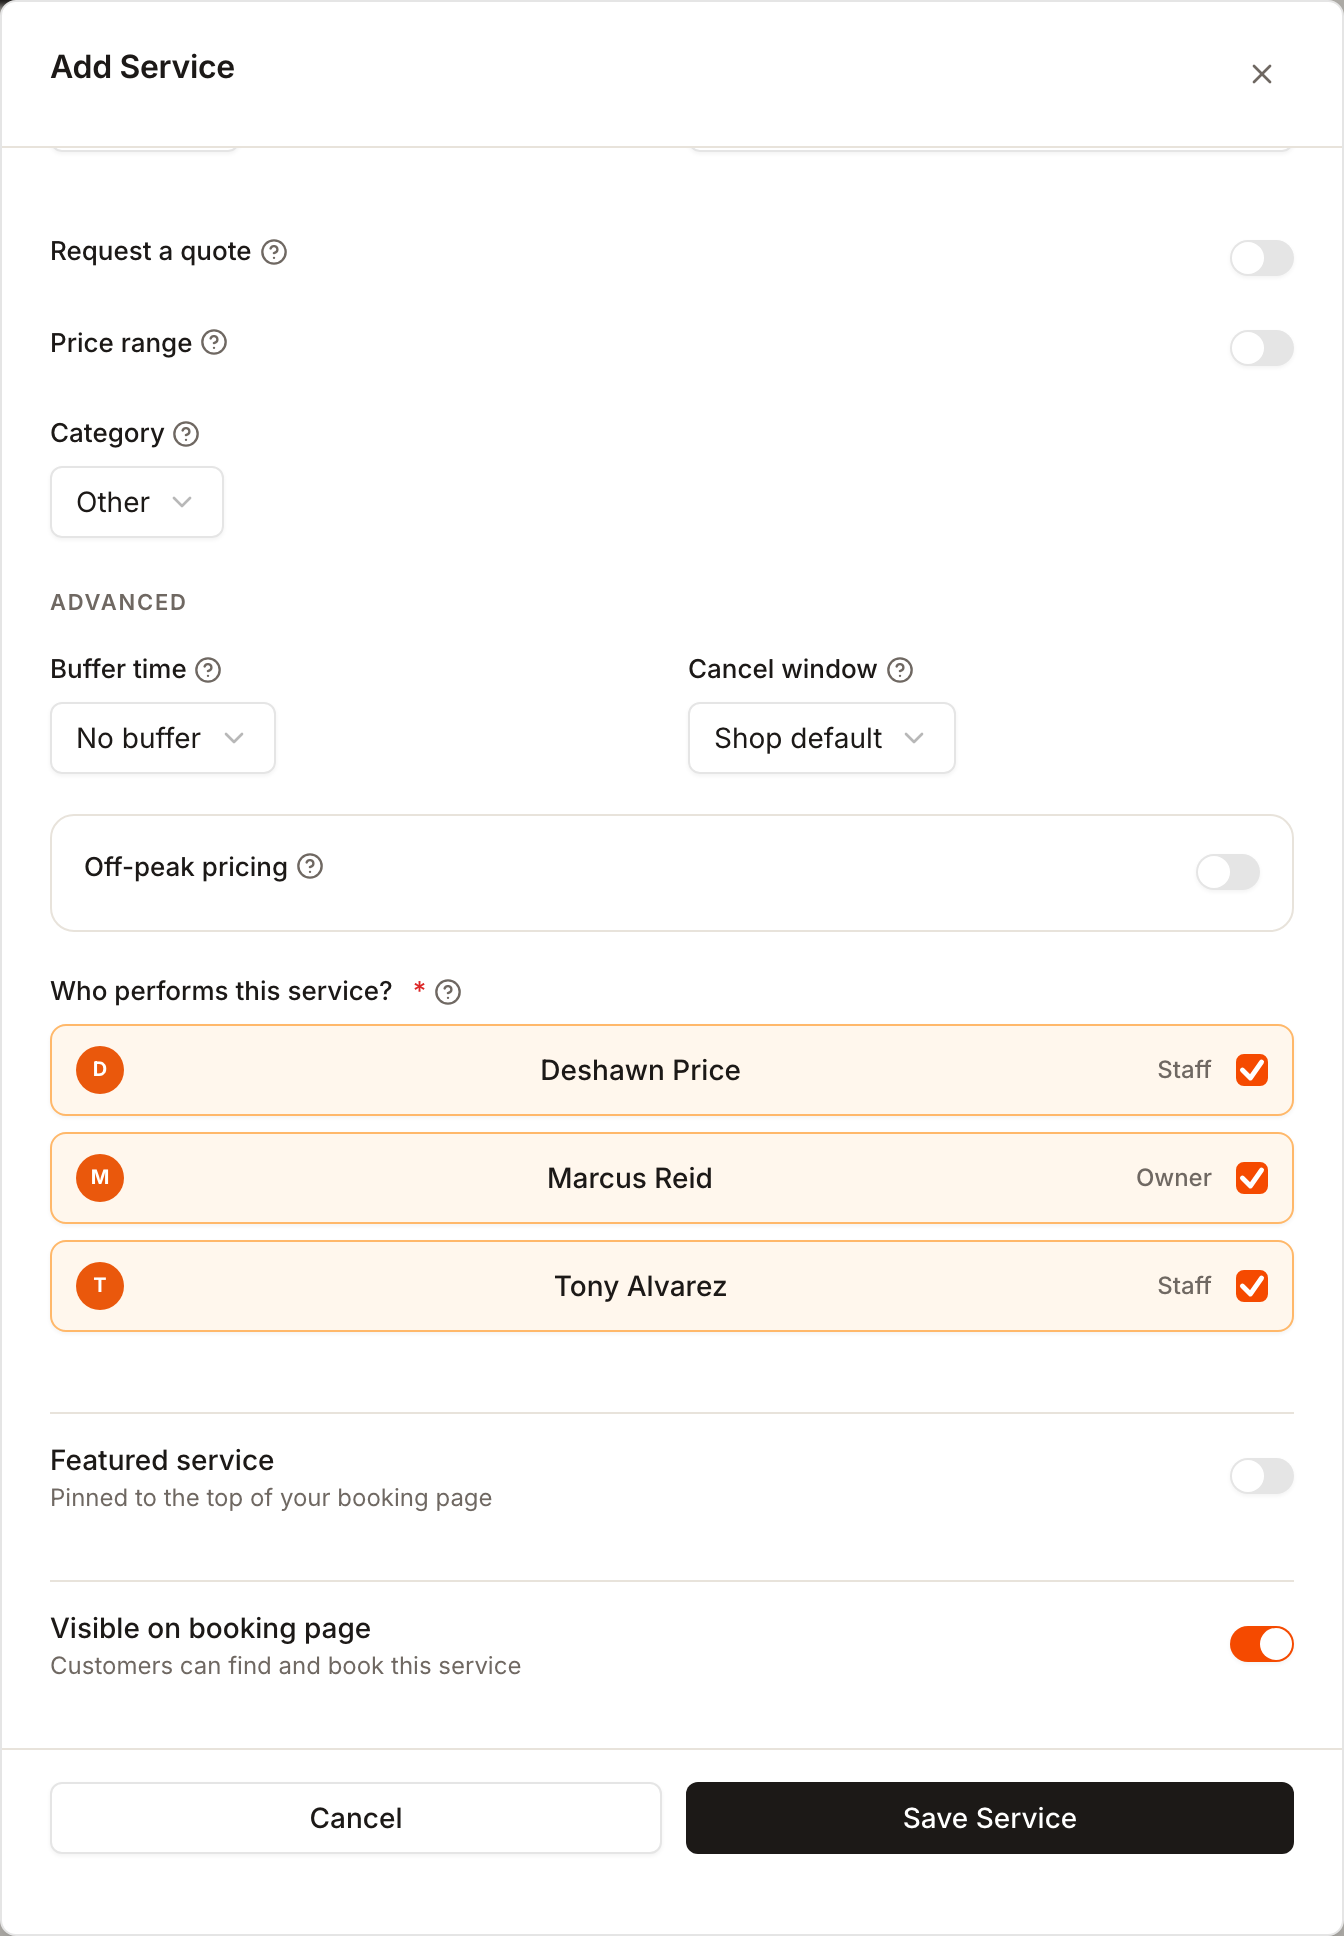
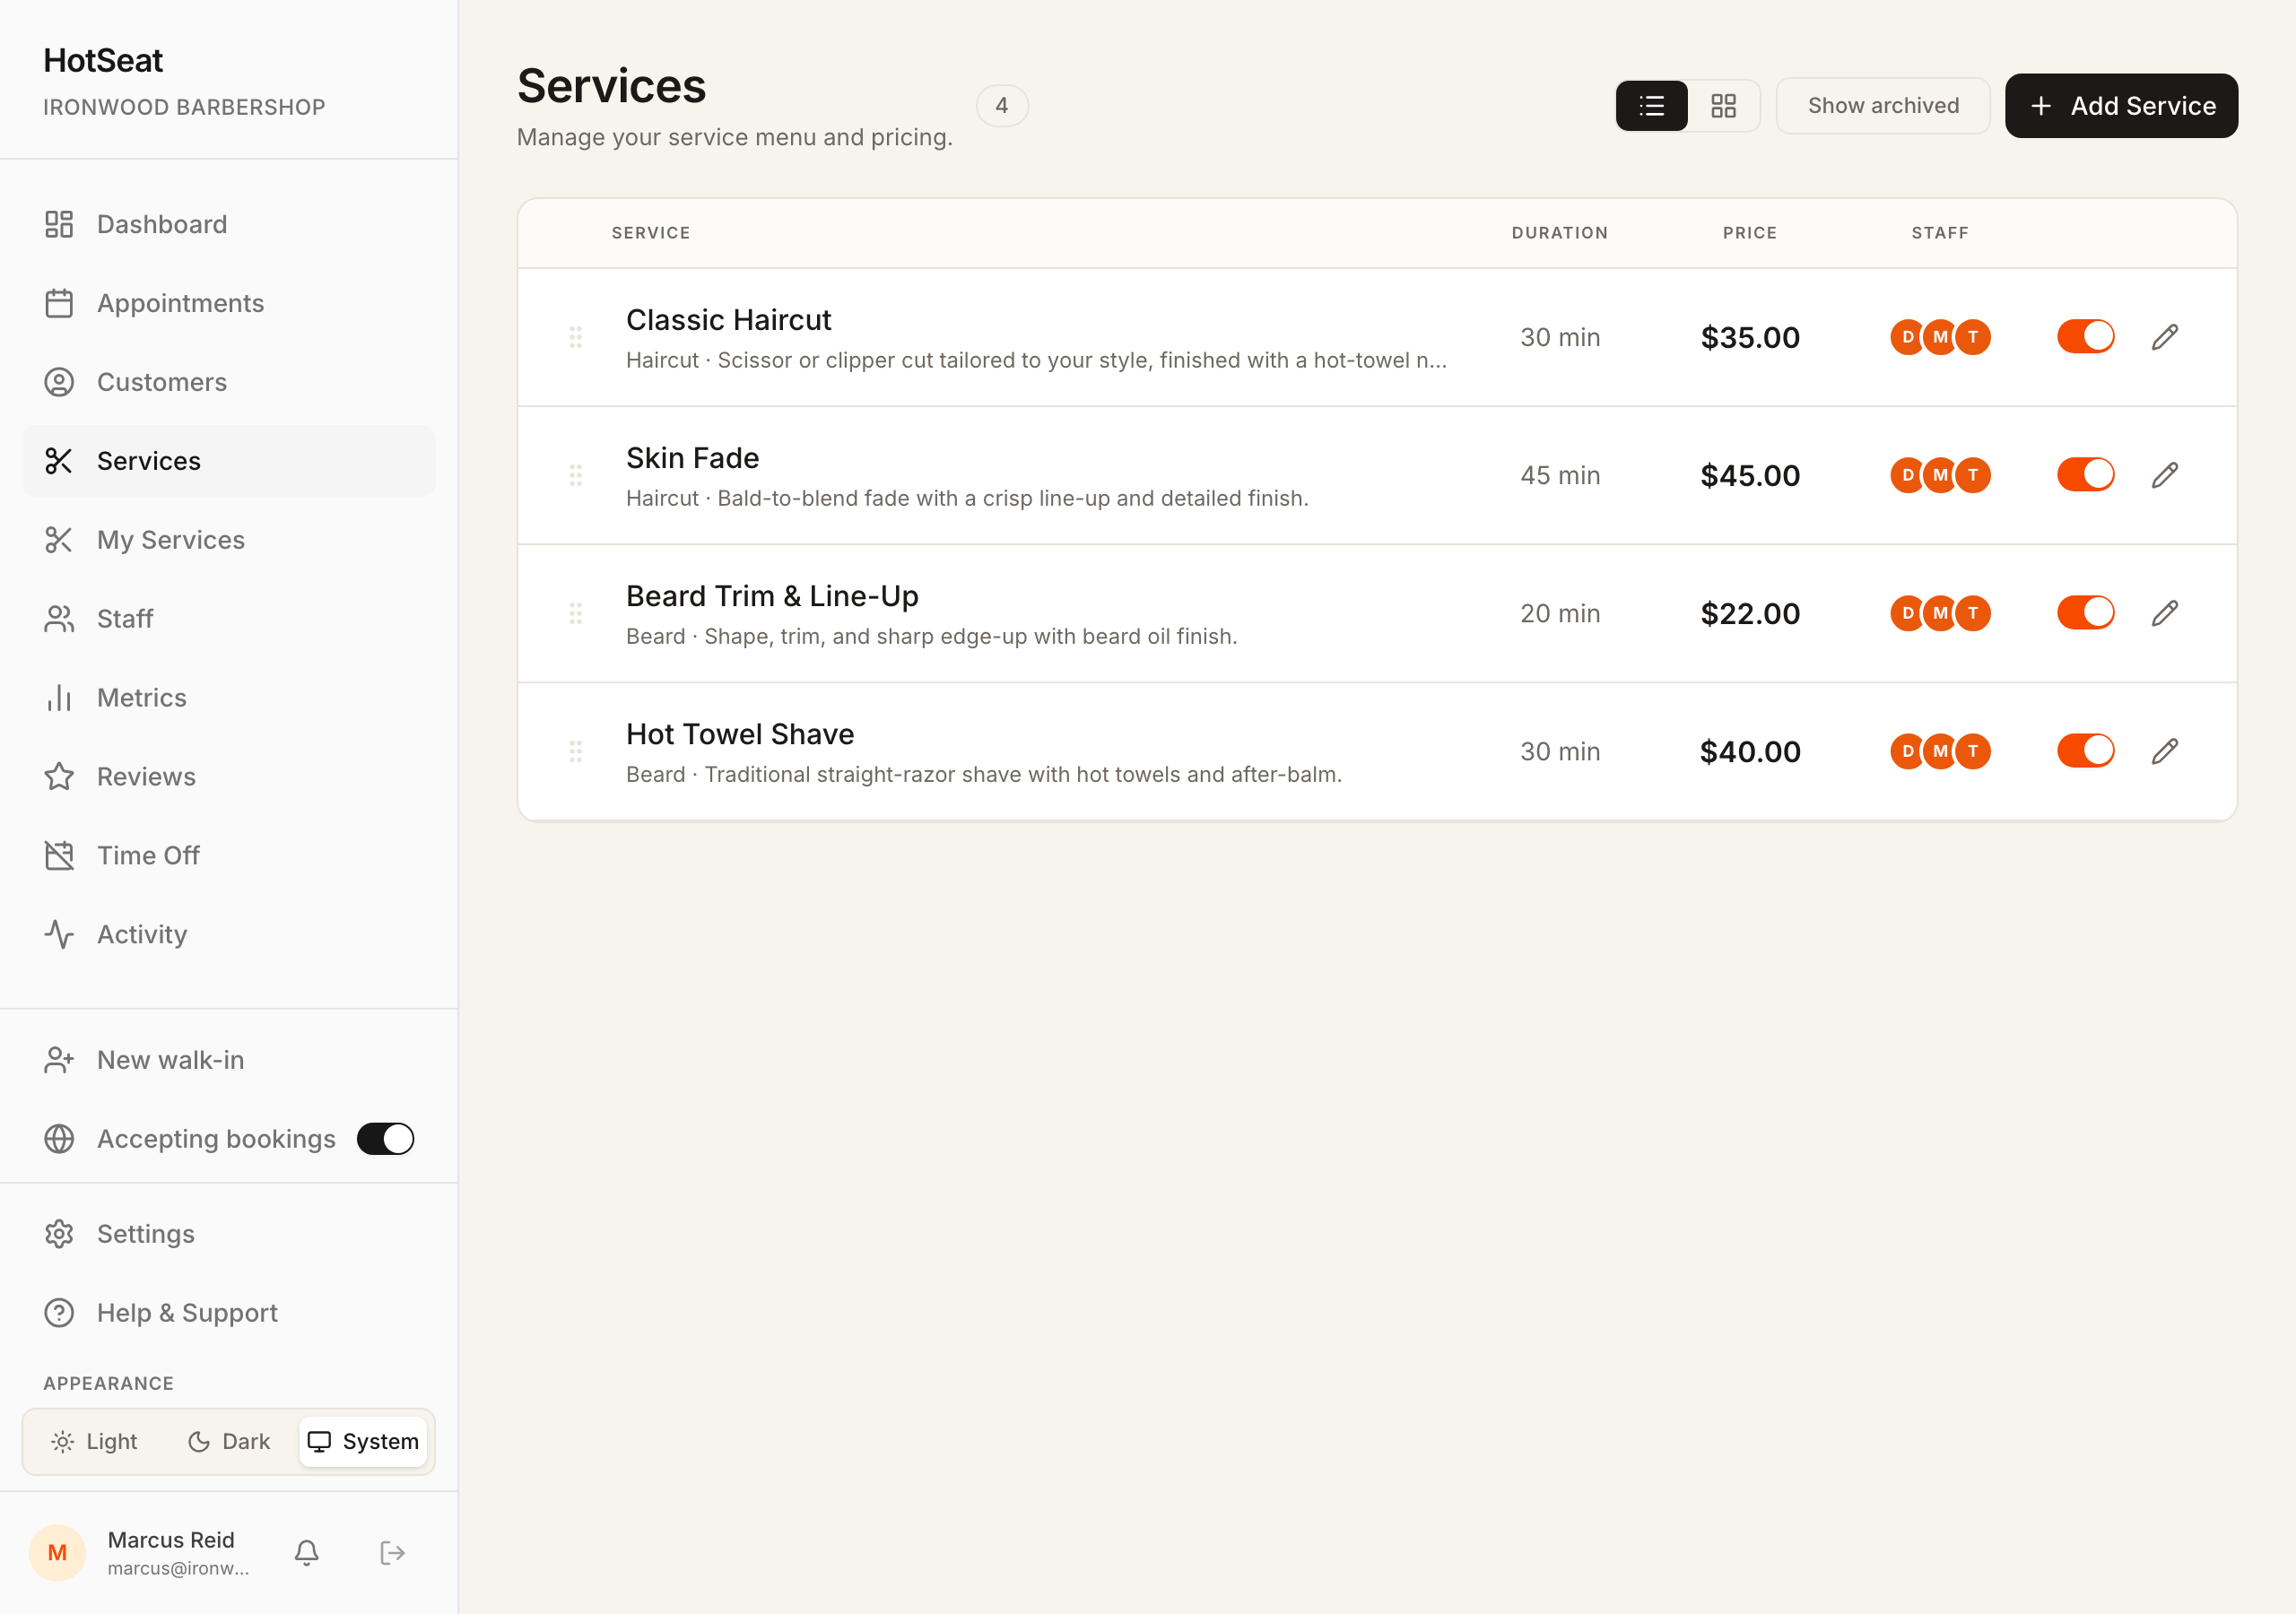
Tip: Set the Duration to the real appointment time — HotSeat uses it to space out your day so two customers never land in the same slot. Add a teammate after this? They won't be attached to anything yet — Step 5 links them up.
You'll know it worked when each service appears in your Services list with the right time and price.
Assign services to your team
This is the step that makes each person bookable. HotSeat only offers a service when someone who performs it is free, so every specialist has to be linked to the services they do — a teammate with a schedule but no services assigned is on the calendar but bookable for nothing.
- 1When you add a service, tick the specialists under Who performs this service? (Step 4) — the fastest way to line up a whole team at once.
- 2For someone you added later, go to the Staff page, click the more (⋯) button on their card, and choose Manage.
- 3Open the Services tab, tick every service they perform, and click Save.
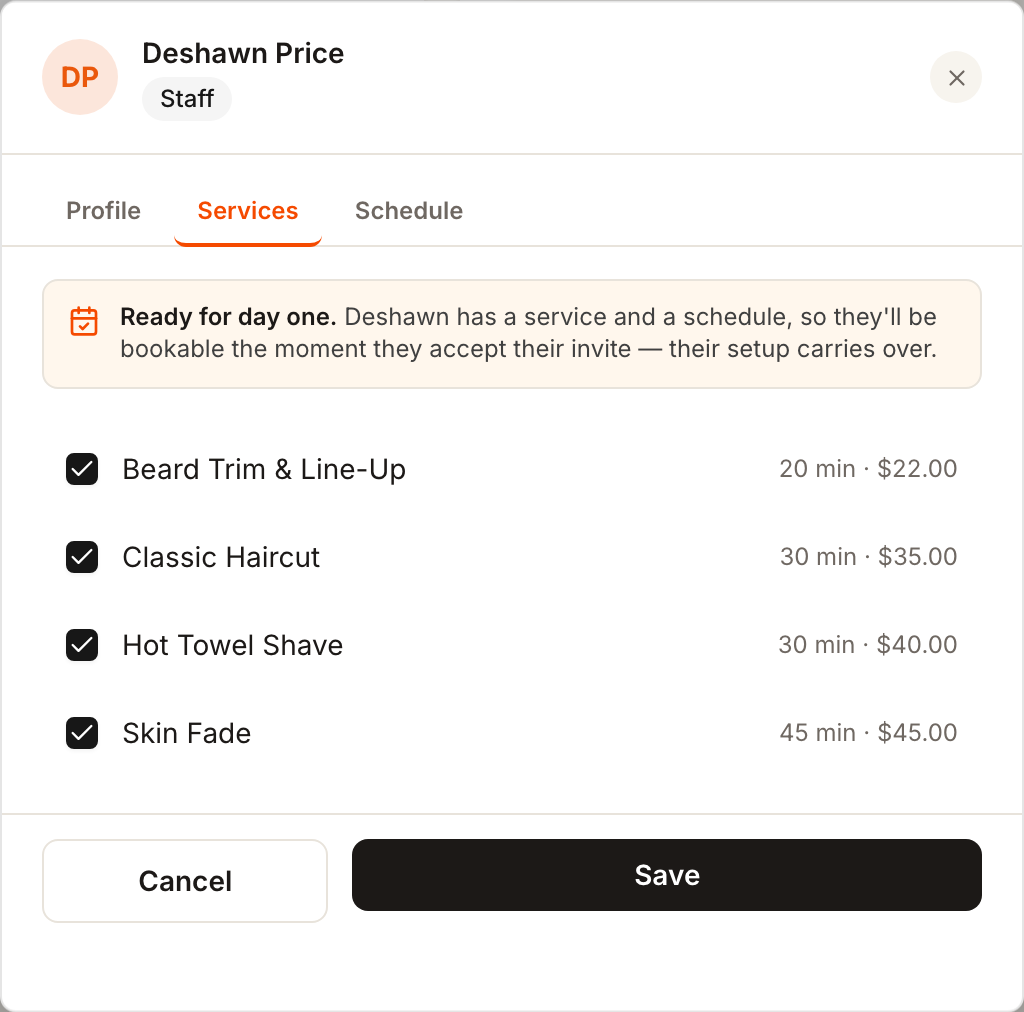
Tip: New teammates start with no services assigned — the one thing that's easy to forget. Whenever you add someone, or add a new service after your team is already set up, come back here so nobody ends up on the schedule with nothing to book.
You'll know it worked when the person shows the services they perform on their Services tab, and picking that specialist on your booking page brings up their open times.
Set your schedule
This is when each person actually works. Customers can only book inside these hours.
- 1On the Staff page, click the more (⋯) button on a person's card and choose Manage.
- 2Click the Schedule tab.
- 3Turn each working day on, set the start and end time, and add a break if needed. Click Save.
Once every specialist has their services and a schedule — on top of your opening hours and service menu — your dashboard greets you with a green You're ready to take bookings! banner. That's your whole setup, done.
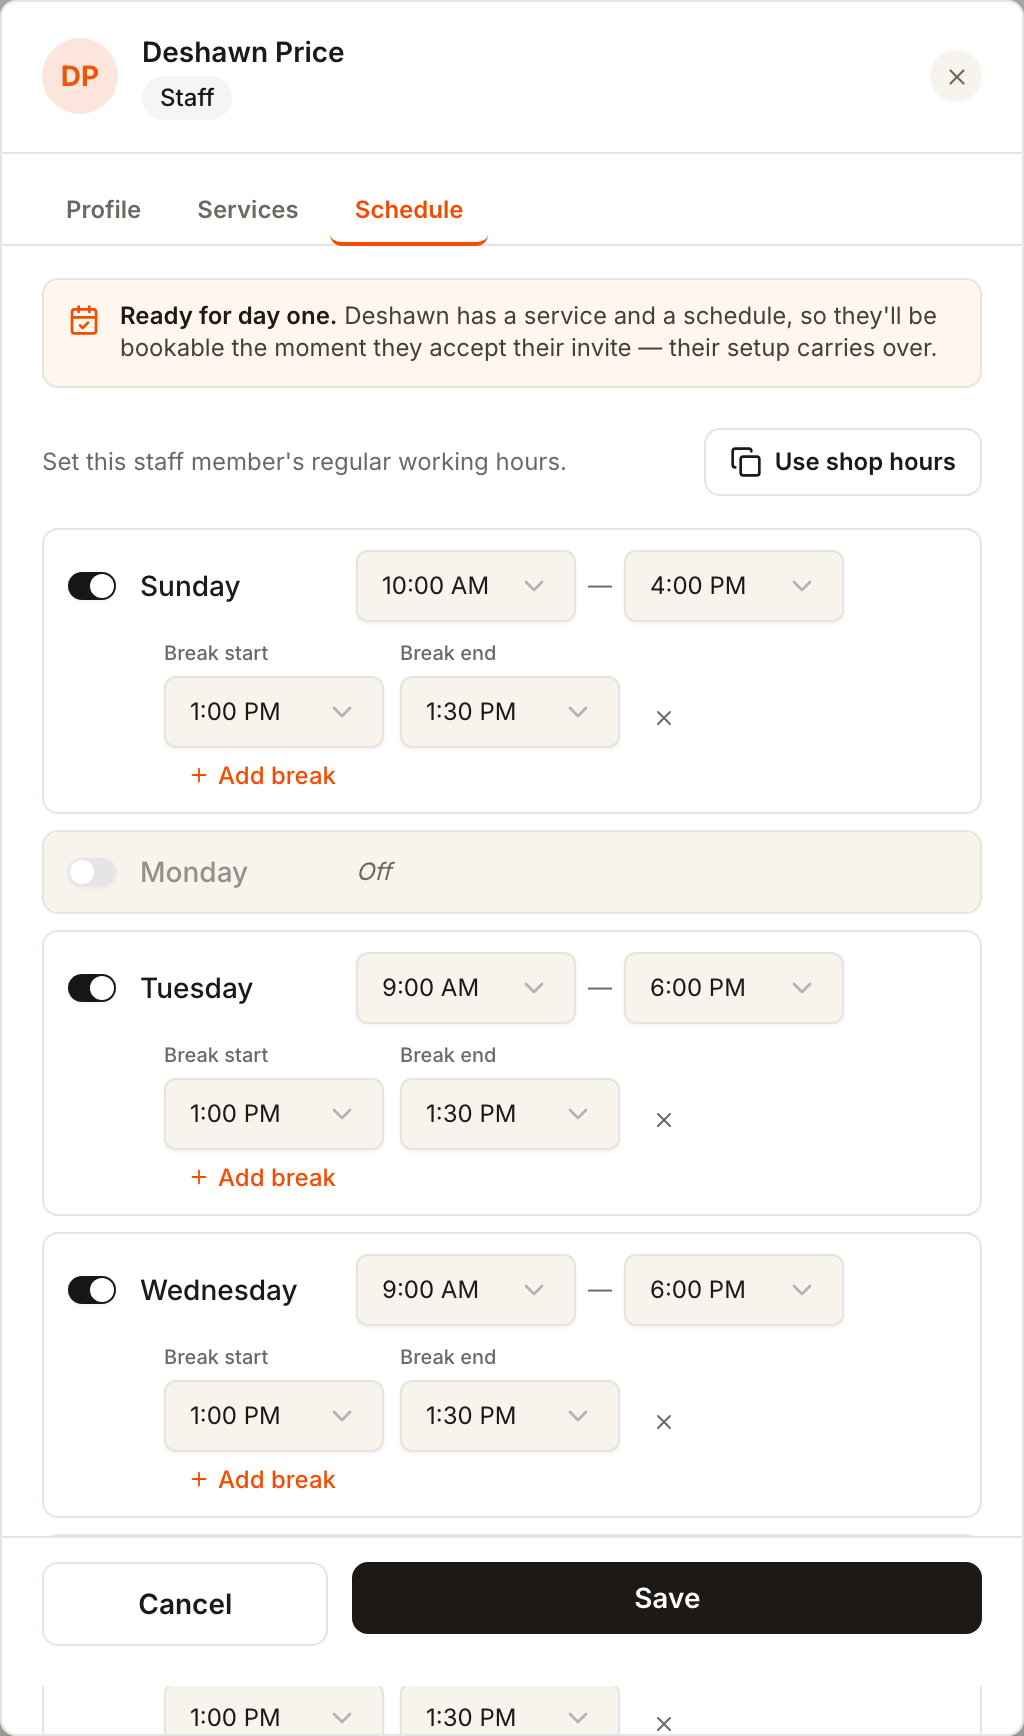

Tip: In a hurry? Click Use shop hours to copy your opening hours to that person in one tap, then tweak from there.
You'll know it worked when the person's card shows a schedule and an Active status — the green light that they're bookable.
Make your booking page yours
A few small touches make your page look like your shop, not a template. Both live under Settings.
- 1Find Shop Photos and upload a Logo (a square image works best) and a Cover image.
- 2Find Booking Page Style and choose a colour preset — the change is live immediately.
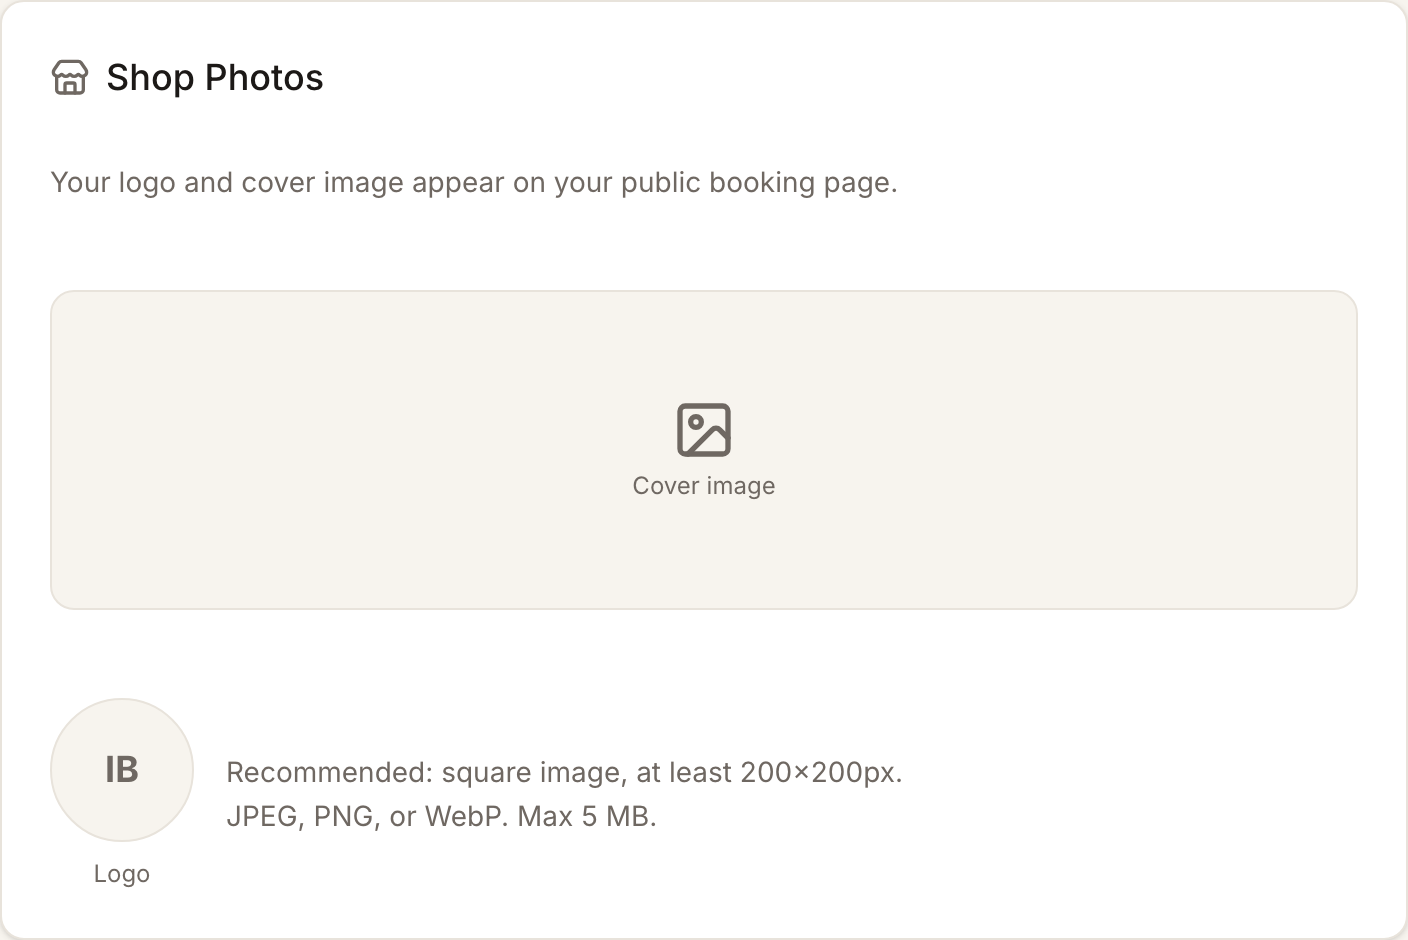
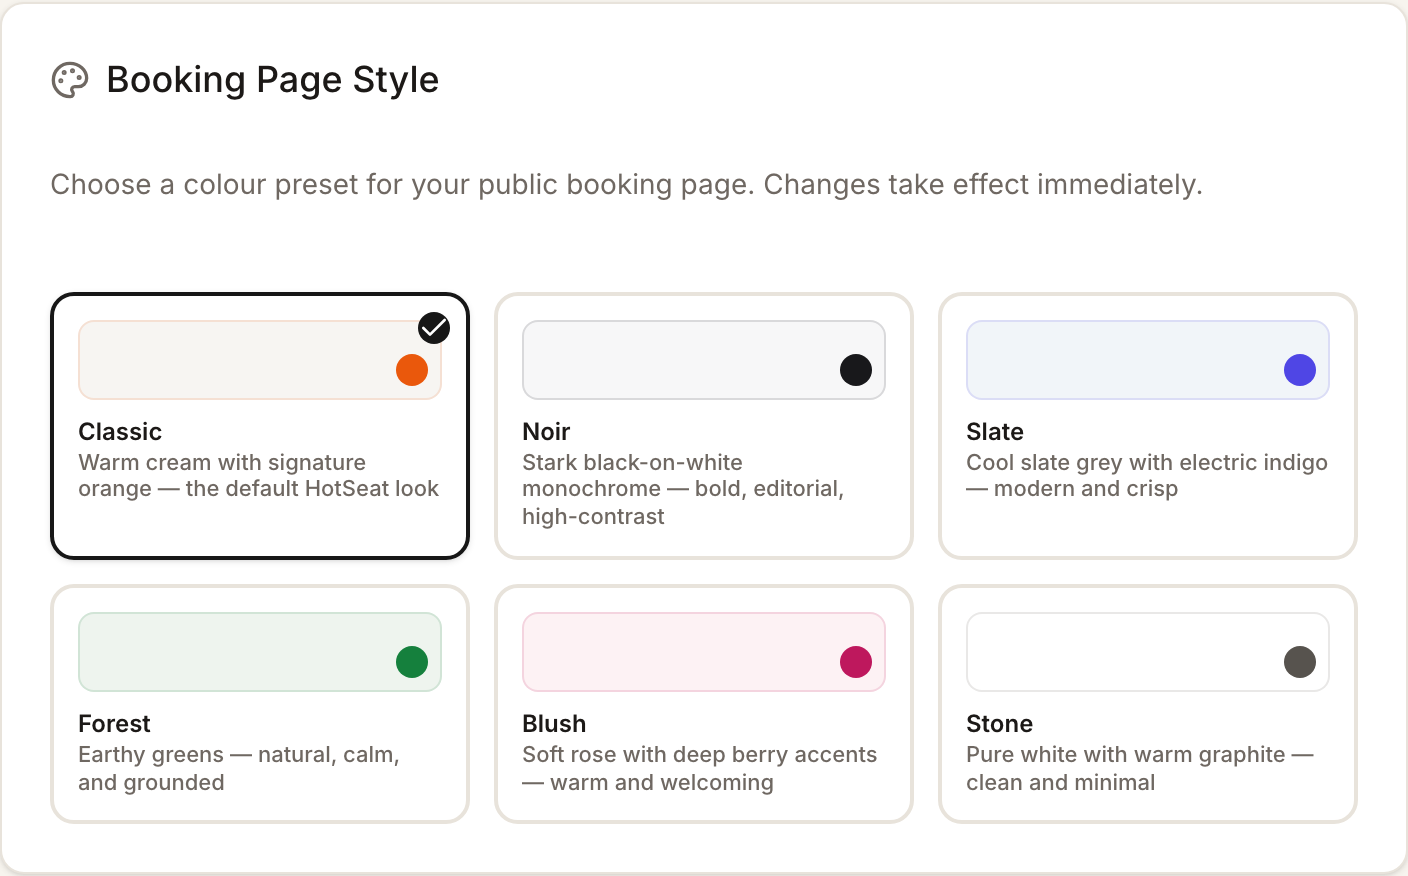
Tip: Keep it simple — a clear logo and one colour that matches your brand is all it takes. You can change these anytime, and your page updates instantly.
You'll know it worked when you preview your booking page and see your logo, photo, and colours in place.
Share your booking link
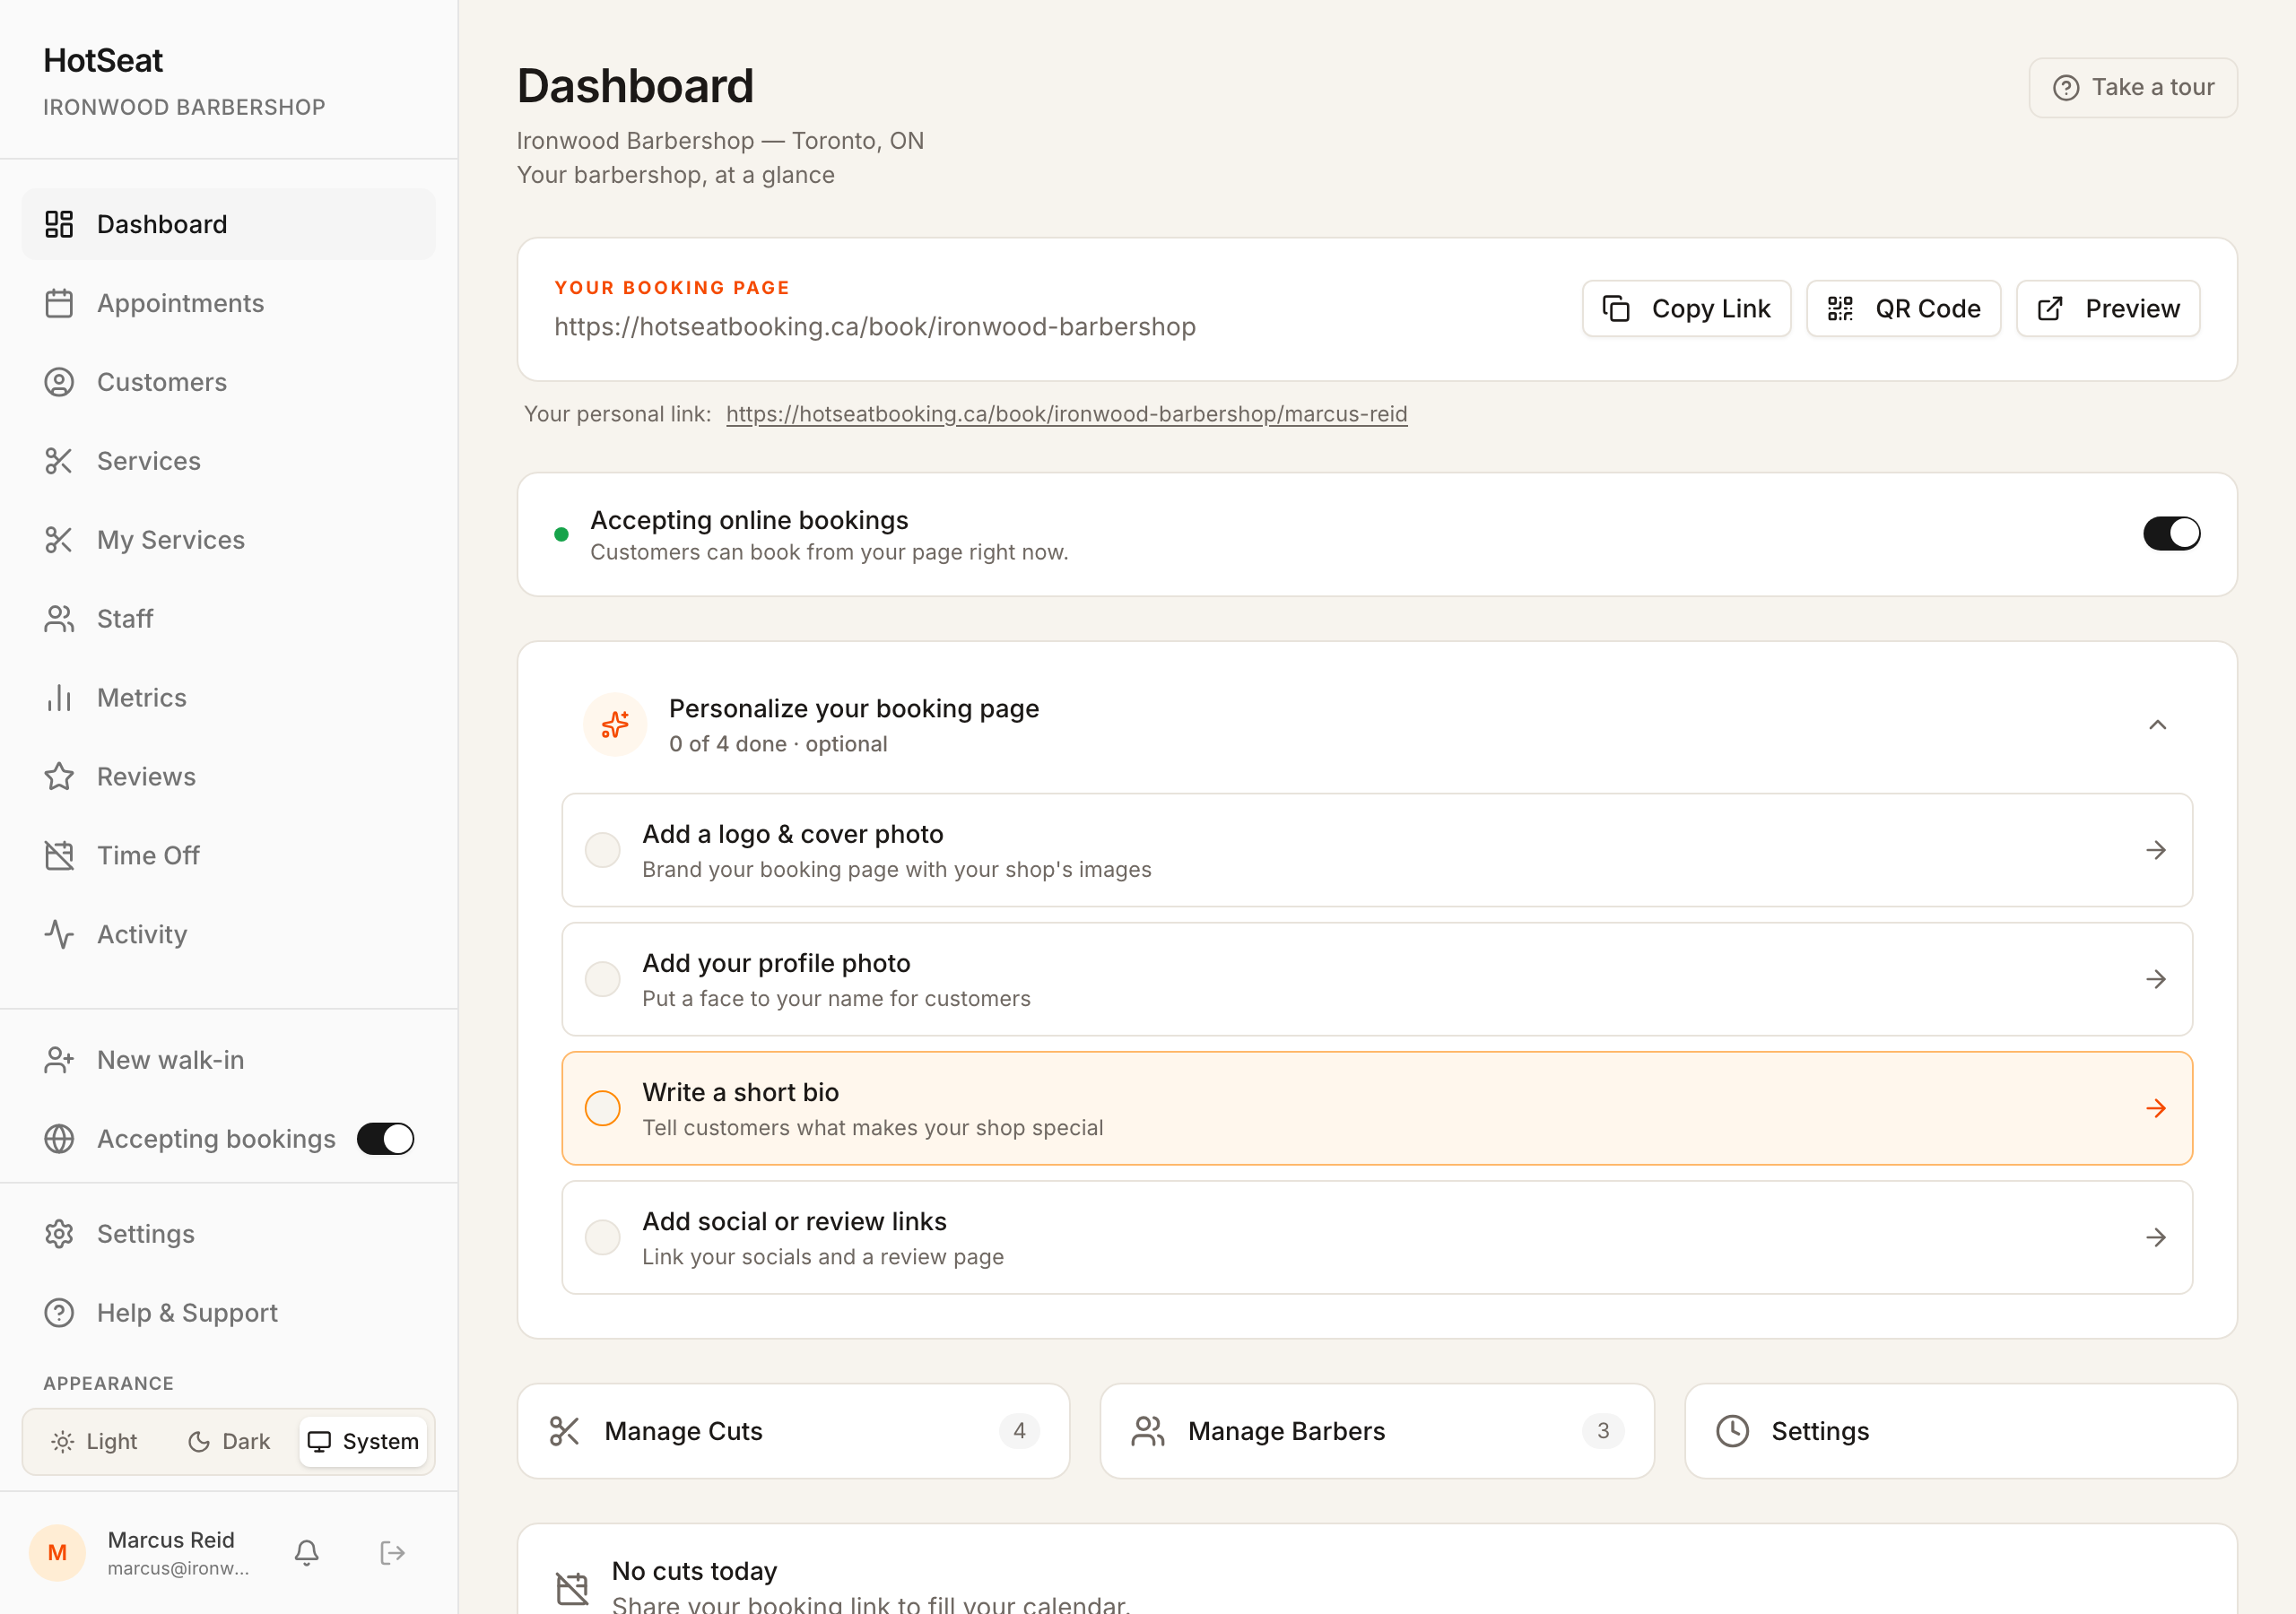
Your page is live. Now put it where customers will find it. Everything you need is on the Your Booking Page card on your dashboard.
- 1Copy Link — paste it into your Instagram bio, Google profile, texts, or website.
- 2QR Code — print it for your door, mirror, or business card; customers scan it to book.
- 3Preview — open your page exactly as customers see it.

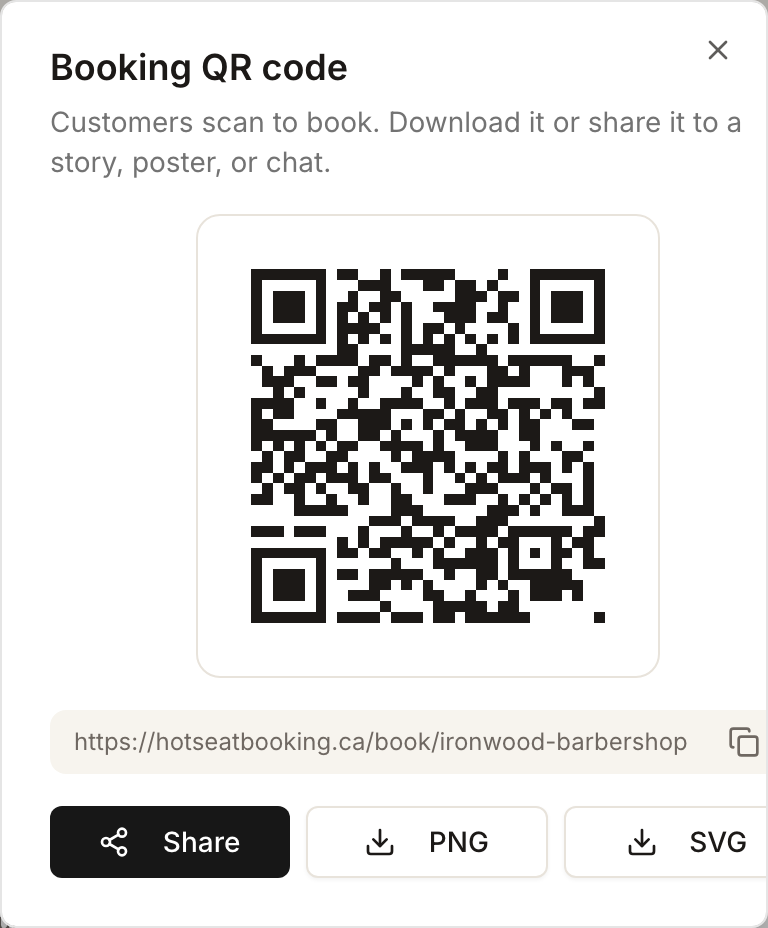
Tip: Your Instagram bio is the single highest-value spot for your link. Put the QR code by the register too — walk-ins can book their next visit before they head out the door.
You'll know it worked when you click Preview and your booking page opens with your services and team ready to book.
See how customers book
Here's the whole thing from your customer's side — on their phone, in seconds, with no account. They tap a service, pick a specialist (or Any Available), choose a time, enter their name, email and phone, and confirm.
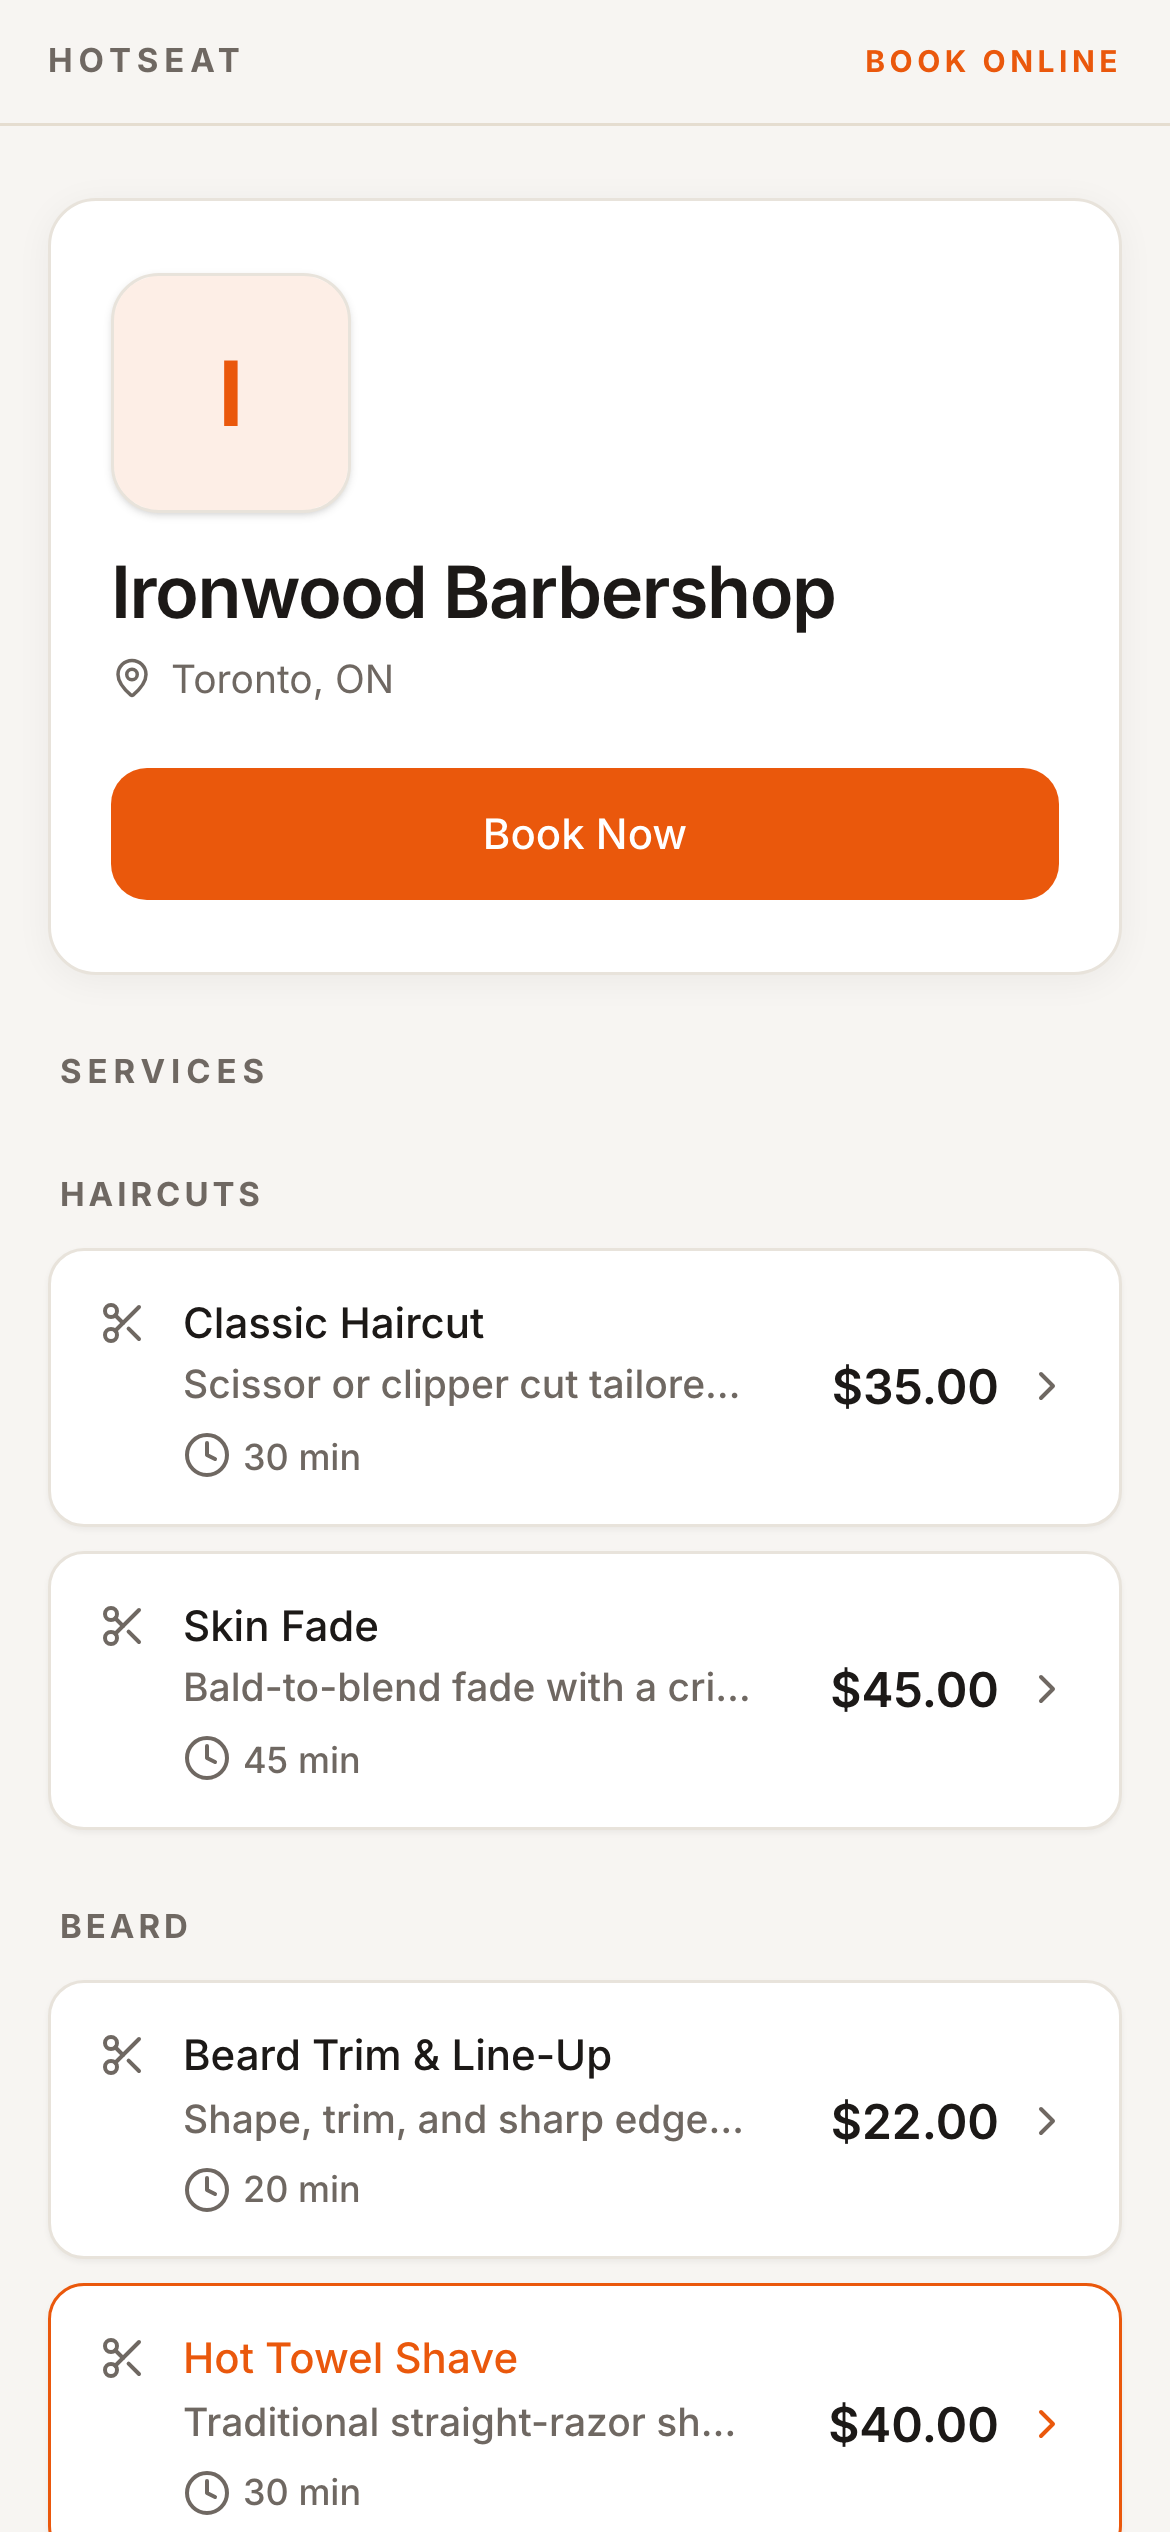
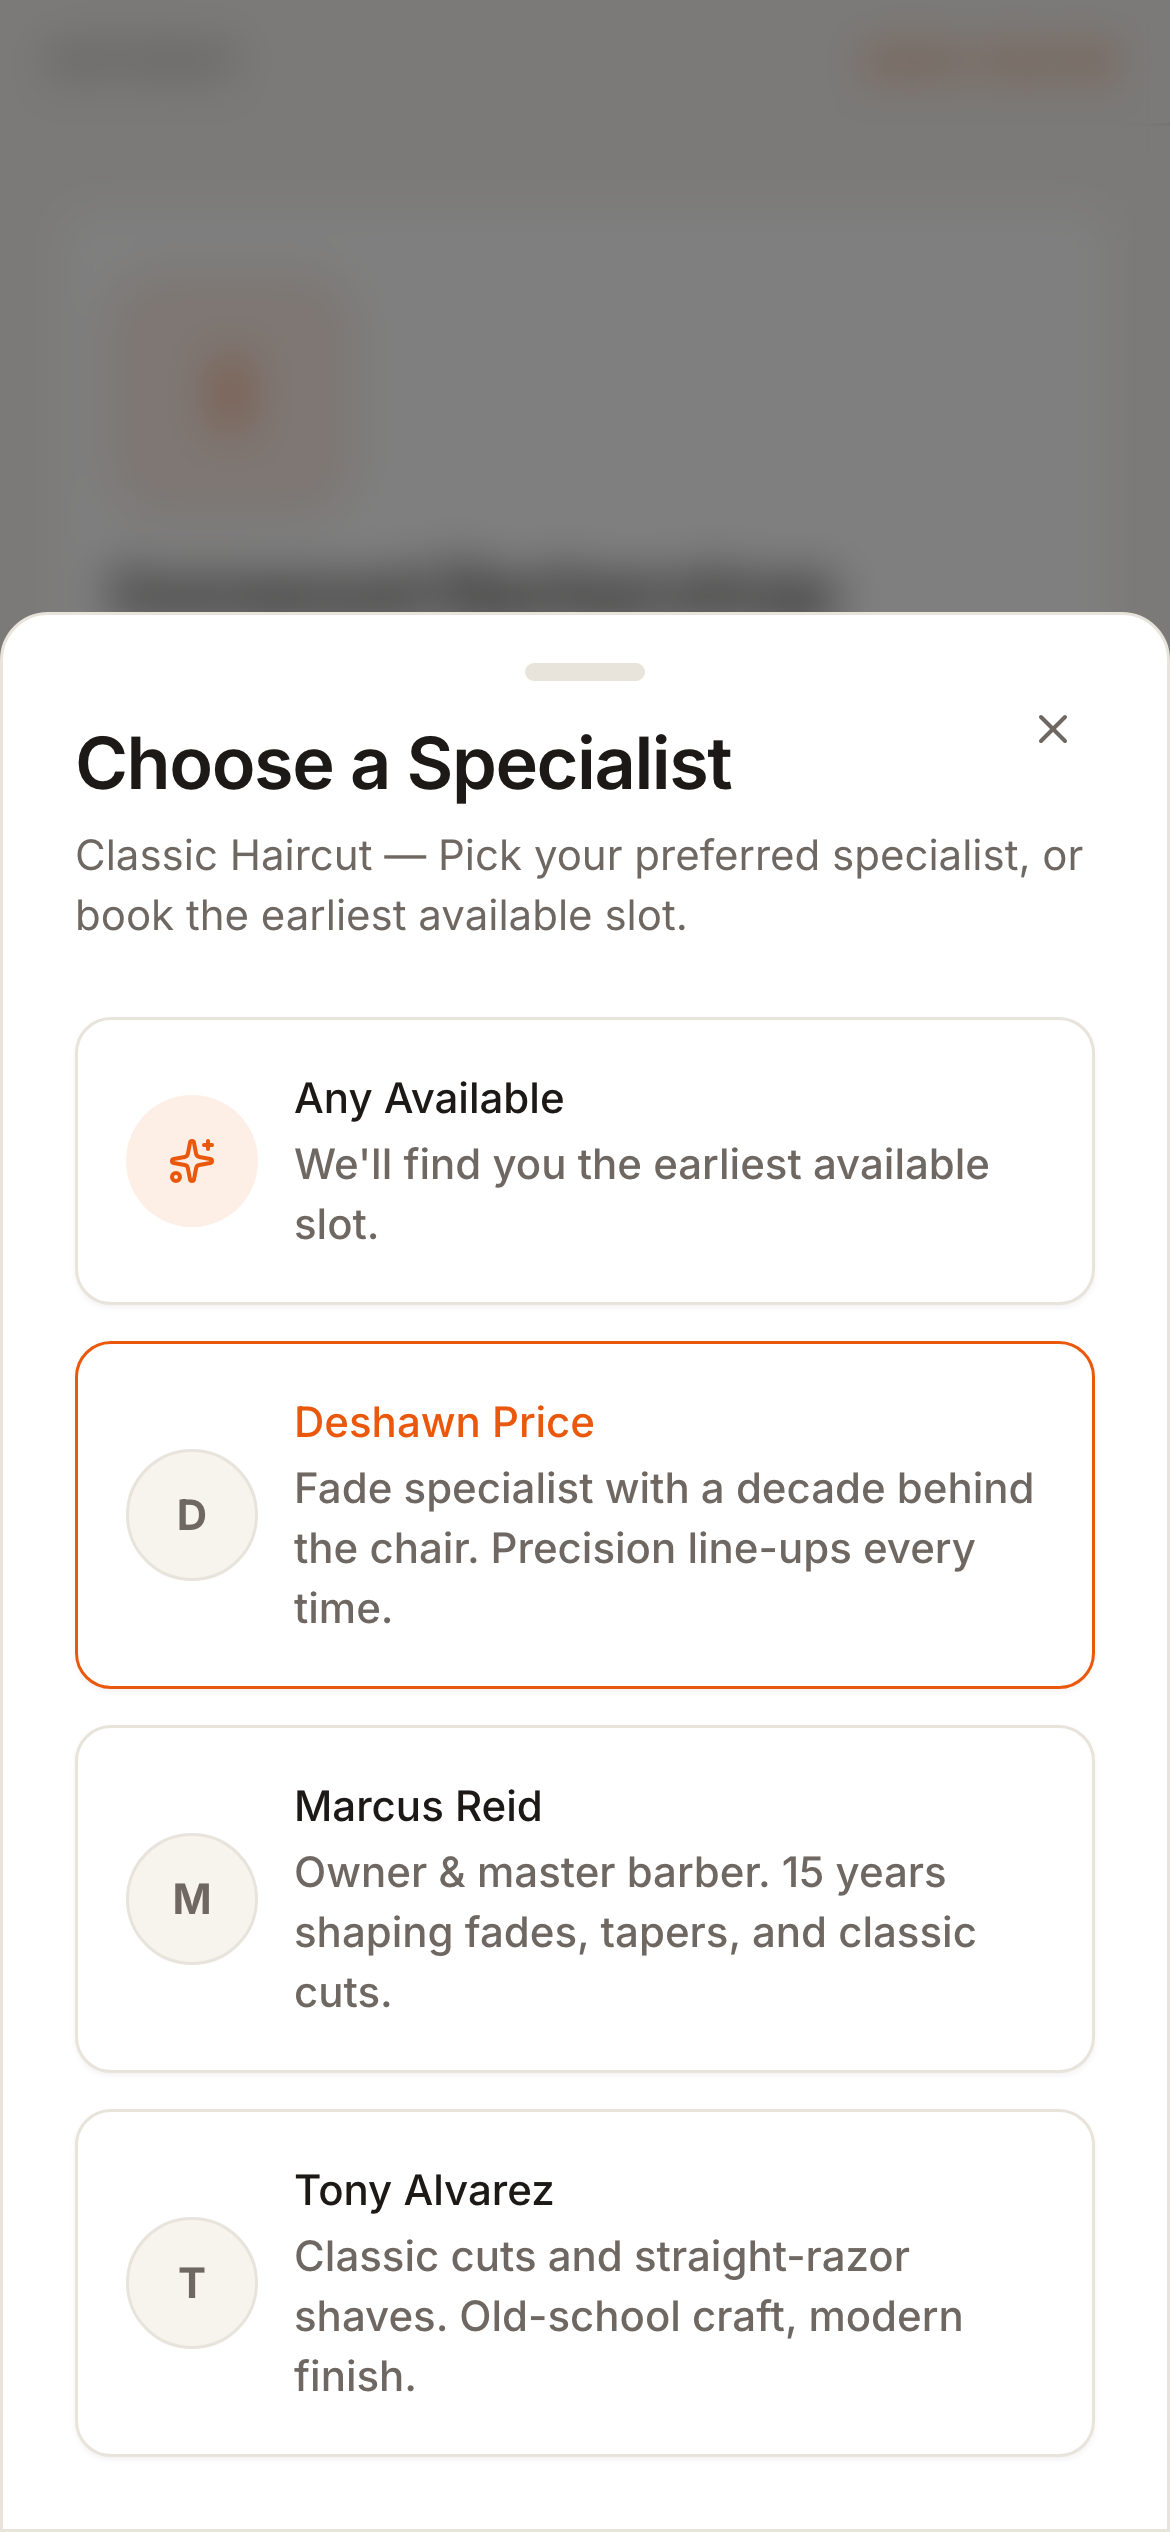
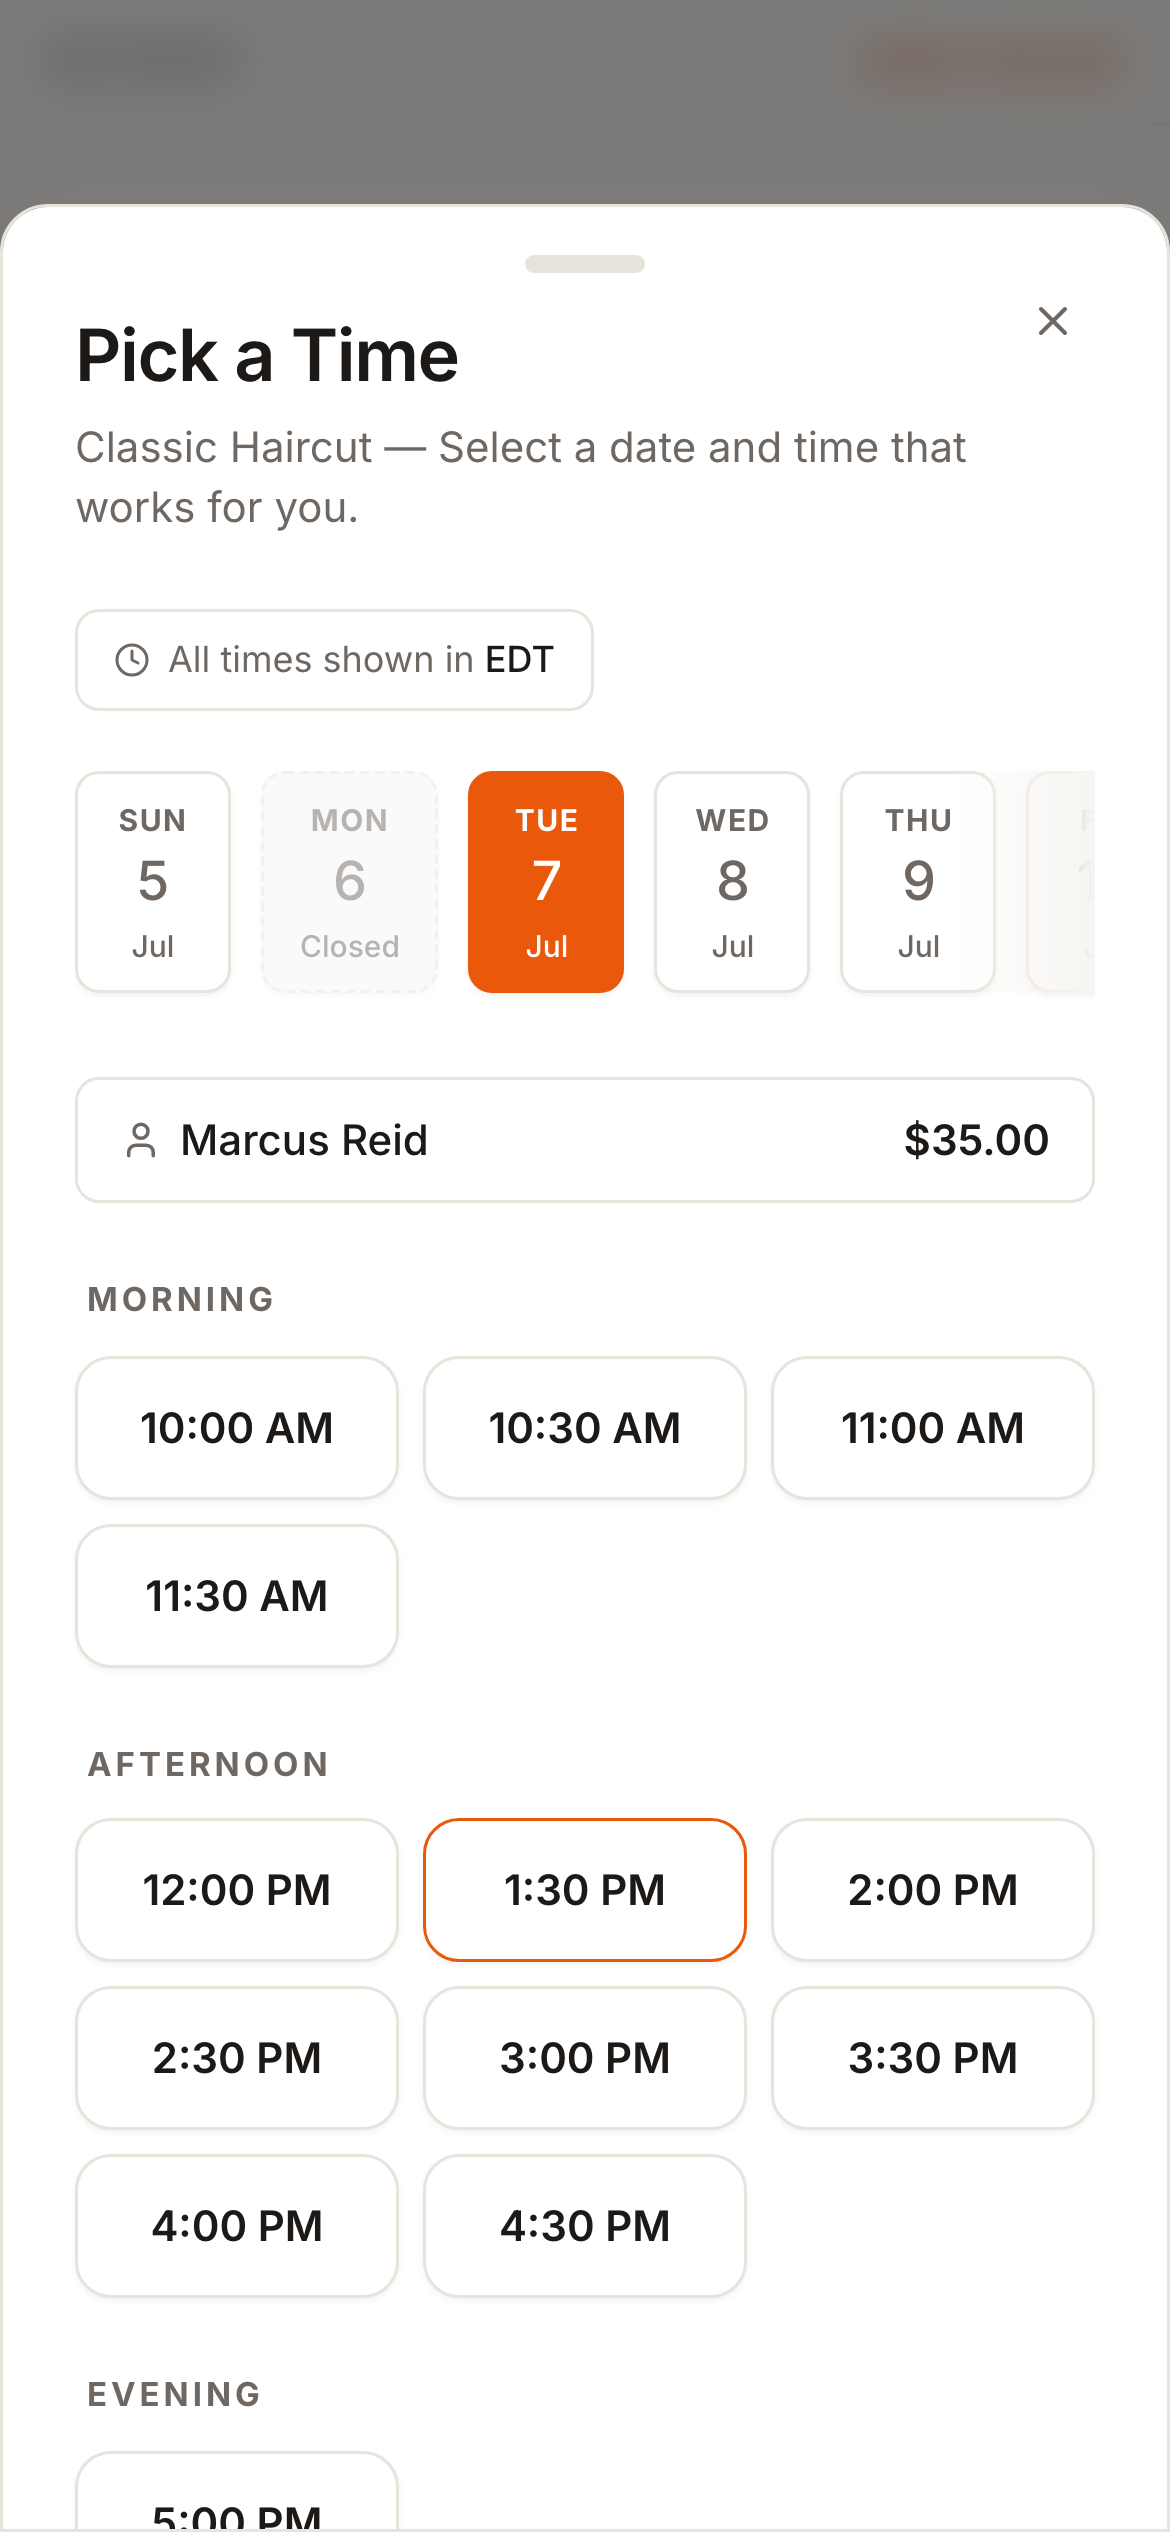
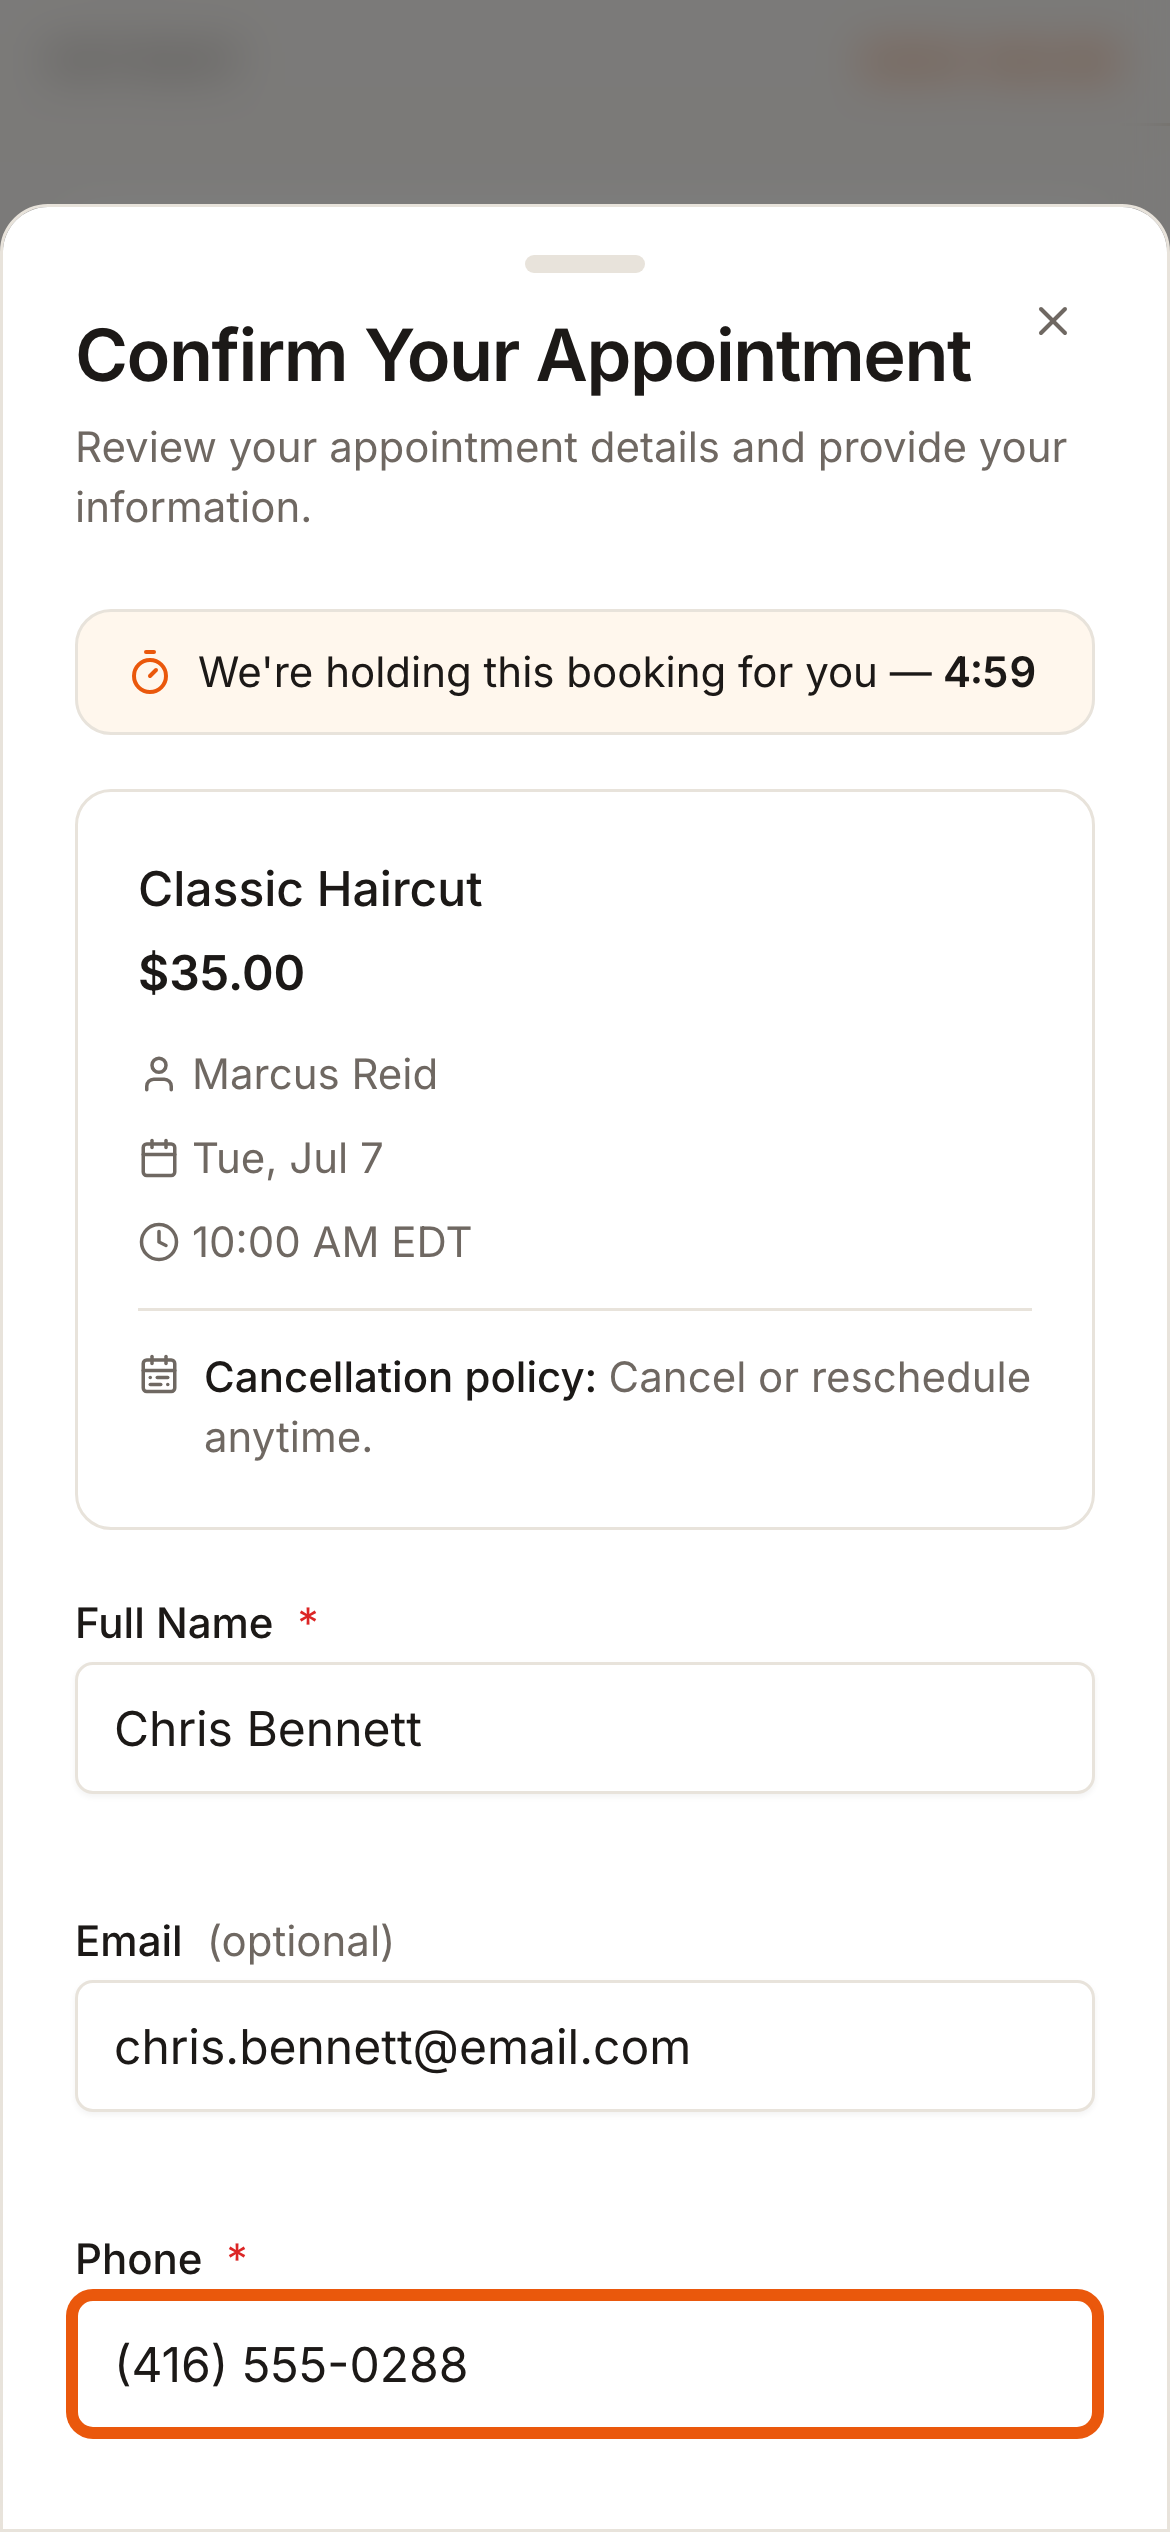
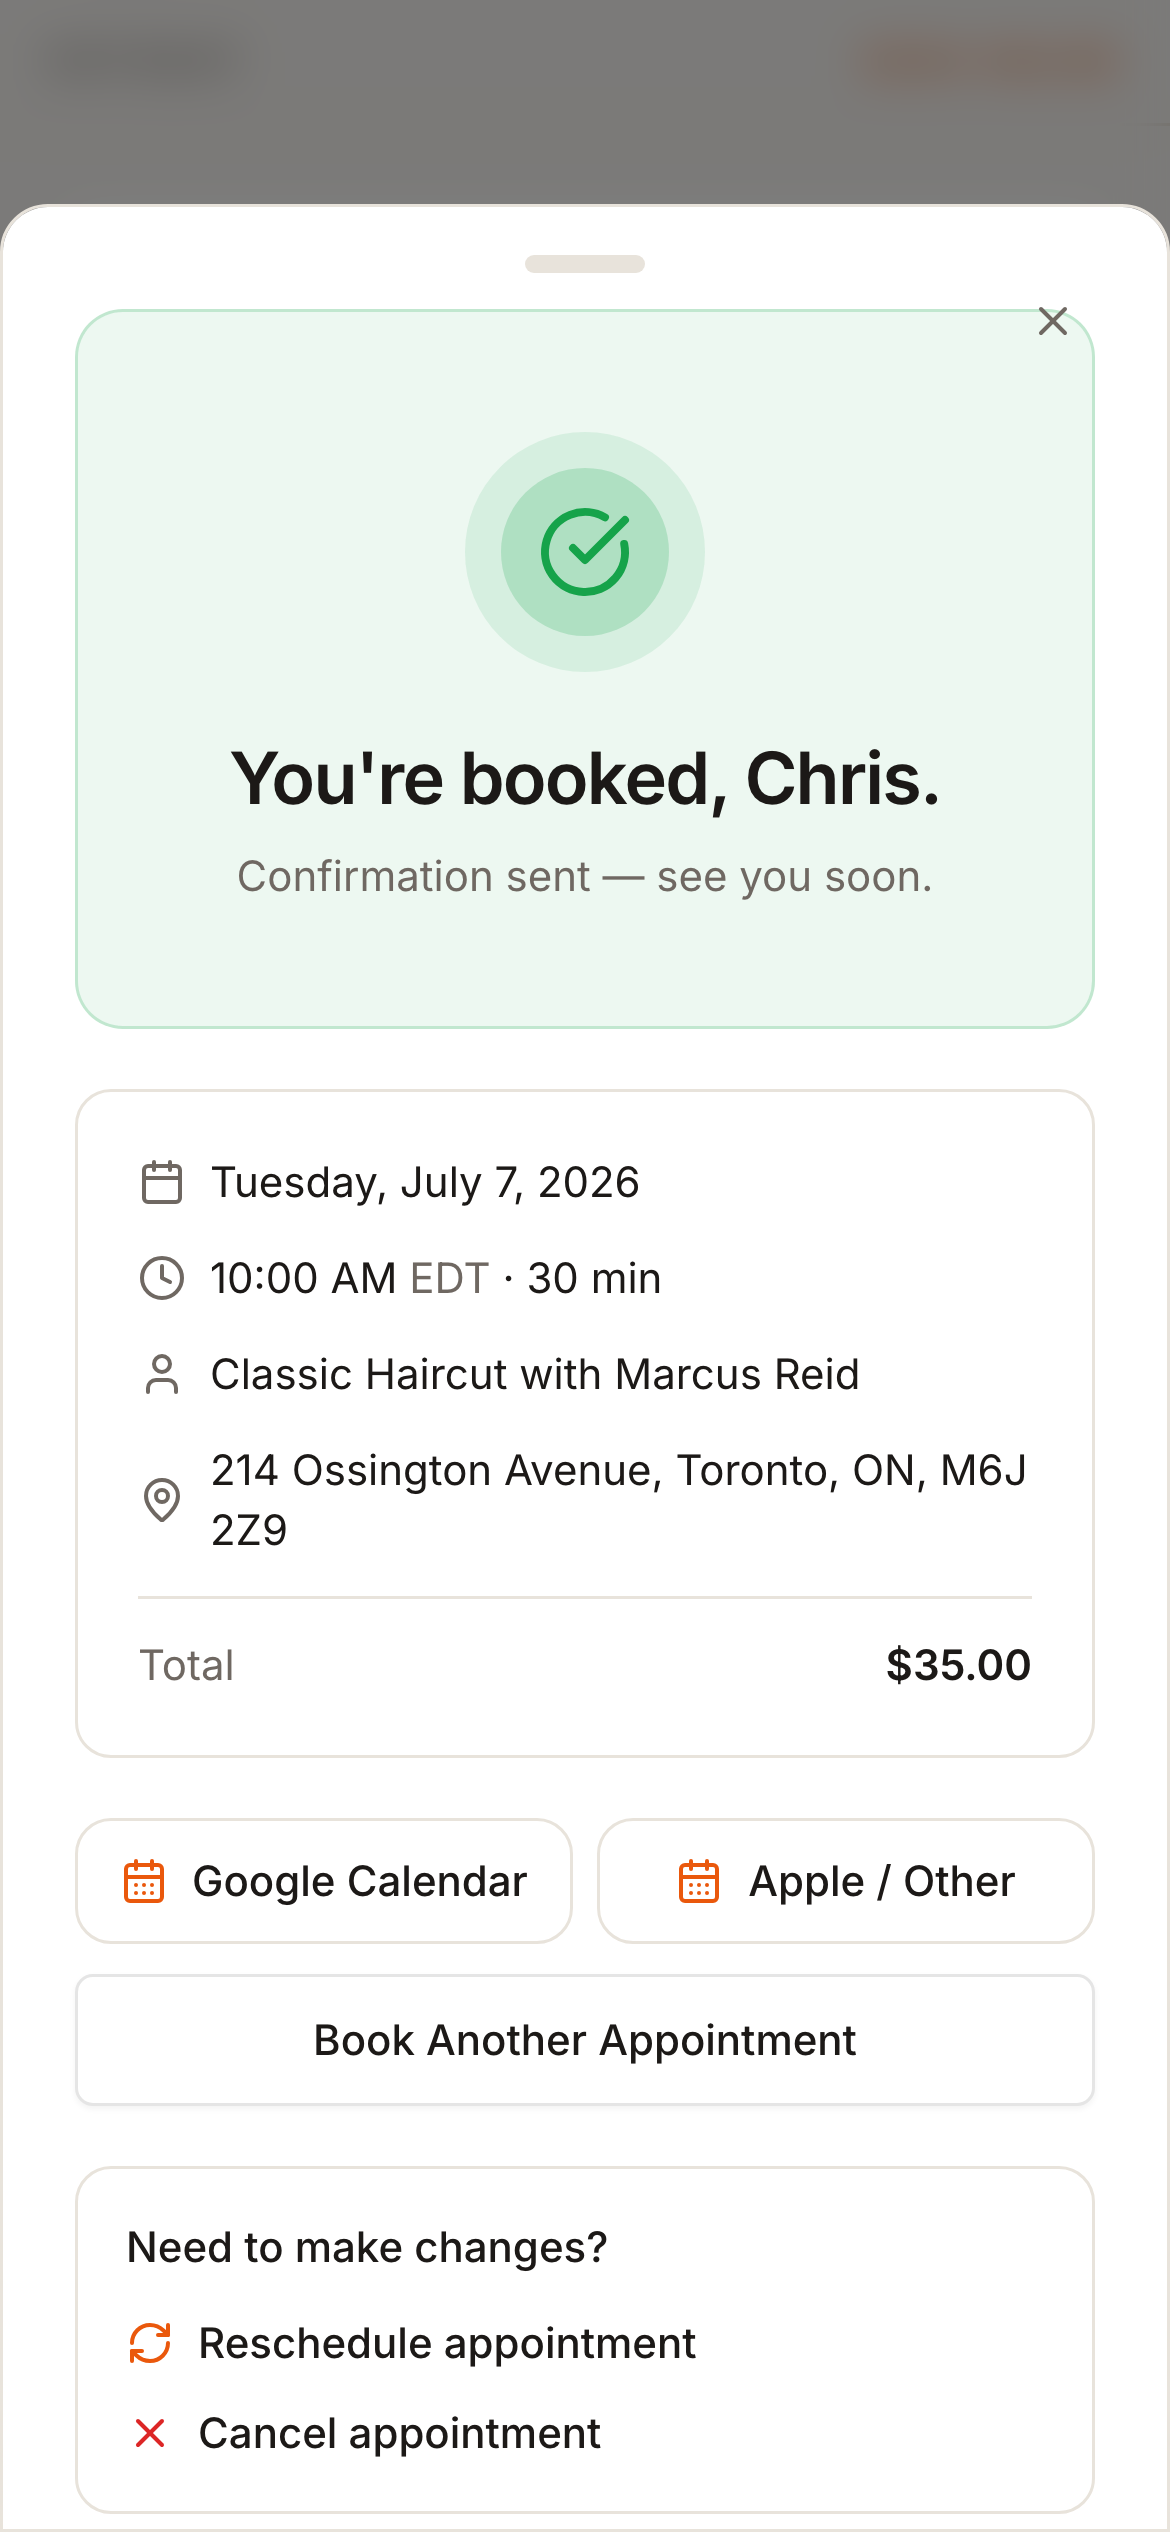
Tip: That's guest checkout — no password, no download, nothing to forget. The less you ask for, the more people finish booking.
You'll know it worked when you complete a test booking and it appears on your dashboard (Step 10).
Manage your day
Your dashboard is your command centre. Click Appointments to see your day laid out hour by hour, then click any appointment to run it start to finish.
- 1Check In when the customer arrives.
- 2Mark it Complete when you're done.
- 3Or Mark No-Show, Cancel, or Reschedule if plans change.
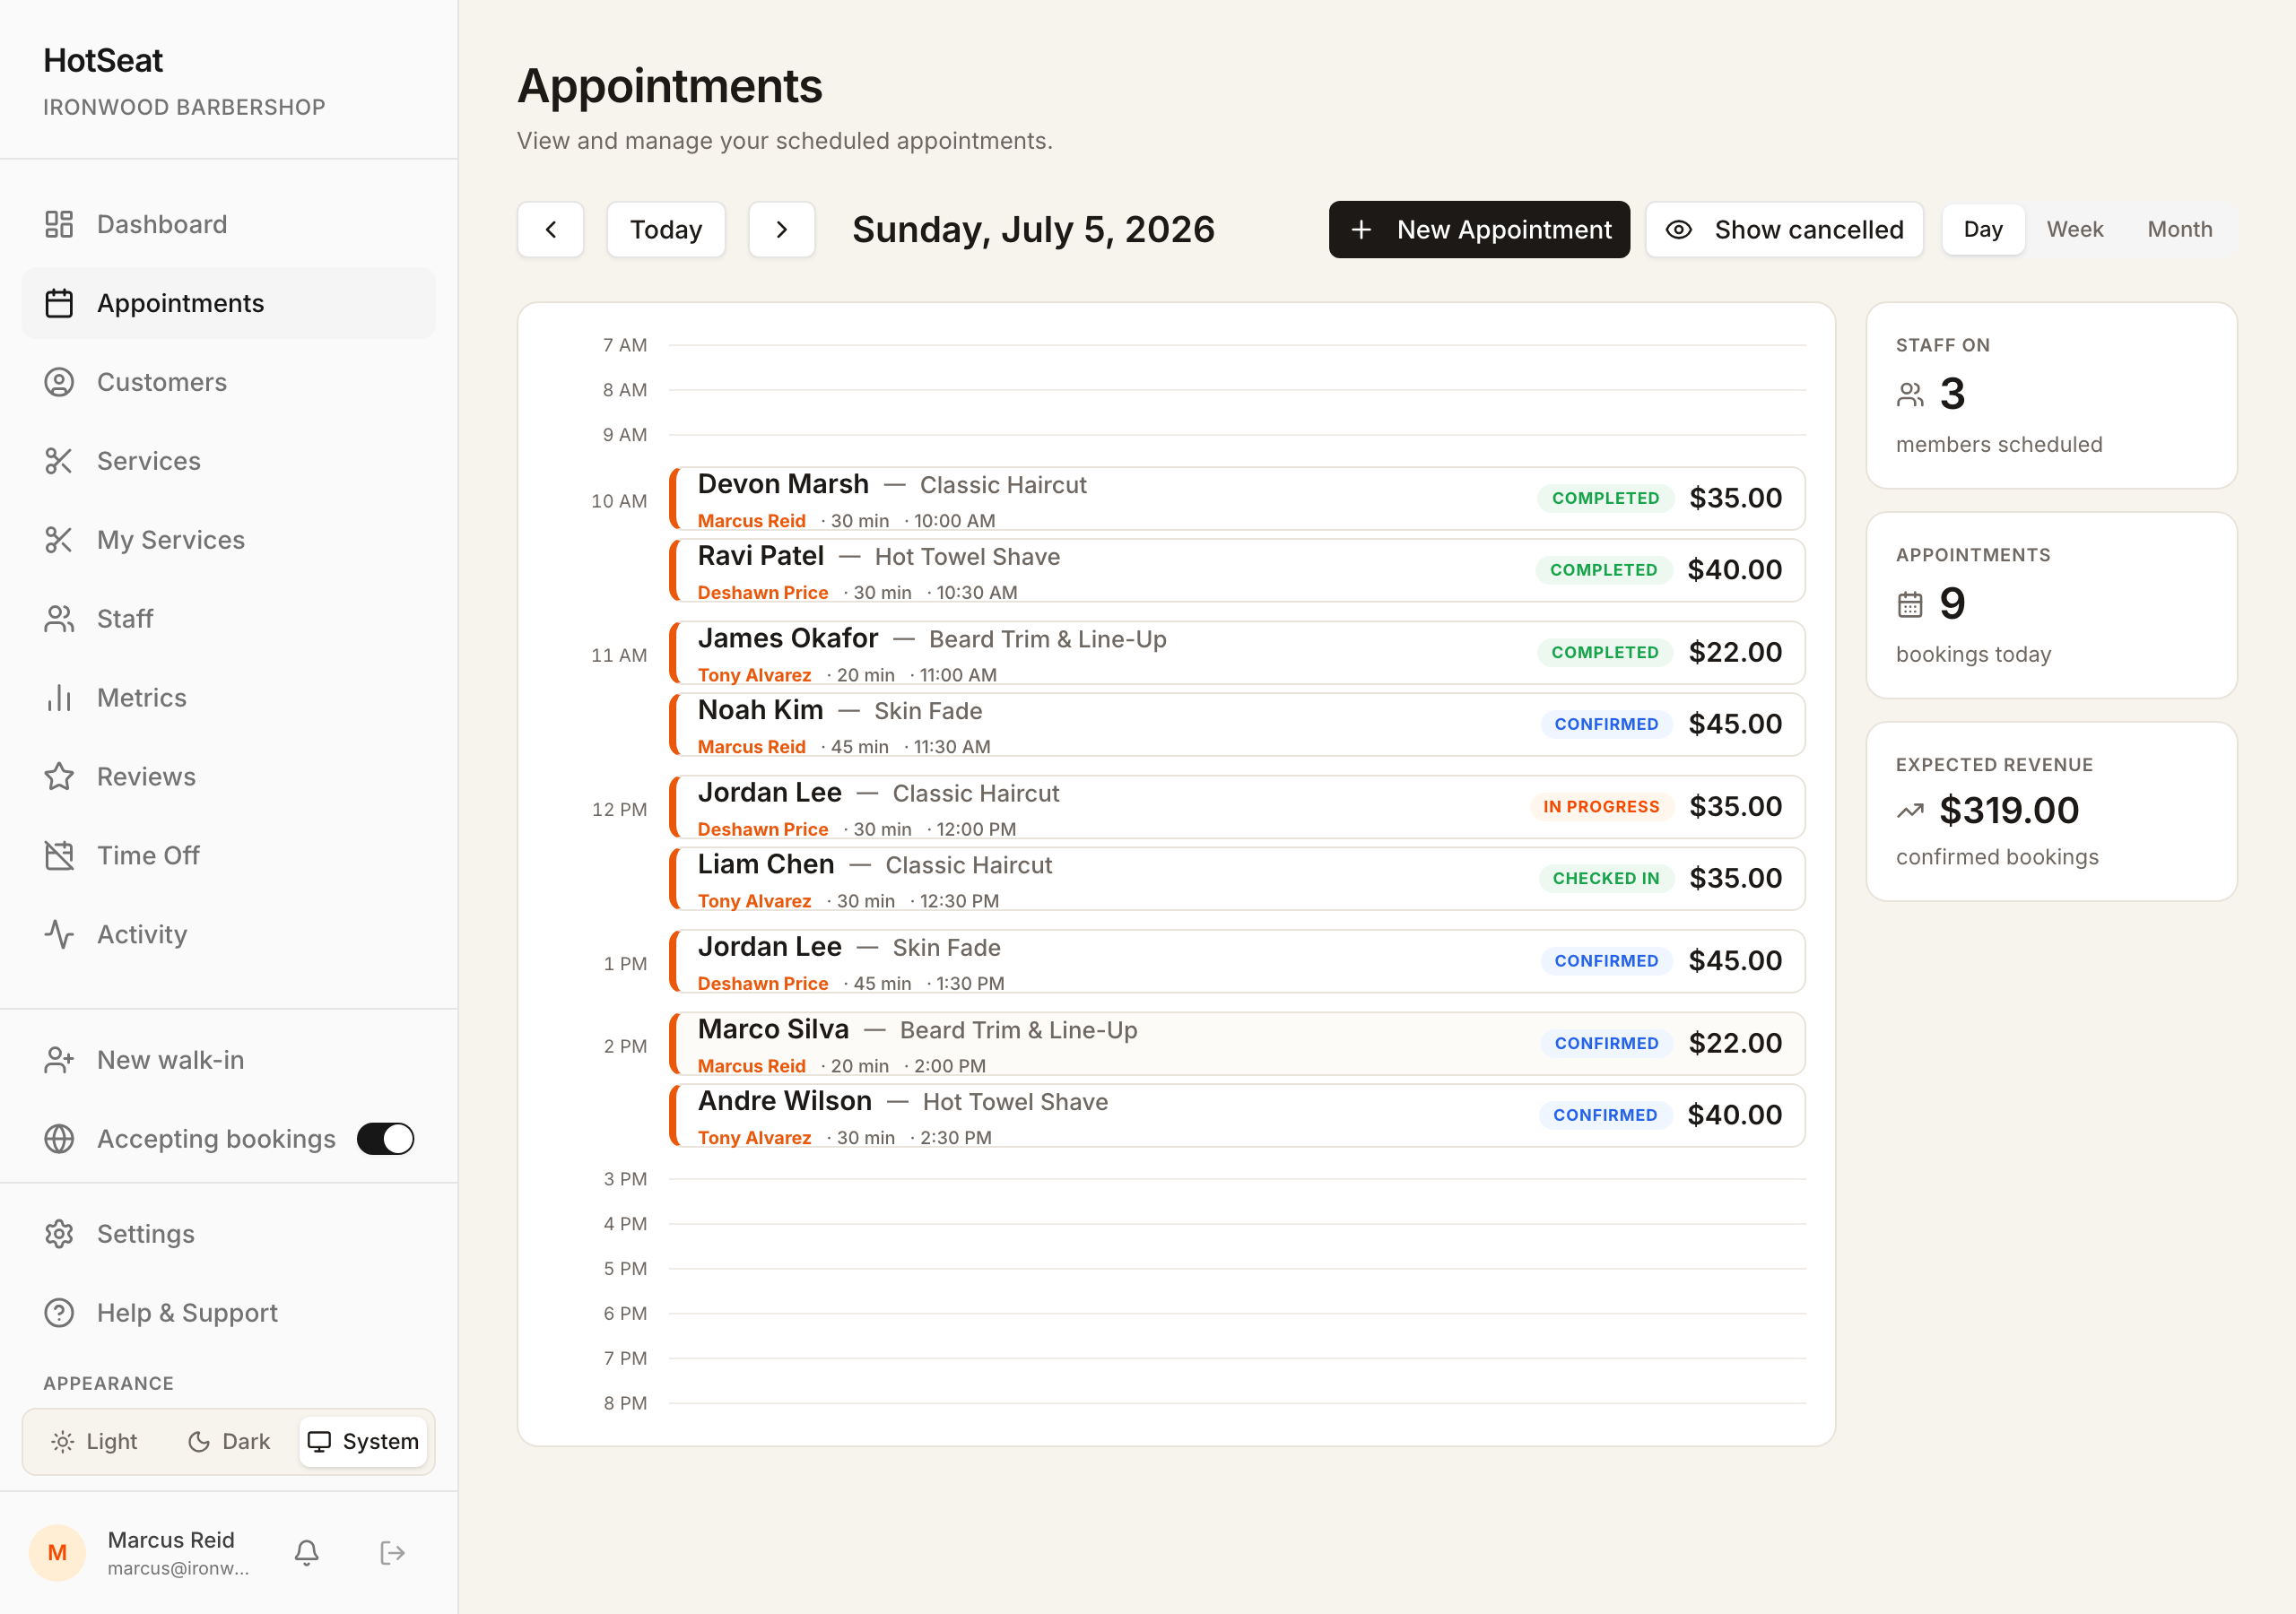
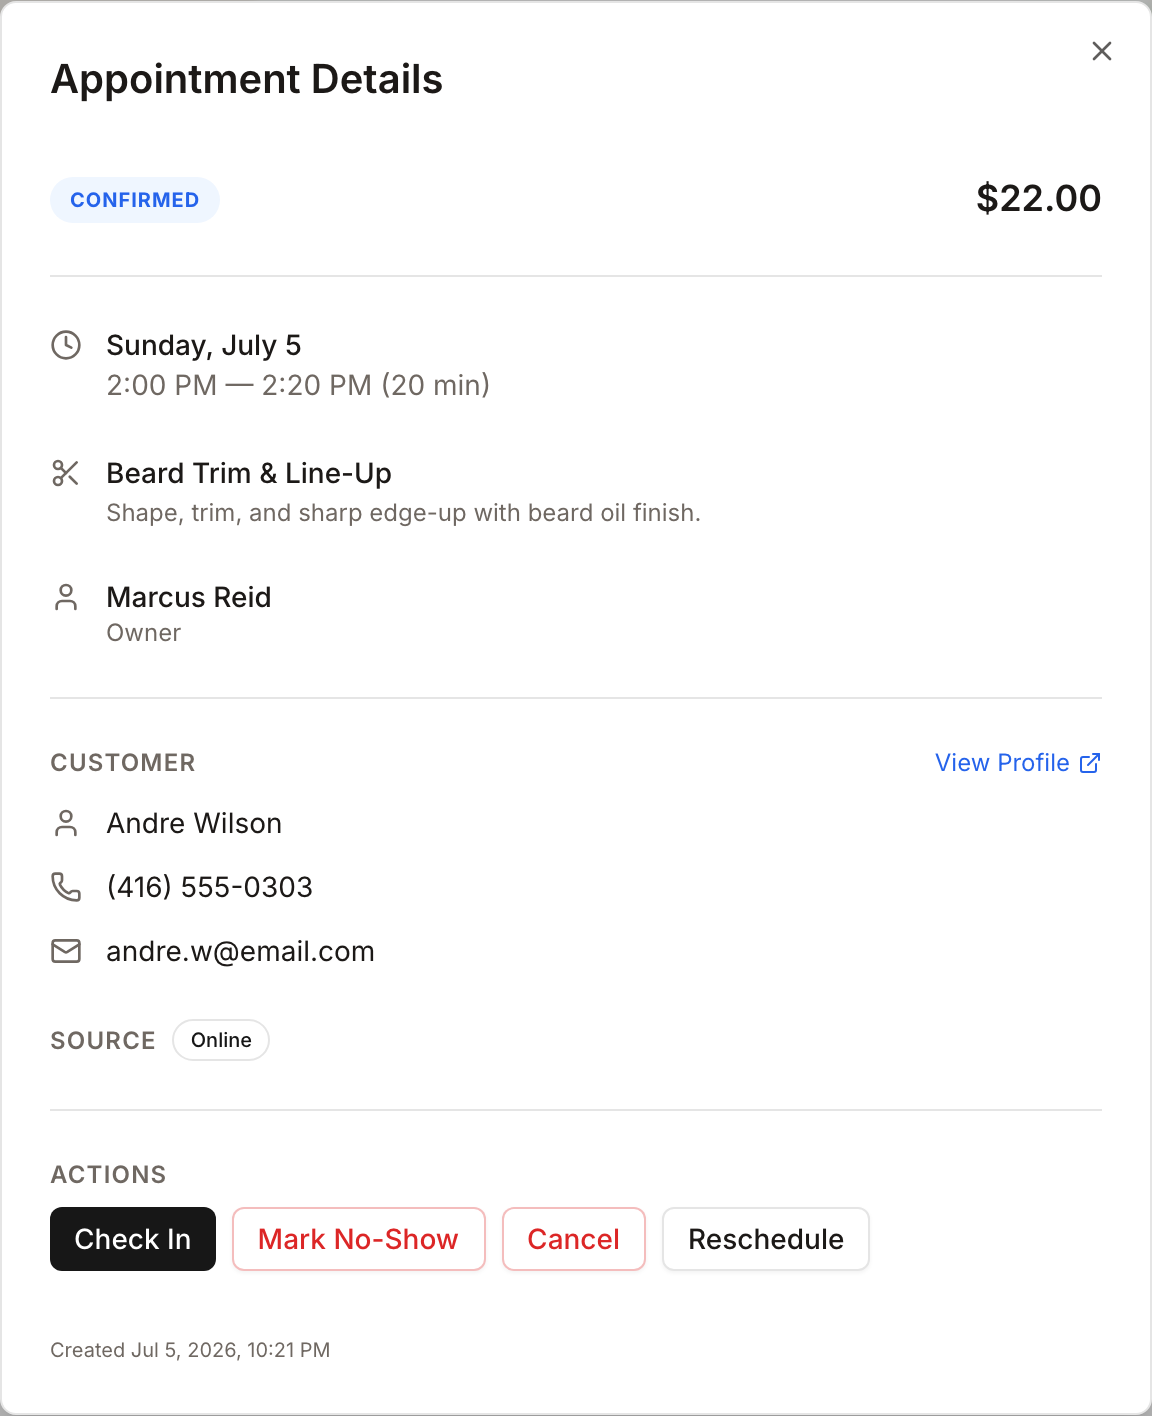
Tip: Marking appointments Complete keeps your revenue numbers accurate and can trigger a friendly thank-you email — a gentle nudge to rebook and leave a review.
You'll know it worked when you can move an appointment from Confirmed to Checked In to Completed with a couple of taps.
Cancellations & reschedules
Plans change — HotSeat handles it from both sides without a phone call. Every confirmation email includes Reschedule and Cancel links, so customers help themselves and the freed slot reopens automatically. You can also reschedule or cancel any appointment yourself from the Appointments page.
Set how much notice customers must give before they can change an appointment online in Settings → Cancellation Policy (below).
Tip: Letting customers reschedule themselves is the quiet superpower here. A rebooked slot is a slot you didn't lose — and a call you didn't have to take.
You'll know it worked when a cancelled appointment disappears from your day and its time opens back up for new bookings.
Settings worth a look
You're live and taking bookings. When you have a minute, these are worth a quick visit under Settings (and Time Off — Closures on a menu-only shop — in the left menu).
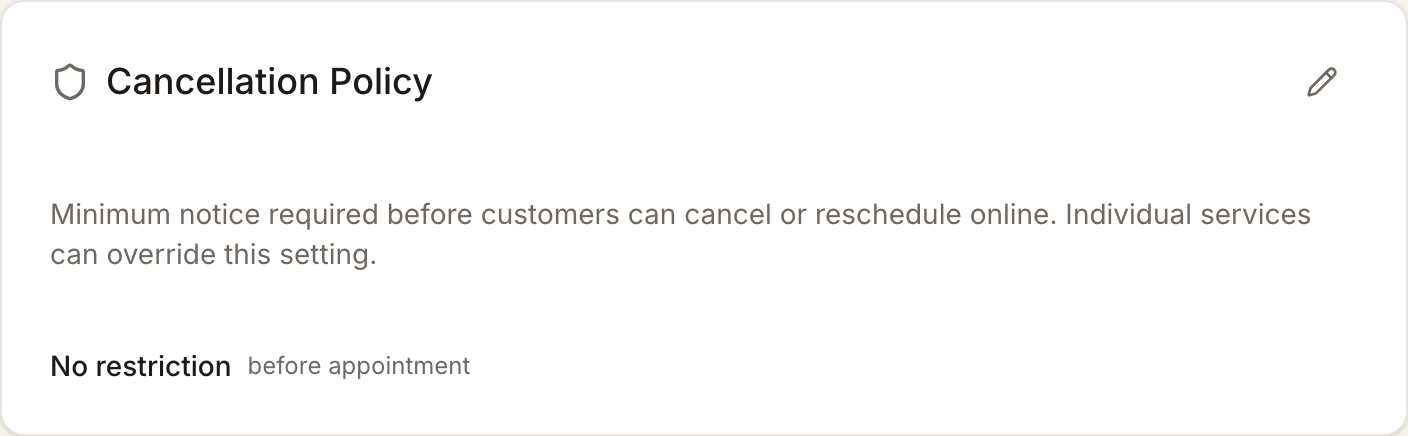
Cancellation policy
Set how much notice customers must give before they can cancel or reschedule online. Individual services can override the shop default when they need to.
Communications
The automatic email sequence customers get around their visit — a Booking confirmation the moment they book, an Appointment reminder before the day (24 or 12 hours), and an optional Post-visit thank-you that can invite happy customers to leave a review.
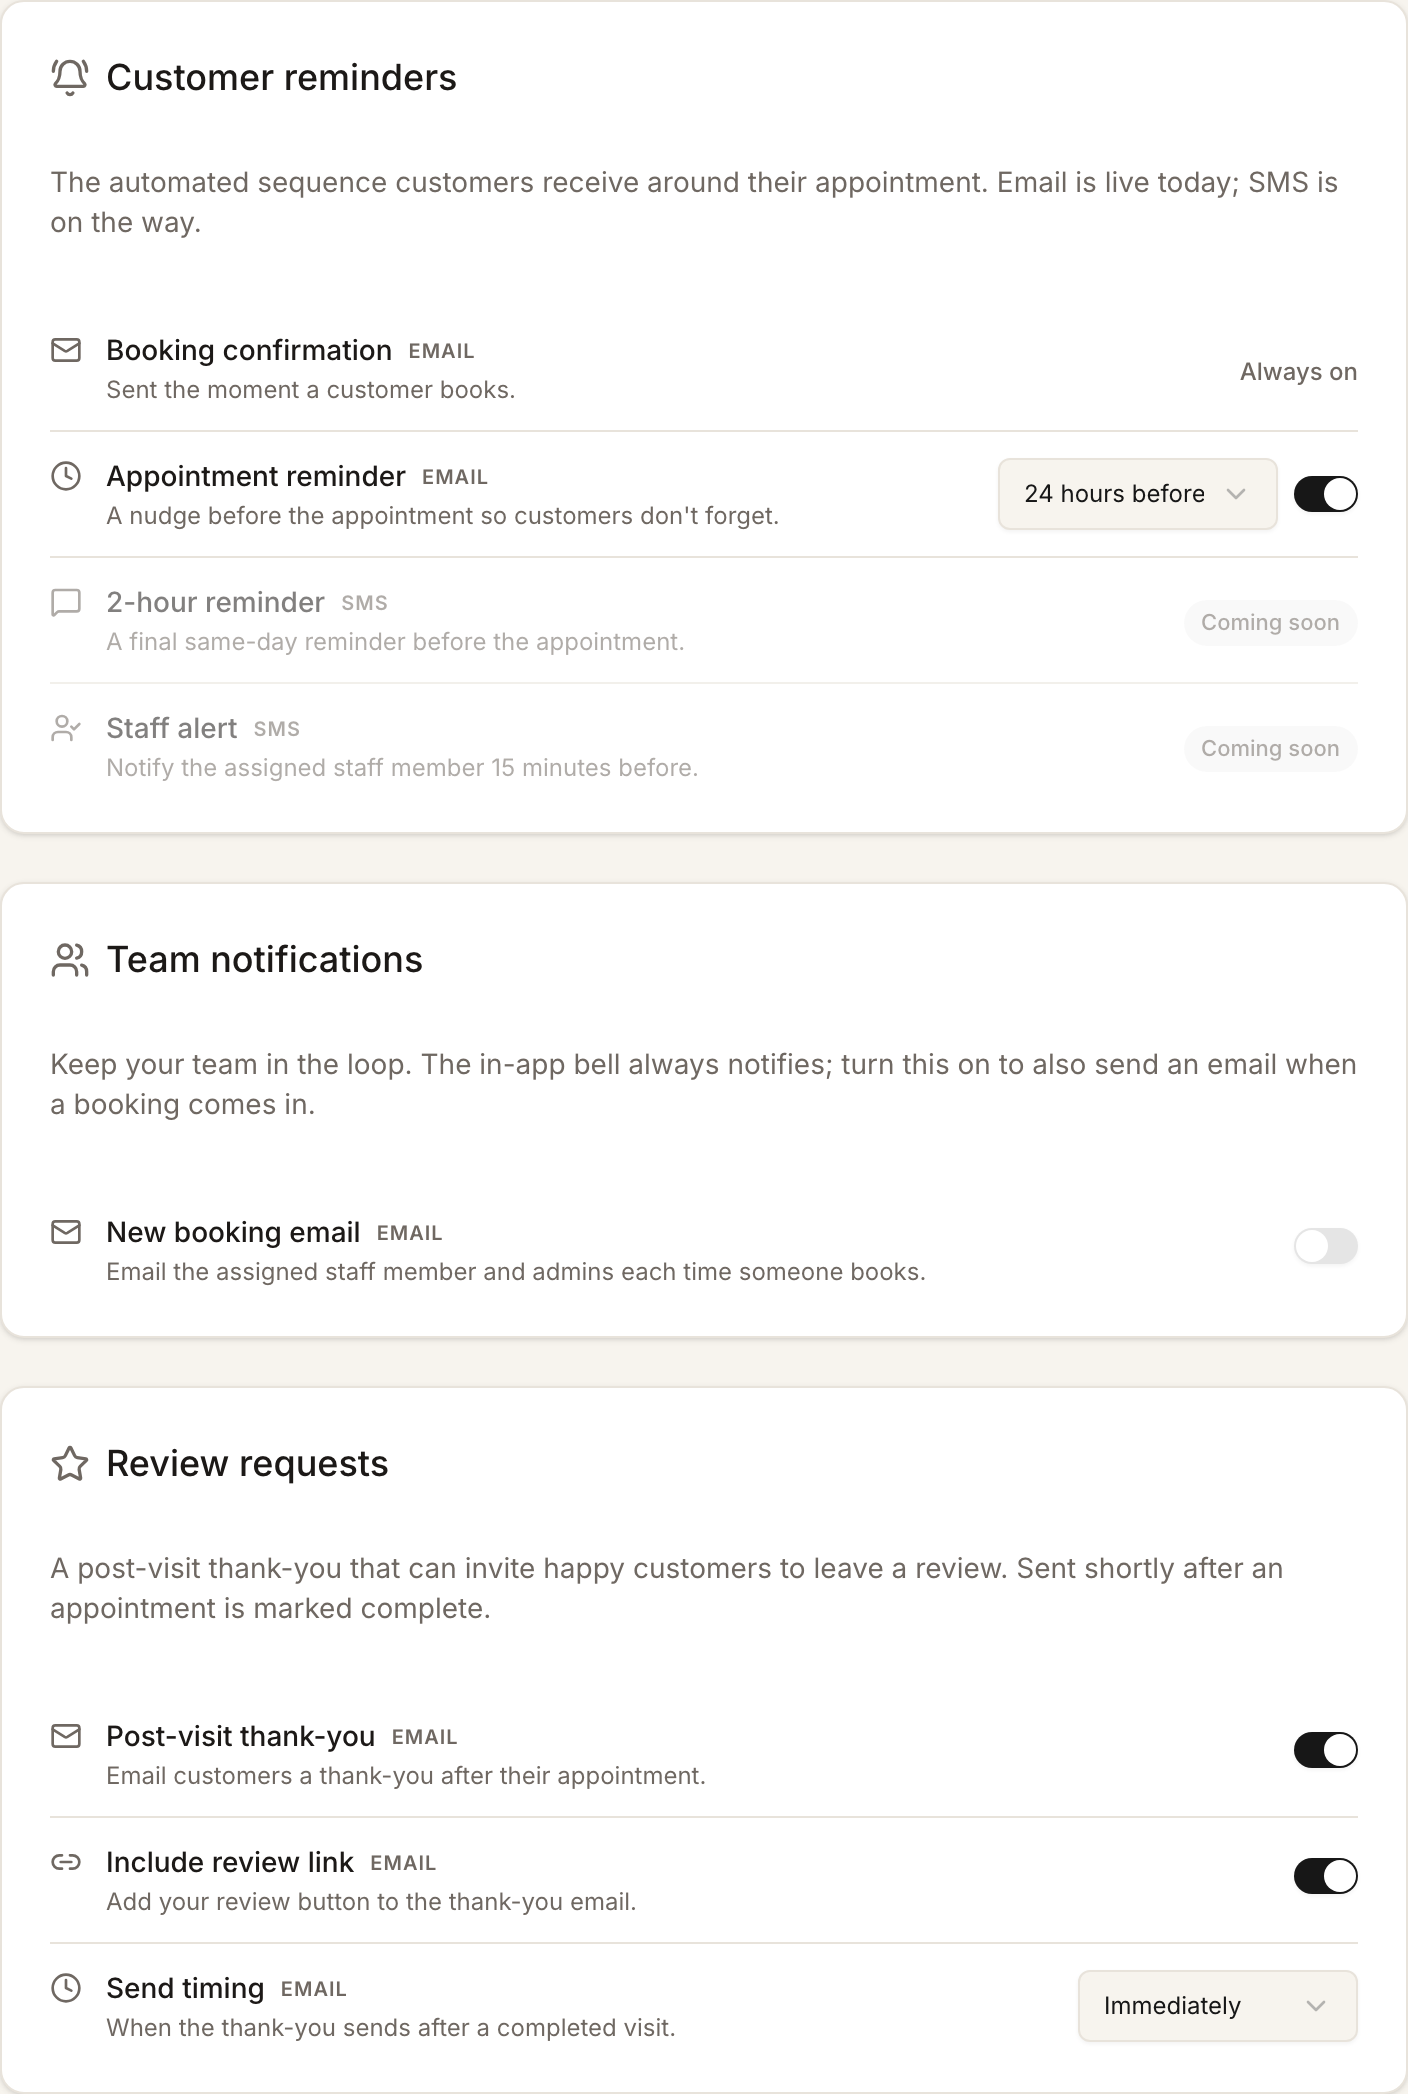
Tip: The 24-hour reminder is your best defence against no-shows. Leave it on.
Time off & holidays
Open Time Off in the left menu — Closures on a menu-only shop — to block out days your shop is closed or a specialist is away. Under Shop Closures, add a one-off or recurring closure — or use Quick-add public holidays to drop in the Canadian stat holidays in one tap. Under Staff Leave, log an individual's vacation or sick day. Closed days and approved leave drop off your booking page automatically.
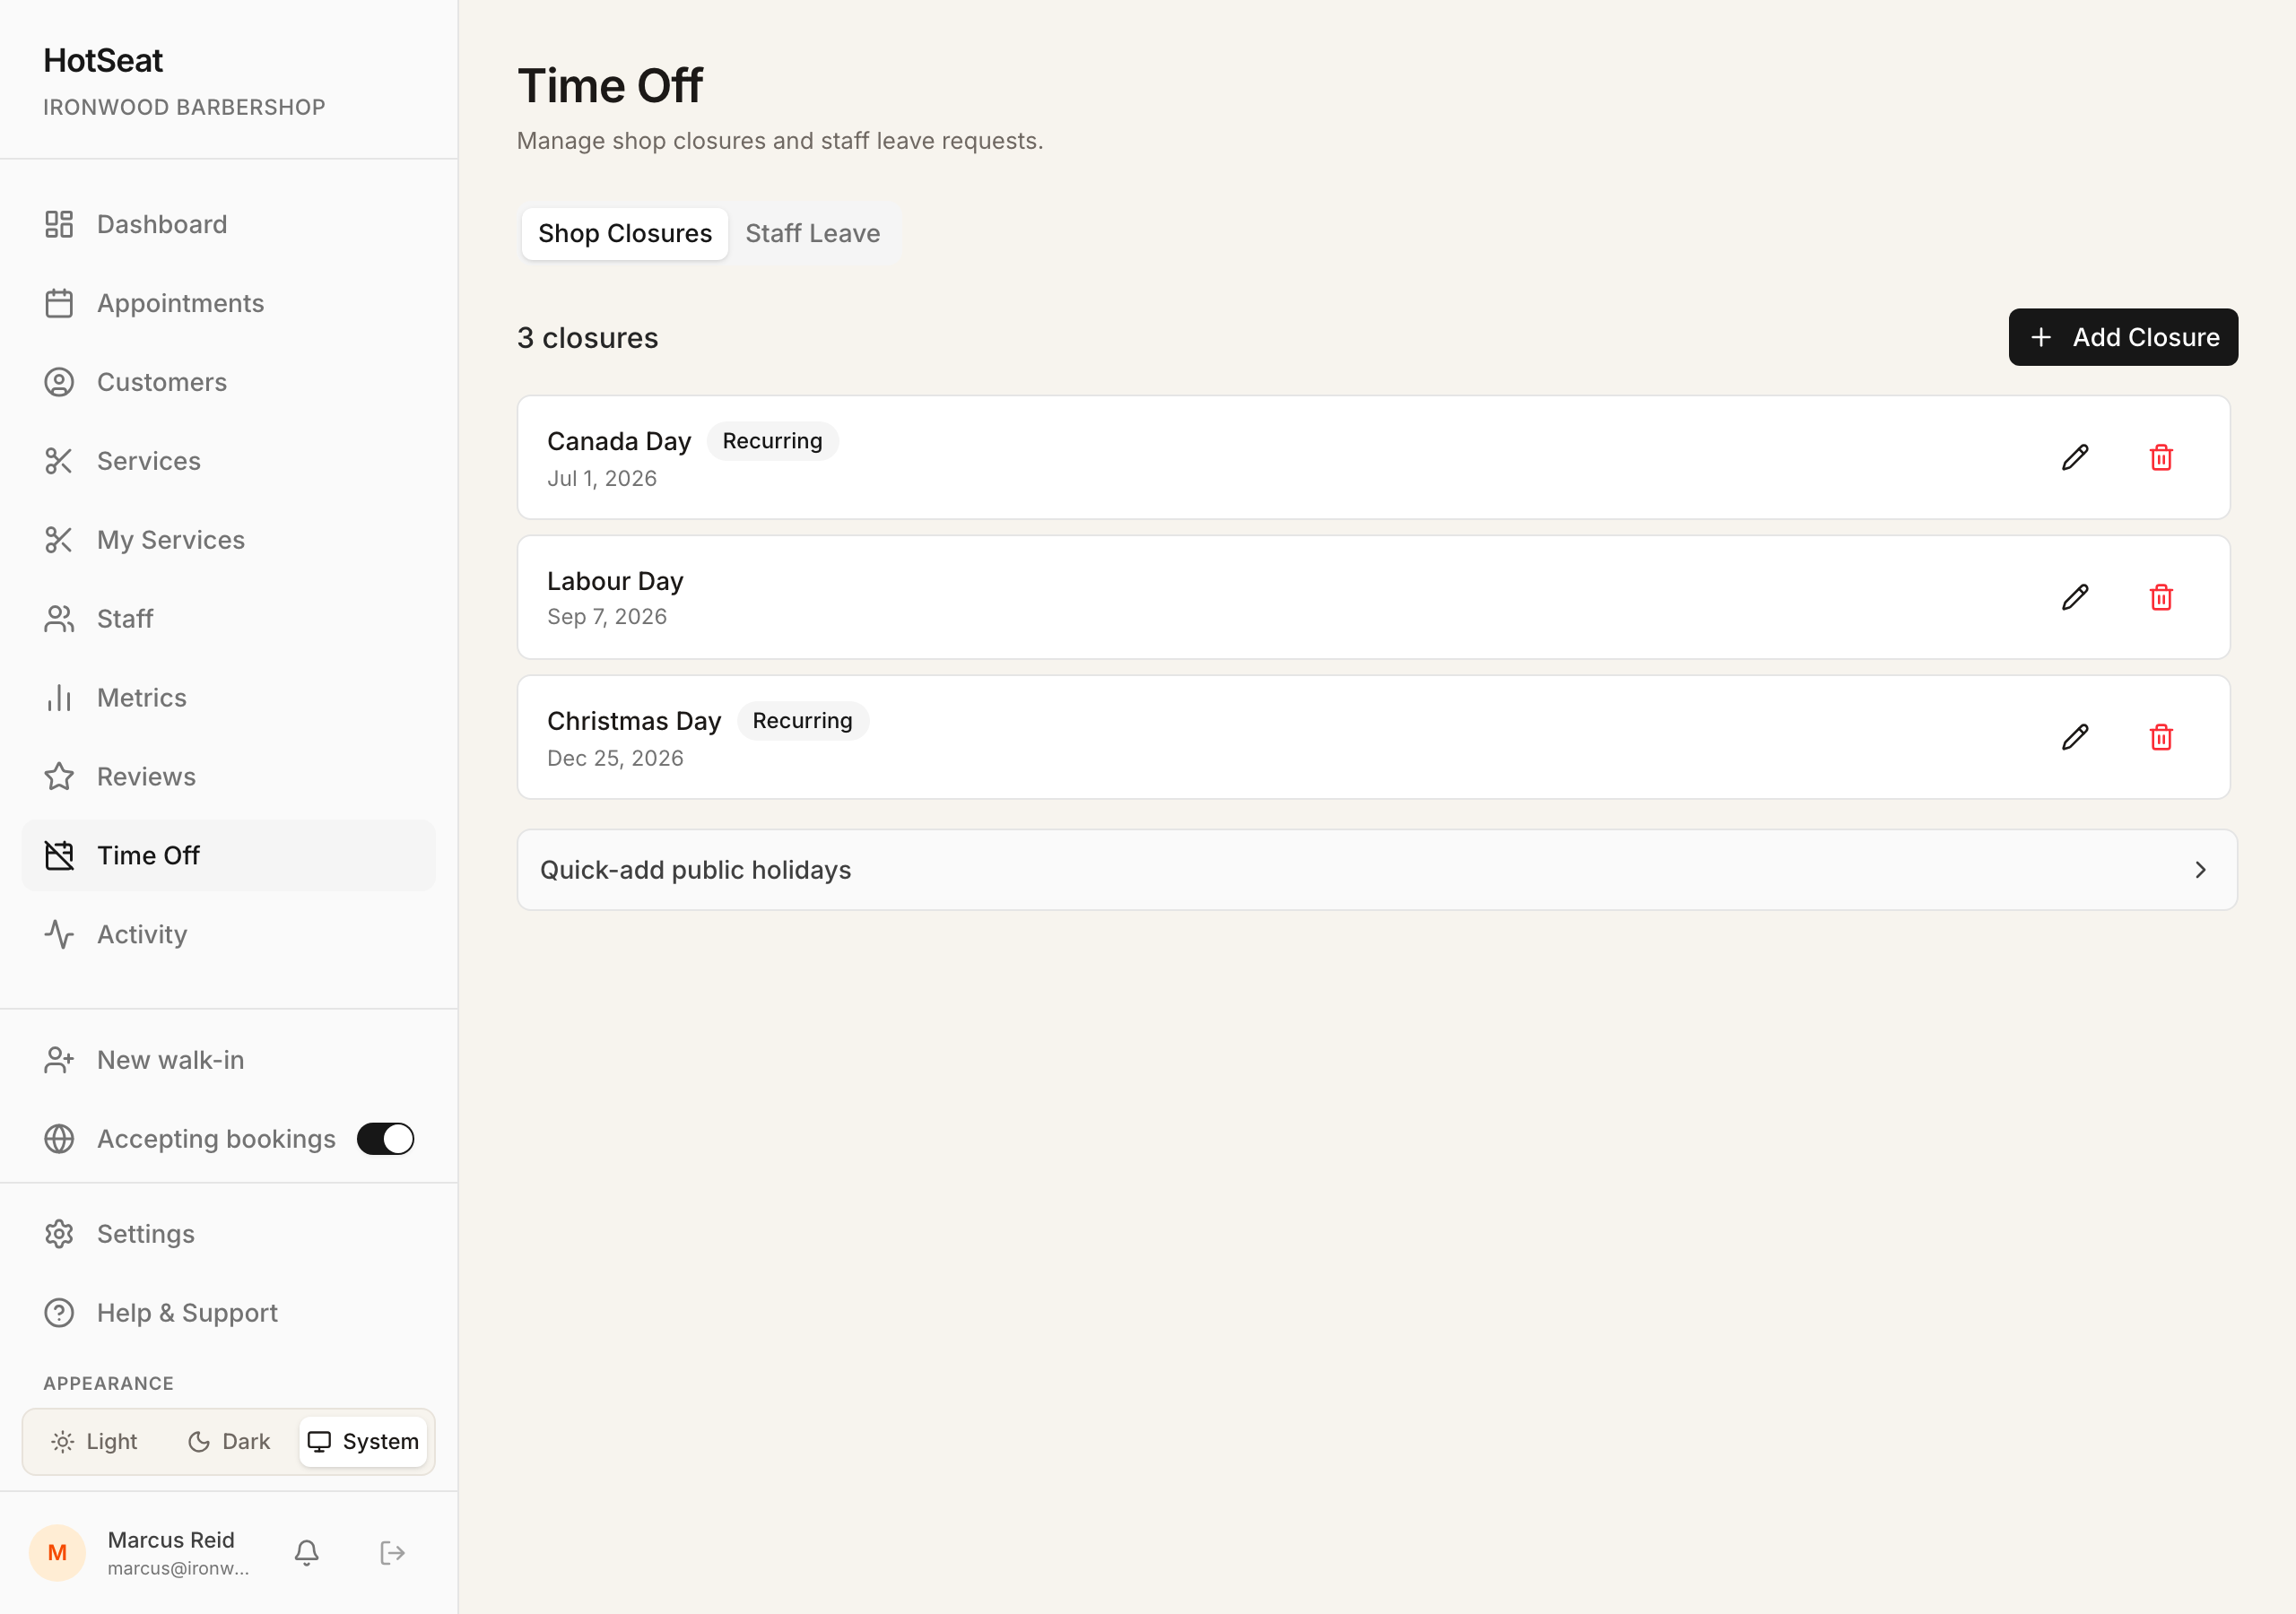
Tip: Add your recurring holidays once — HotSeat repeats them every year, so you'll never accidentally take bookings on Christmas.
Your login email & password
In Settings, open the Account section for Login email and Password. Changing your email sends a confirmation link to the new address — the change only applies once you click it. For your password, click Send reset link and follow the secure link we email you.
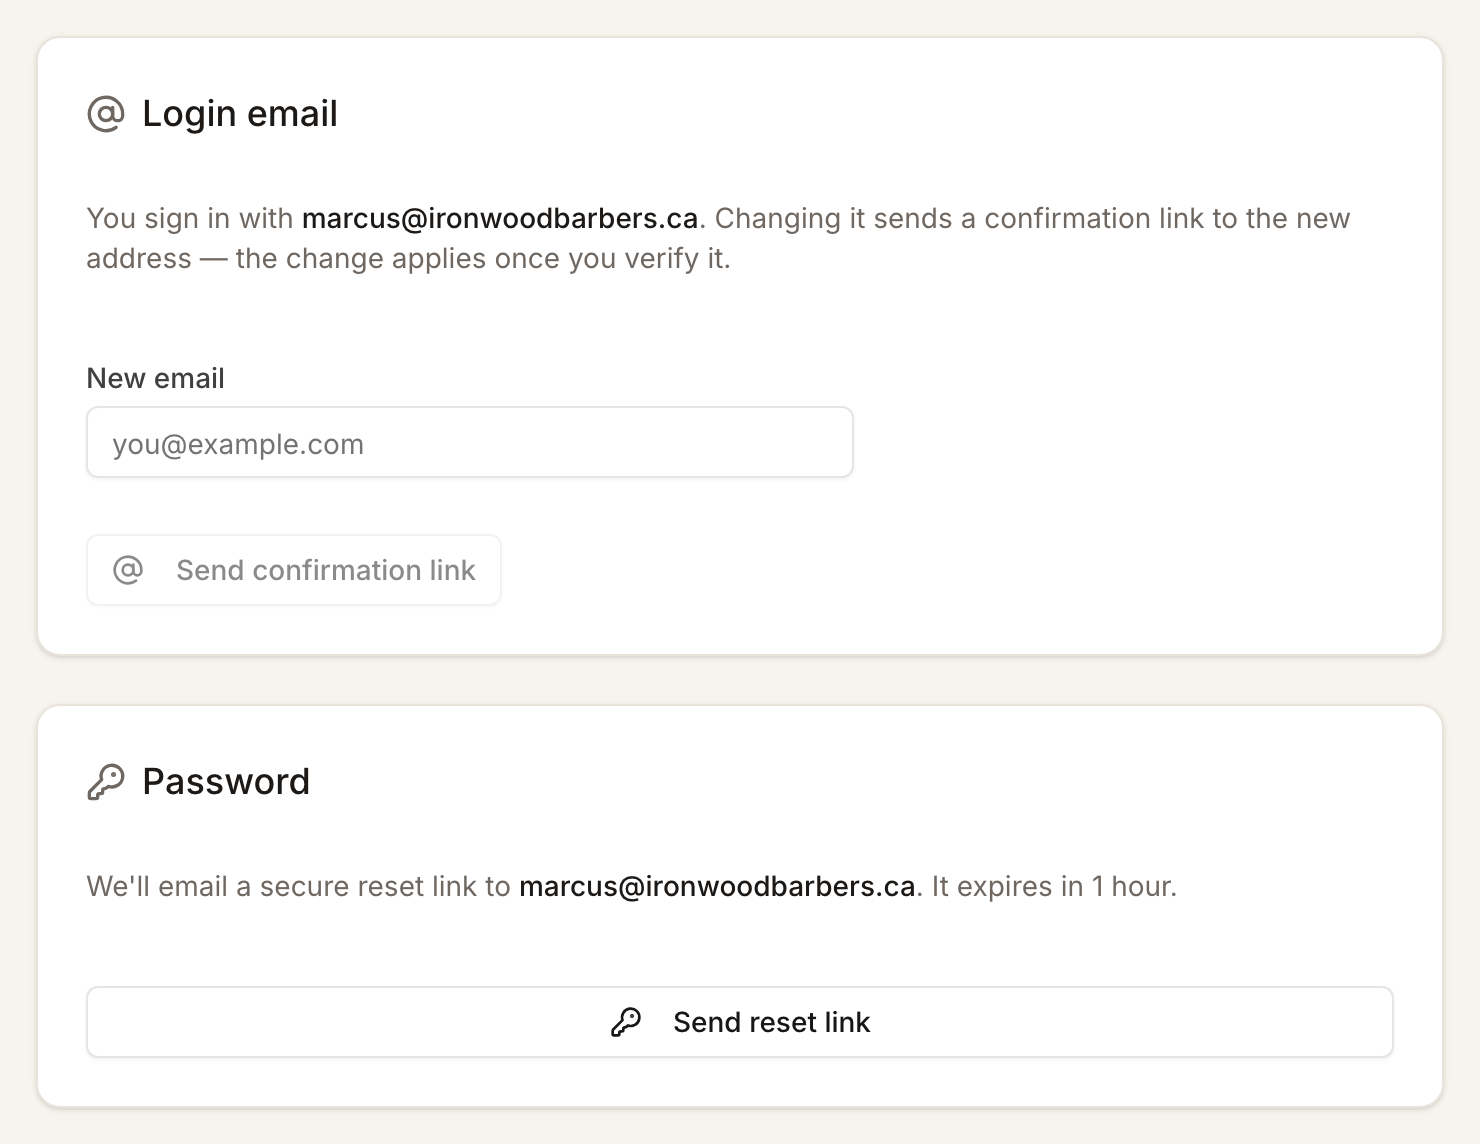
Tip: This is your one login for everything. If you ever think it's been compromised, reset your password here, then use Sign out everywhere just below to sign out any other device.
Questions, answered
- Do my customers need an account?
- No. They book as guests — name, email and phone, no account and no password. The email is what carries their confirmation, their reminder, and the link they use to cancel or reschedule.
- How much does it cost?
- Your first month is free, and you don't need a card to start. Your team size sets your plan and monthly price, and you can change it anytime in Settings > Billing. To keep your shop running after the trial, set up billing in Settings > Billing; your first charge is taken when the trial ends. If the trial ends with no payment method on file, your shop keeps full service for 48 hours, then locks: its booking page shows it as unavailable and takes no new bookings until you subscribe.
- Can I take bookings before I've added my logo and colours?
- Yes. Your page is live the moment you have your opening hours, a service, a specialist who's assigned to that service, and a schedule for them. The logo and colours are polish you can add anytime.
- I added a specialist and set their schedule, but customers can't book them — why?
- They're almost certainly not assigned to any services yet. A specialist is only offered for the services they perform, so a new teammate with a schedule but no services is bookable for nothing. Assign their services from the Staff page (their Manage → Services tab) and they'll show up.
- Can I add a walk-in or a phone appointment myself?
- Yes. On the Appointments page, click New Appointment (or New walk-in in the menu) to add an appointment by hand.
- Can my staff manage their own schedules?
- Yes — when you invite them, tick the permissions to let them manage their own services and hours. They get their own scoped view and can't touch anything they shouldn't.
- How do I turn bookings off temporarily?
- Use the Accepting online bookings toggle in the left menu of your dashboard to pause online booking without losing any of your setup.
Need a hand?
Email support@hotseatbooking.ca and a real person will help you get set up. Welcome aboard — your calendar's about to get a lot busier.